Showing posts with label Daring Bakers. Show all posts

Nutty But Thankful - Pecan, Maple and Pumpkin Sans Rival Cake

Monday, December 5, 2011

In the midst of chaos, being told (or even gently encouraged) to be thankful can be akin to having the Trifle-Eating Cat's Dad shout "Dropped it!" on hearing a crash from an adjacent room. That is, it's completely true, patently obvious even if you don't want to hear it, and therefore entirely infuriating*. And yet, there can be a lot to be thankful for, even if you have to poke under a few rocks to think of it. Good friends. Sleeping in. The prospect of Christmas. The absence of bagpipes. More occasions than usual to justify wearing sparkly shoes. The limitless patience of the Other Penguin.
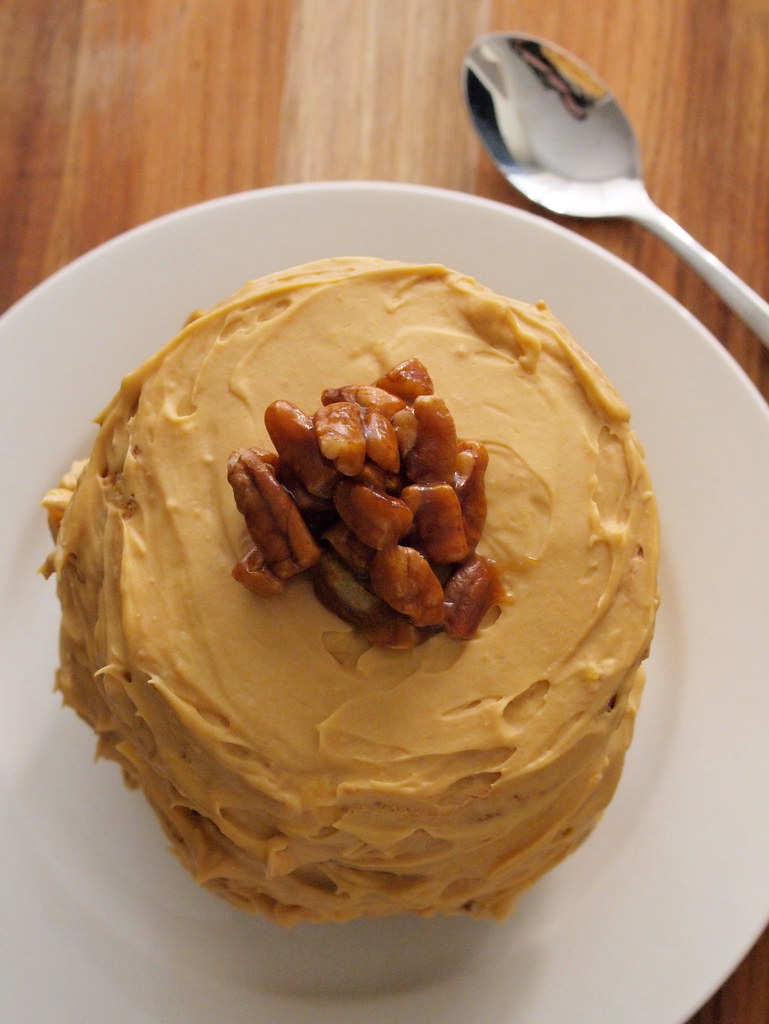
Pecan, caramel and pumpkin Sans Rival cake
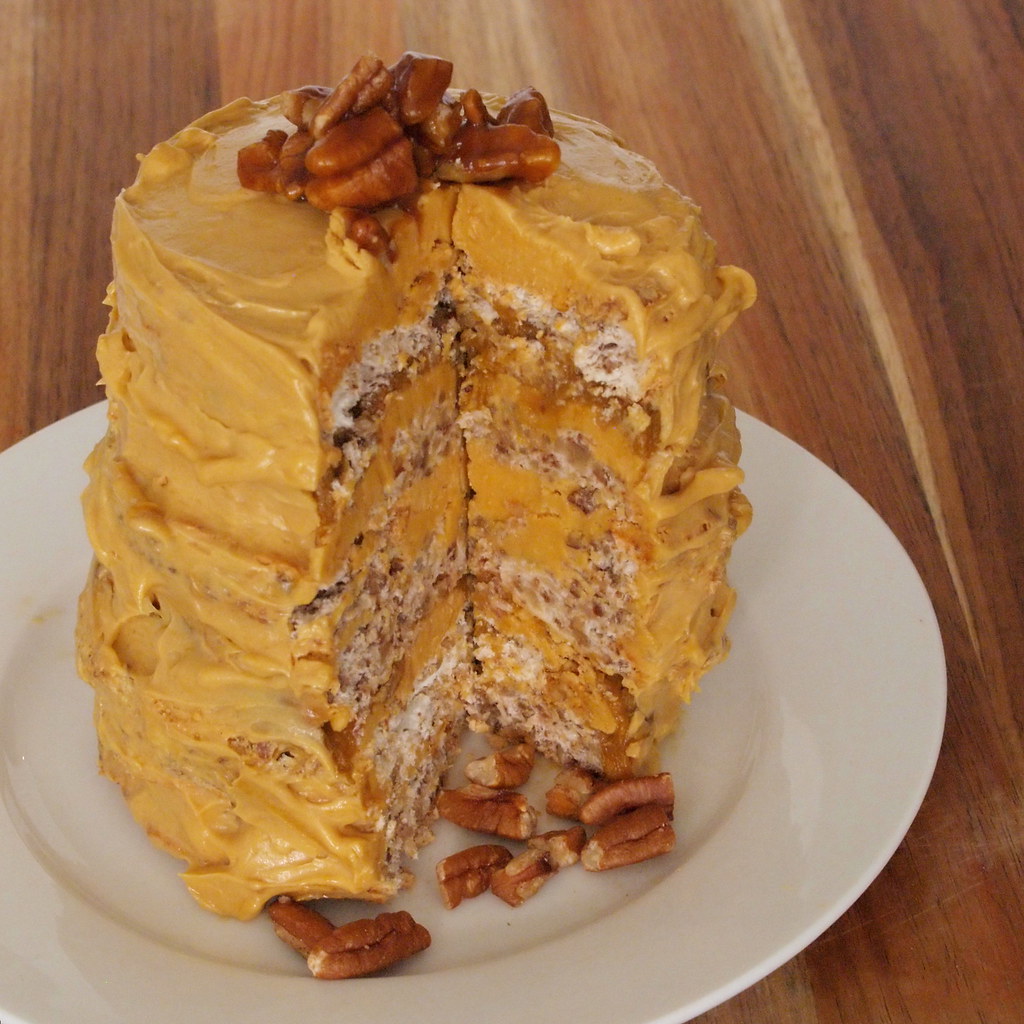
Pecan, caramel and pumpkin Sans Rival cake - an innocent buttercream exterior hides nutty meringue inside...

Thanksgiving, a holiday that (unsurprisingly, given its origins) passes in Australia with barely so much as a peep, has just been and gone for another year (passing with a much louder peep indeed on the food blogs, where pumpkins and pecans abound in every possible incarnation). This was on my mind when I tackled this month's Daring Bakers challenge.

Catherine of Munchie Musings was our November Daring Bakers’ host and she challenged us to make a traditional Filipino dessert – the delicious sans rival cake! And for those of us who wanted to try an additional Filipino dessert, Catherine also gave us a bonus recipe for bibingka which comes from her friend Jun of Jun-blog. In a rare application of common sense, I decided that, much as I did want to try an additional dessert (when do I not...?), it was wiser to tackle one thing with conviction than bite off more than I could chew and end up grumpy (and with a pair of baking fails).

Pecan, caramel and pumpkin Sans Rival cake
Alternating layers of pecan meringue and caramel buttercream, with pumpkin cookie dough for good measure and to add to the festive flavours

A sans rival cake is a form of dacquoise which involves alternating layers of (traditionally) cashew meringue and buttercream. When I first read about the resulting crunchy, silky, rich confection, it sounded like eating a generously buttered cloud. Half the fun of Daring Bakers is trying to find a creative way to interpret the given recipe (the other half, I often have to remind myself while muttering intently at something untried and initially seemingly impossible, is the challenge bit of it). So, I decided to combine my Filipino dessert with a US celebration, and bring Thanksgiving to the Sans Rival...

My sans rival incorporated layers of pecan meringue and caramel buttercream with, for good measure, gooey pumpkin cookie dough with more pecans added.

The finished recipe was a mix of invention and evolution. It began with the discovery that pumpkin was thin on the ground in my local supermarket, unless I felt inclined to roast and puree it myself (which I didn't). This led to some improvising with pumpkin soup and brown sugar, which produced a satisfyingly rich and pumpkin-y syrup. I also discovered that this was another recipe that didn't lend itself to a rustic baker - the assembly process had more in common with bricklaying than with Donna Hay.

Pecan, caramel and pumpkin Sans Rival cake
The rustic effort in icing the cake didn't detract from its indulgent taste (phew!)

However, after the finished cake had been put in the fridge to cool down and set, it turned out surprisingly well. It wasn't particularly cloud-like, as the nuttiness of the meringue gave it more substance and texture than the melting crunch of the regular variety. The deep caramel flavour kept the taste of the buttercream from being dominated by, well, butter. Combined with the pumpkin cookie dough, the finished cake had a complexity that was belied by its rather cobbled-together look. Still, it was very indulgent, and a little cake went a long way.
Pecan, caramel and pumpkin Sans Rival cake
Don't be taken in by its small size - even a half-size Sans Rival packs a serious sugar hit

If you'd like to make your own Thanksgiving Sans Rival, here's what to do...

What you need
For the pecan meringue
(note: this was half the quantity in the original recipe, as I decided to make a smaller cake)
120 g chopped pecans
5 large egg whites, at room temperature
½ cream of tartar
113 g sugar
For the caramel sauce
(note: this makes more than needed for the recipe - I simply can't imagine what leftover caramel sauce could be useful for, though!)
115 g butter
200 g sugar
120 ml cream
For the maple buttercream
(note: this is the full quantity from the original recipe, as adapted for my flavourings. Why twice as much buttercream as meringue? Well, it matched the number of egg yolks remaining, as well as giving a bit of room for trial and error. But there was still way too much - enough to ice a batch of small cupcakes as well, for instance...
5 egg yolks, at room temperature
225 g  sugar
60 ml water
275 g butter
2½ tbsp maple syrup
180 ml caramel sauce
For the pumpkin cookie dough
560 ml pumpkin soup (I used Darikay)
150 g dark brown sugar
75 g butter
125 g dark brown sugar, additional
200 g flour
1½ tbsp molasses
130 g roughly chopped pecans

What to do
For the pecan meringue
1. Preheat oven to 160°C. Line the base of two 10 cm springform cake tins (or four if you have them - I needed to do two batches of two) with baking paper, and grease the sides with butter, taking care not to miss any spots as the meringue will stick very easily.
2. Whiz the pecans in a food processor until they are roughly ground. (The recipe recommends not processing them so much that they become an even powder, as the textural contrast of the nuts is an important part of the cake).
3. Whisk the egg whites until frothy (around 2 minutes in a stand mixer), then add the cream of tartar. Continue whisking on high speed, adding the sugar a couple of tablespoons at a time, until firm glossy peaks form.
4. Gently fold the ground pecans into the egg whites.
5. Carefully dollop the meringue batter into the prepared cake tins. Plonk the tins down on the kitchen bench to ensure there aren't any gaps (just the once or it'll knock out all the air), and level the top with a knife or an offset spatula
6. Bake for 30 minutes. Remove the cooked meringues from the tins 2-3 minutes after removing from the oven, and place on a wire rack to cool. Then, wash, re-line and grease the cake tins, fill with the second batch of meringue batter and bake.
Important notes on baking time: I scaled back the original meringue recipe by half, and cooked it in smaller tins. Even after this, I ended up filling the cake tin each time. In hindsight, thinner, flatter meringues would have cooked more quickly and evenly, and then been easier to work with when assembling the finished sans rival.
Interestingly, the results varied quite significantly between batches - while the same quantity was put in the tins, the first batch came out thinner and crispier, and the second batch was thicker and chewier. I left both batches in the warm oven overnight and then, before preparing to assemble them, cooked them (on the wire rack, not in their tins) for a further 60 minutes at 120°C. This helped dry them out and crisp them up appreciably more. And taught me (yet again) that tinkering with recipes I've never attempted before can have mixed results and need a bit of tweaking.
For the caramel sauce
7. Put the butter and sugar in a large saucepan and heat, stirring only minimally, until it turns golden brown. When it's ready, it will be starting to turn a darker brown, and may still look almost frothy. If you leave it till it's going too much darker, it'll get beyond salvation as it keeps cooking after removed from the heat.
8. Remove the pan from the stove and add the cream, ¼ cup at a time, stirring in between. The mixture will froth and bubble up as the cream is added, so be careful not to get scalded. Also, be careful not to sound like a little old woman when writing recipes full of boiling sugar...
9. Allow the caramel sauce to cool to room temperature before using it in the buttercream.
For the maple buttercream
10. Put the egg yolks in a mixing bowl and beat on high speed until they are thick and pale yellow, and almost double in size (this took quite a bit longer than I expected).
11. Put the sugar and water in a large saucepan, and heat until it reaches 112°C. As it heats, brush the sides of the pan occasionally with water to avoid sugar crystals forming.
12. Make sure the splash guard is on your mixer, and very carefully, slowly pour the scarily hot sugar syrup into the egg yolks. Mix at high speed until the egg and sugar mixture has cooled to room temperature, which takes around 15 minutes.
13. Add the room temperature butter about a tablespoon at a time, and continue beating on high. It helps to make sure that each addition of butter is incorporated before adding more. Then, add the maple syrup and beat in until well combined.
Important note on adding the sugar syrup: The recipe requires this to be done with the mixer on high speed, but my wariness around boiling sugar meant it was on about middling speed, and the syrup went in far quicker than it should've. I was very, very nervous indeed that it was going to turn into scrambled eggs. While it wasn't perfect, it ended up not being too bad for my first ever attempt at French buttercream. It improved significantly as the rest of the steps were completed.
14. Refrigerate the buttercream for at least an hour (mine was in the fridge for over 12 hours, to enable baking to fit round important things like sleeping and going for brunch with the Penguin Wrangler). This is the finished buttercream as adapted from the original recipe - it reminded me that I find buttercream, well, entirely too buttery and without enough other flavour, so I decided now that it needed something else to give it some depth. That something was caramel...
15. When ready to assemble the sans rival, remove the buttercream from the fridge and beat on high speed. Add 180 ml of caramel sauce, a little at a time, and beat until thoroughly incorporated.
For the pumpkin cookie dough
16. Put the pumpkin soup and 150 g of dark brown sugar in a saucepan and heat until thick and syrupy - about 15 minutes. Set aside and allow to cool to room temperature.
17. Beat the butter until pale, add  125 g of dark brown sugar and cream together with the butter until light and pale.
18. Alternately add the syrupy soup and the flour, a little at a time of each, to the creamed butter and sugar, beating well at a slow speed after each addition.
19. Add the molasses and mix thoroughly, then add the chopped pecans and mix again to distribute evenly through the cookie dough. Refrigerate for at least 30 minutes before using.
To assemble the sans rival
20. Trim the edges of the meringue so that the layers are an even roundness. I also sliced each of the two meringues from my second batch into two thinner layers, so they were consistent with the thickness of the layers from the first batch.
21. Starting with a layer of meringue, alternate layers of meringue and buttercream, spreading the buttercream to the edges, Every third layer, add a layer of pumpkin cookie dough.
22. Spread the sans rival with buttercream and decorate with additional crushed pecans. I also added some chopped pecans in caramel sauce to the top of the cake.
23. Refrigerate the finished cake until ready to serve, and before cutting it.
Assembly is resoundingly not my strong suit, not by a long shot. My initial reaction to the sans rival was that it would have plenty of rivals, and would succeed on appearances only by pulling a proverbial Steven Bradbury... I ended up with a badly engineered tower with an uneven smeary coat of buttercream. Paddington Bear would have been very proud.

Pecan, caramel and pumpkin Sans Rival cake

* It may not surprise you after hearing this to hear that the Trifle-Eating Cat's Dad has prior form in consulting, which involves saying much the same things, only about technical matters and getting paid for it...

Read more...
Not Drowning, Swirling - Four Varieties of Povitica

Thursday, October 27, 2011

Change can be good. Especially when you unexpectedly find it down the back of the couch. But if a change is as good as a holiday, too much change can feel about as comfortable as a three month trek across the Arctic wilderness in Jimmy Choos a size too small. Is the ice going to crack underneath me? Is that polar bear eyeing me off for its next meal? Have I got my heel caught in a crevasse?

So, having moved to a new role at work, and in a new grade in dancing, with an exam lurking menacingly round the corner (a bit like a hungry polar bear), I approached the prospect of Daring Bakers with trepidation. Can’t I just come up with another flavour of brownie and not go looking for unfamiliar and difficult things and poking them with a stick to see what happens? Nope…

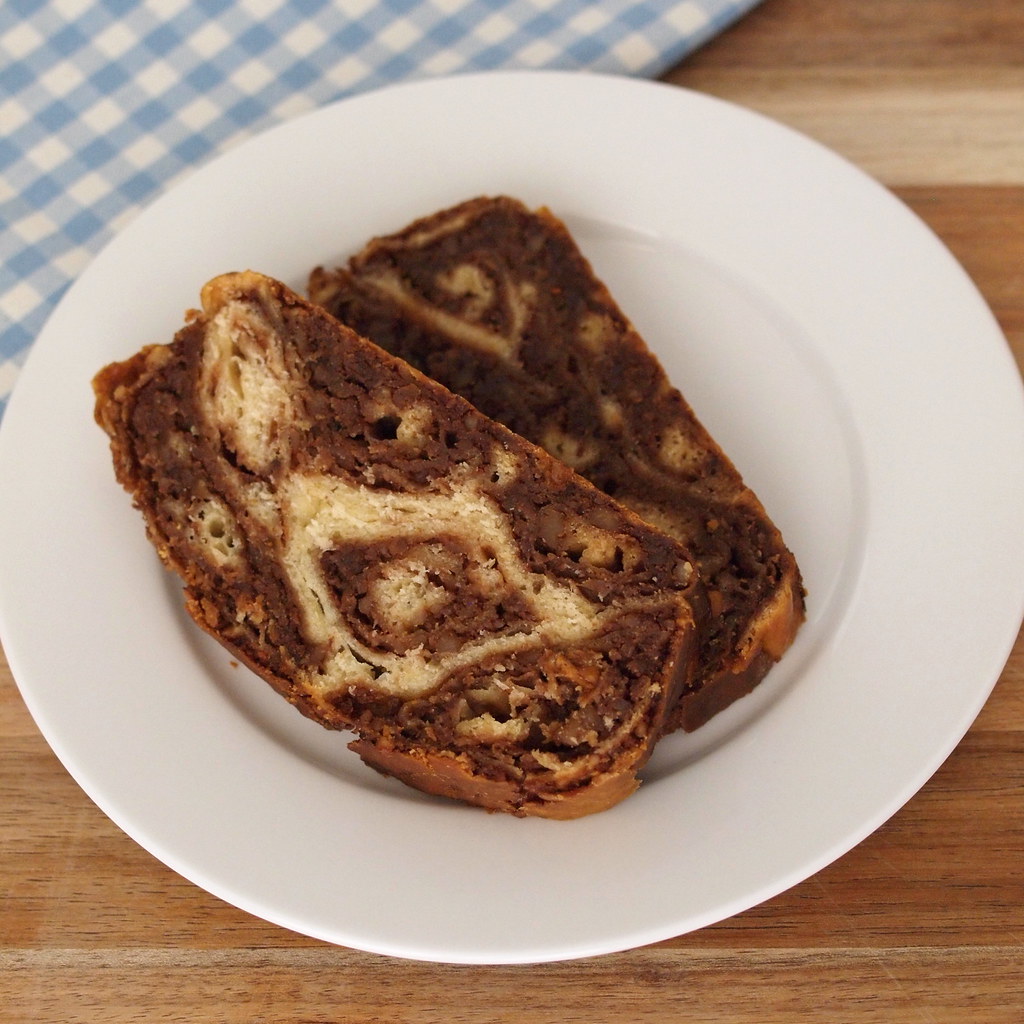
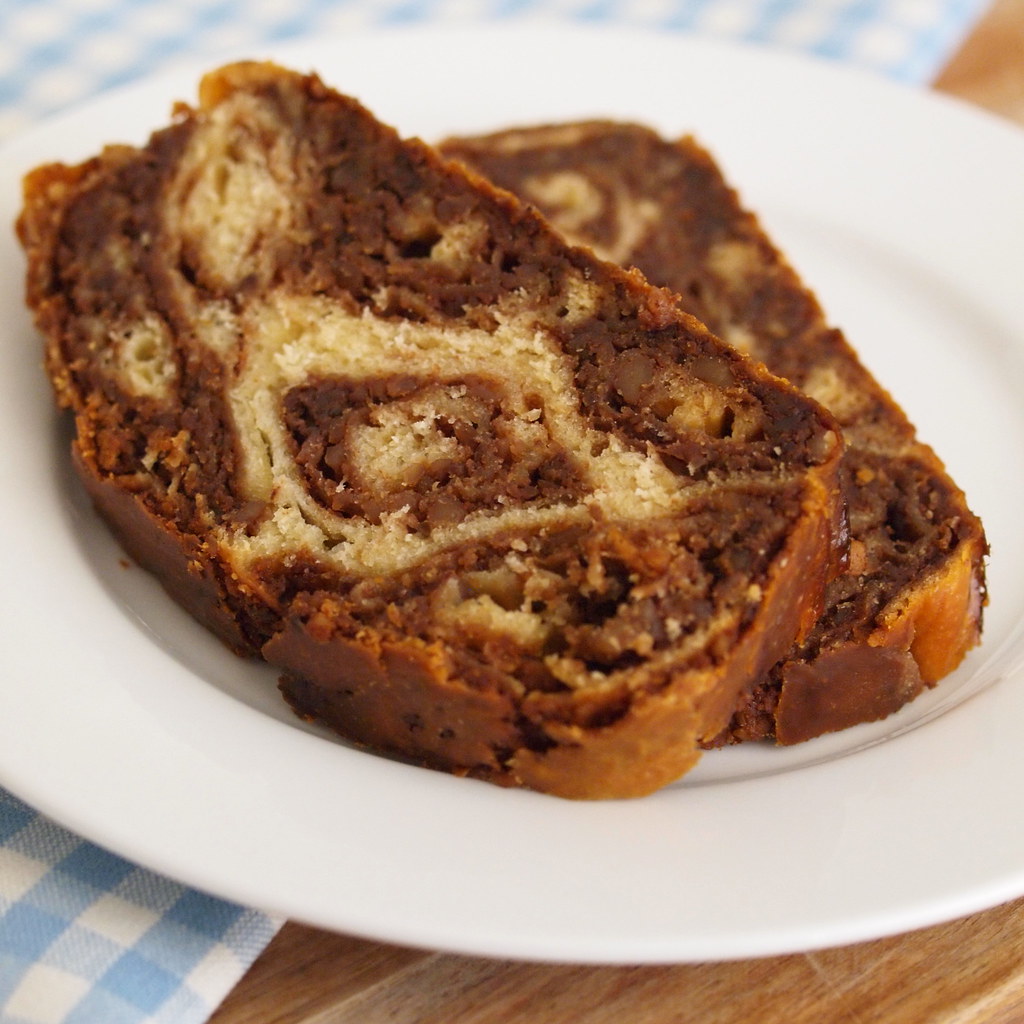
Traditional walnut povitica 

Some Daring Bakers challenges involving making something beautiful (as well as delicious). Lots of them involve making something that’s time-consuming (some of them, mind-bogglingly so). Almost all of them involve making something unfamiliar (because that’s the point). Not many of them involve something a little rustic round the edges, baked in a loaf tin. So, odds are that the rustic loaf is going to involve all sorts of trickiness and will take half the night. And it did. But it was so tasty I quite forgave it, through my sleep-deprived haze. And I was so pleased I gave it a try (even if it turned out a bit more resoundingly rustic than just around the edges).

The Daring Baker’s October 2011 challenge was Povitica, hosted by Jenni of The Gingered Whisk. Povitica is a traditional Eastern European Dessert Bread that is as lovely to look at as it is to eat! It’s a sweet loaf made by rolling up thin dough spread with a filling so that each slice has a beautiful swirled pattern and every bite contains a mix of flavours. The traditional recipe combines ground walnuts with cinnamon, sugar and cocoa, but the recipe lends itself very well to experimenting with other sweet or savoury fillings. The recipe makes a monster four loaves, so there was lots of opportunity to try out some new varieties. As well as the traditional recipe, I also made:
  • Caramelised white chocolate with chocolate chips (if you decide to do this version, you’ll need to have made the caramelised white chocolate in advance – or to be a vampire and so not need any sleep. Luckily, I had a jar I’d prepared earlier for the purpose... though since discovering this recipe, I’ll be needing to make some more)
  • Peanut butter and strawberry jam
  • Moreno cherry and ricotta
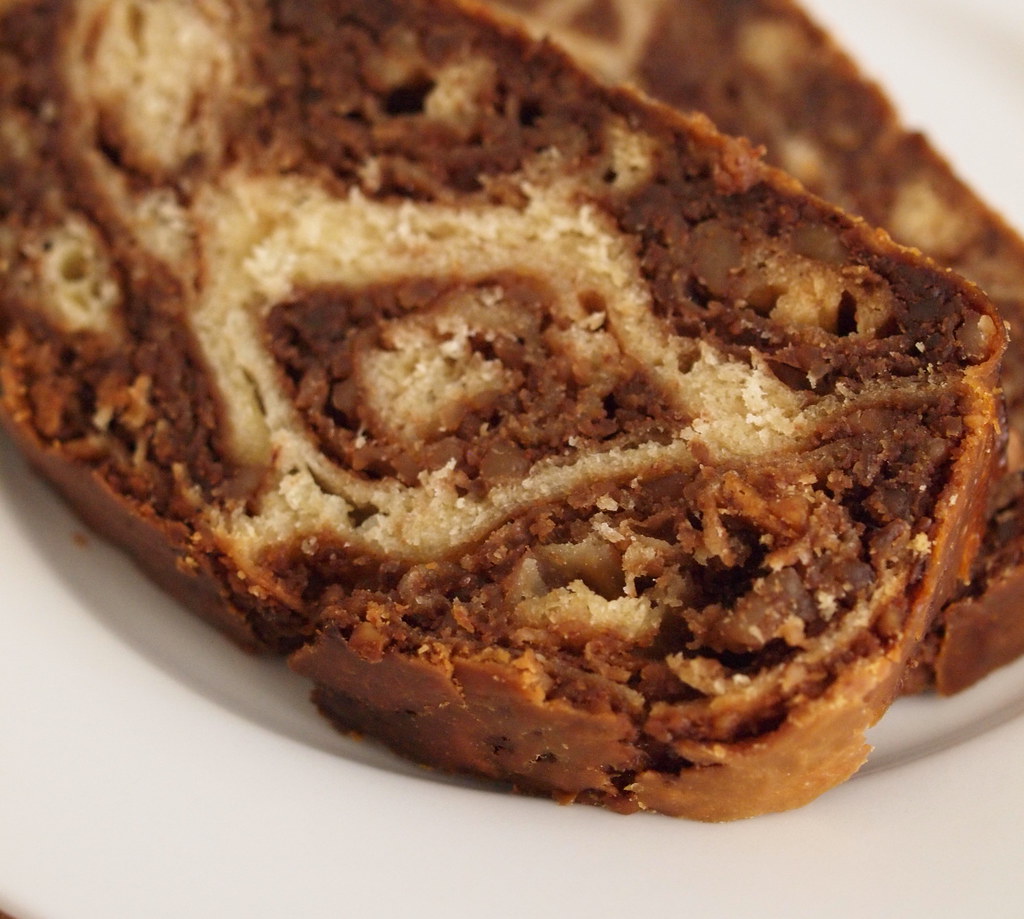
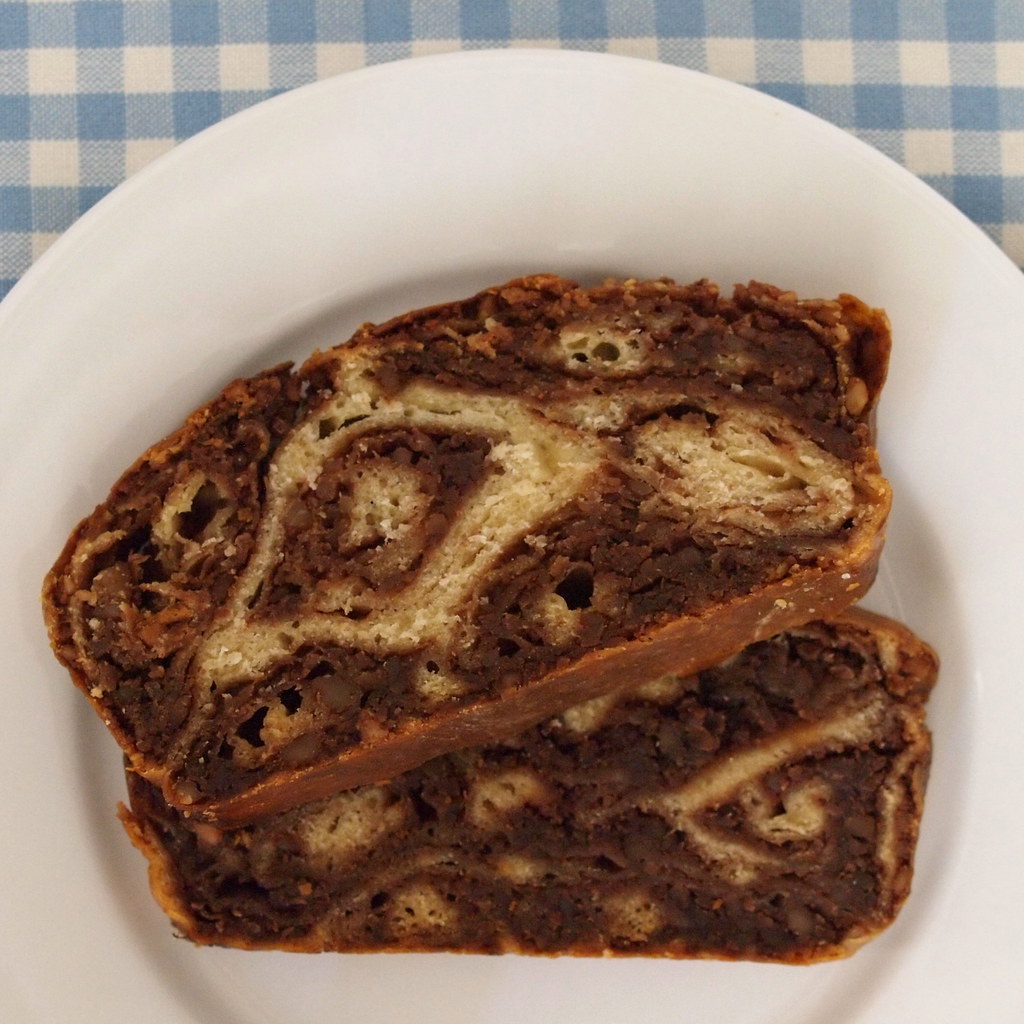
 The povitica has a detailed swirl pattern in each slice

The most challenging part of the recipe involves rolling and stretching the dough to the requisite thin-ness and shaping it into loaves; otherwise, the recipe is relatively straightforward. It does involve quite a lot of “process” though – getting started late on a Sunday afternoon with the added distractions of a (thankfully rare) crash of the Daring Bakers site and an (even more thankfully rare) lengthy phone call by the Other Penguin to wrangle a travel arrangements, during which the noisy machinations of the KitchenAid would not have been well received.

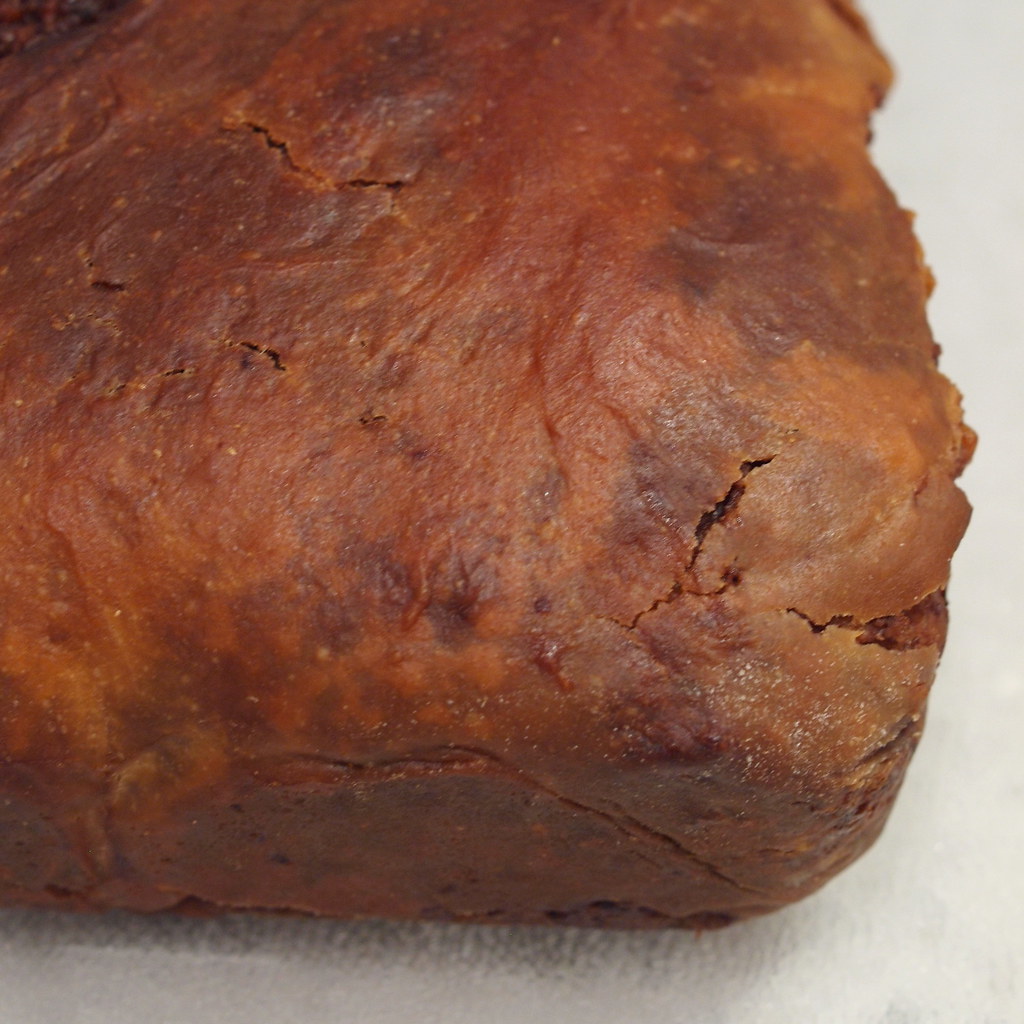
The finished loaves, however, were definitely well received. They came out a deep golden brown and their unexpected heft belied their light-but-filling texture. When cut open, the filling formed a clear swirl pattern – I’d been a little worried it might just become a jumbled, albeit tasty, mixture. The different fillings impacted the consistency of the loaves, as well as their cooking time – the walnut and peanut butter versions came out dense and tightly coiled, while the cherry and ricotta one took quite a bit longer to cook through as the filling was wetter. As helpfully foreshadowed in the comments for the challenge, allowing the bread to cool completely and to sit overnight in the fridge made it easier to cut evenly. Even so, it was a little crumbly round the edges, probably from how it was rolled up and coiled into the tin. 

 The crunchy golden crust on the peanut butter and strawberry jam povitica
I tried a little of the peanut butter and the walnut versions, and was pleasantly surprised. The bread itself was sweet-tasting, and reminded me of a heavier version of Chinese milk bread. Combined with the well-dispersed filling, it had an unexpectedly subtle flavour and was neither too plain nor too stodgy. The traditional walnut version was It’s well suited to a simple morning or afternoon tea, but could also be good at breakfast time (I’d be interested to see how it came out if you toasted it) or for one of those late-afternoon high teas which graze across baking, charcuterie, cheese and fruit (one of my favourite things about Christmas with my family). The bread is quite filling, so more than one of those options might leave you a little sleepily full, much as I’d love to advocate baked goods for every meal! 

I would definitely like to try making the dough again, although next time I’ll scale it back to half the quantity and just make two loaves. A marzipan version, a little like a swirly stollen, is an appealing possibility. More likely, though, is that I’ll try using the dough for loaves or small rolls without the swirled filling, or with some fruit or chocolate scattered through. A dark chocolate chip version might even tame my longing for a pain viennois chocolat, which I’ve been carrying since that wonderful discovery in Paris last year. 
If you’d like to try making povitica ("povateetsa") for yourself, here’s how it was made:

What you need
To activate the yeast
2 tsp / 9 g sugar
1 tsp 3 g plain flour
2 tbsp / 14 g dry yeast
½ cup / 120 ml warm water
Dough
2 cups / 480ml full cream milk (as we don’t tend to have this around, I referred to Joy of Baking and substituted skim milk with 50 g extra butter added)
¾ cup / 170 g sugar
3 tsp / 18 g salt
4 large eggs (at room temperature, lightly beaten)
½ cup / 115 g butter (melted and cooled)
8 cups / 1.12 kg plain flour
Walnut filling (these quantities were for one loaf – if you make the above dough recipe and want to do all of them with this filling, it’ll need to be scaled up by 4)
1 ¾ cups / 280 g walnuts (ground – I used whole ones and whizzed them in a food processor)
½ cup / 113 g sugar
2 tbsp cocoa powder (this is way more than the recipe called for in the original recipe, but I wanted to go extra chocolatey, and also to have a greater colour contrast in the swirls)
¼ tsp cinnamon
¼ cup / 60 ml milk (I used skim)
¼ cup / 56 g butter
1 egg, lightly beaten (note: the recipe for the full quantity, which makes 4 times this amount, uses 2 eggs – as others had needed to add more milk to make the filling wetter, it seemed sensible to use a whole egg and no extra milk, than to use half an egg and get rid of the other half – this worked well – the mixture didn’t need any extra milk to be spreadable)
¼ tsp vanilla extract
Peanut butter and jam filling
240 g peanut butter (I used smooth, but crunchy would work well for the textural contrast)
55 ml milk (just under ¼ cup)
400 g jam (I used strawberry)
Ricotta and cherry filling
375 g light smooth ricotta
200 g (approximately) Moreno cherries (squashed), plus 3 tbsp (45 ml) juice from the jar (a small splosh, for those of a less precise persuasion)
Caramelised white chocolate filling
1 batch of caramelised white chocolate (made from 400 g white chocolate, using this recipe)
White chocolate chips – enough to cover the dough as liberally as you wish (I used around 150 g))
Glaze (for traditional version)
¼ cup / 120 ml strong coffee (cooled)
2 tbsp / 28 g sugar (which I added to the hot coffee so that it dissolved)
Melted butter
Glaze (for the other versions)
1 egg, lightly beaten
2 tbsp / 28 g sugar (which I added to the hot coffee so that it dissolved)
Melted butter 
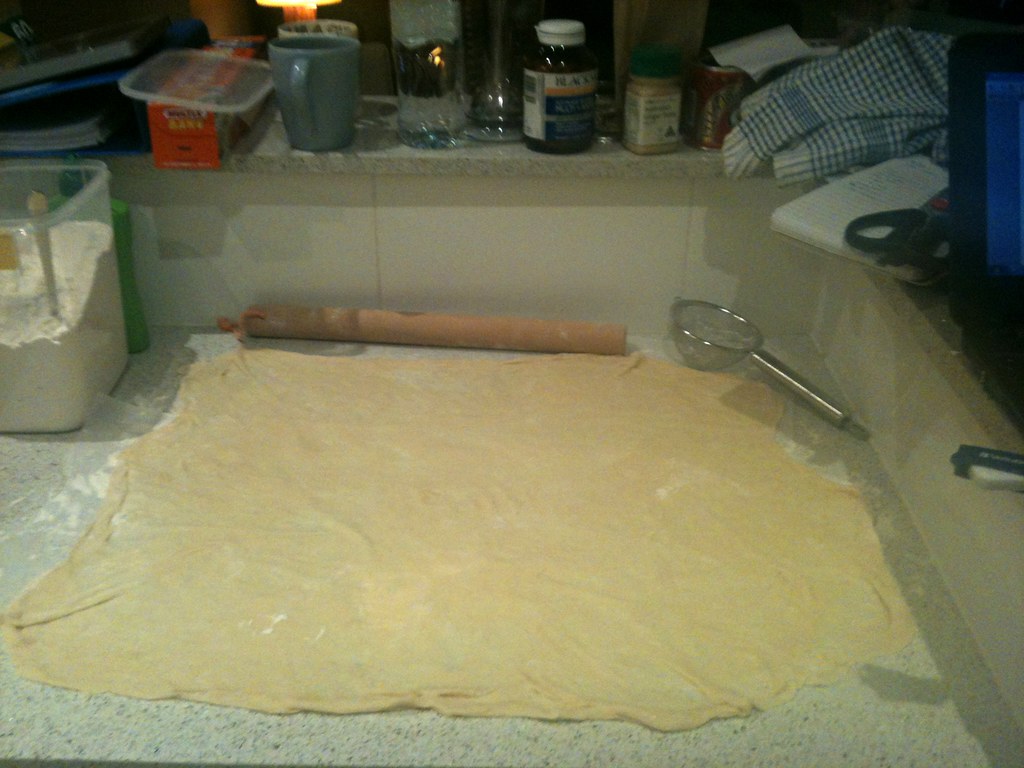
The dough needs to be rolled our very thinly before being spread with the filling

What to do
To activate the yeast
1.     Put 2 teaspoons of sugar, 1 teaspoon of flour and 2 tablespoons of yeast into a jug or small bowl. Stir and then add 120 ml warm water and stir again to combine.
2.     Cover with plastic wrap, put in a warm place in the kitchen and allow to stand for 5 minutes.
Note: if you activate the yeast before starting making the dough, as I did, it ends up sitting for a lot longer than 5 minutes, although this didn’t seem to cause a problem. Next time, though, I would activate the yeast part-way through making the dough, after removing the scalded milk from the heat (step 3 below).
To make the dough
3.     Heat the milk (or, if using skim milk, the milk and 50 g extra butter) in a saucepan until just below boiling point (about 180°F/82°C), stirring regularly so that a skin doesn’t form on top. It should be scalding hot, but not boiling (this can be done using a sugar thermometer, or just by eye and experience). Allow the milk to cool slightly (until it is about 110°F/43°C, or very warm but safely bearable to the touch – this took about 10 minutes, for the avoidance of burnt fingers, for anybody else who lacks asbestos hands!).
4.     In the bowl of a stand mixer (or a large bowl if you’re going to mix the dough by hand), combine the cooled scalded milk, 170 g sugar, and 3 teaspoons salt.
5.     Add the lightly beaten eggs, yeast mixture, cooled melted butter, and 280 g of the sieved flour (about a quarter of the total amount).
6.     Mix thoroughly and slowly add the remaining flour (840 g if you use it all), mixing well until the dough starts to clean the bowl. Note: At this point, much as I’d seen from the challenge that the dough was meant to be quite sticky and that others didn’t need all 1.12 kg of flour, I decided it was entirely too sticky and added around another 75 g (½ cup) of flour. It was still very sticky, but at that point I decided to live with it and see what happened, which ended up turning out quite well).
7.     Change the mixer attachment from the beater to the dough hook and knead until smooth (if making the dough by hand, turn – or, perhaps more likely, scrape – the dough out onto a floured surface and knead, gradually adding flour a little at a time, until smooth and a bit less sticky). As I was making the dough in the ever-reliable KitchenAid, I didn’t add any more flour at this stage (although I did worry whether I should – this was even stickier than brioche dough).
8.     Divide the dough into 4 equal pieces (they should each weigh about 550 g).
9.     Place the dough into 4 large lightly oiled bowls (large saucepans work if you’re starting to run out of bowls – if you’re starting to run out of kitchen bench space by now, you’re in the same spot I was in...) cover loosely with a layer of plastic wrap and then a tea towel. Allow the dough to rest and rise for 1 ½ hours in a warm place, after which it should be roughly doubled in size.
Traditional walnut filling
10.  Place the ground walnuts, sugar, powder and cinnamon and cocoa powder in a bowl and stir to combine.
11.  Heat the milk and butter to boiling and pour over the nut and sugar mixture.
12.  Add the egg and vanilla and mix thoroughly.
13.  Allow to stand at room temperature until ready to be spread on the dough. (If the mixture thickens, add a small amount of warm milk – I didn’t need to do this having scaled the recipe to use more egg).
To roll and fill the dough and make the loaves
14.  Preheat oven to moderate 180°C / 350°F, and line your loaf tins with baking paper (I only had two loaf tins, so I baked in two batches).
15.  Cover the kitchen bench with non-stick baking paper, ensuring it overlaps so there aren’t any gaps.
Note: The original recipe advocates rolling the dough, and forming the loaves, on a clean sheet or cloth – I’ve found previously, with dough – including phyllo – that baking paper seems to work just as effectively for this purpose, and creates less washing (which is important, given this recipe seems to use almost every utensil in the kitchen, as well as most of the tea towels).
16.  Sprinkle the paper with a couple of tablespoons to a handful of sieved flour (use flour sparingly, but ensure there is a light sprinkle over the whole surface as, without it, the dough may well stick when you go to roll it up).
17.  Place one of the four blobs of dough on the baking paper and roll it out with a lightly floured rolling pin, starting in the middle and working your way out, until it is roughly 40 cm square (15 inches).
18.  Using a combination of the rolling pin and your hands, roll, stretch or gently pull the dough out from the centre until it is thin and a consistently almost-translucent. You should be able to see the outline of a pattern through the dough (if you slide a picture or some writing under the baking paper). Try to keep the shape roughly square. Gently sliding your lightly floured hand, palm down, beneath the dough as you go will help make sure it doesn’t stick to the paper.
19.  Dollop filling evenly over the rolled out dough and, using a spoon or your fingers, spread over the dough until evenly covered.
20.  Gently and tightly roll up the dough. There are several ways to do this:
-        The easiest way is to just roll the dough along its horizontal edge (either from front to back or from back to front depending on which is easier – I found this was much of a muchness) until you have one long, thin sausage of dough. Then, coil the dough around itself into the base of the loaf tin (a little like in the picture shown, courtesy of the Daring Bakers website):

-        Alternatively, roll the edge of the dough nearest you into the centre, and roll the edge furthest away into the centre, so there are two long sausages of dough joined up beside each other. Then, carefully fold the long ends of the sausage on top of each other (so that you have a roughly loaf-shaped lump which is two sausages wide, and three sausages high), as shown in the diagram below from the povitica genius at Wolf's Den.


21.  Repeat the filling and rolling process with the remaining three blobs of dough to create another three loaves, coiling each sausage of dough in its own loaf tin. The different fillings I used are prepared as follows:
Peanut butter and jam
Place the peanut butter and milk in a microwave-safe bowl or a small saucepan, and heat until the peanut butter is soft. Stir thoroughly until well combined. Spread the peanut butter evenly over the rolled out dough. Then, dollop with strawberry jam and spread this evenly over the peanut butter layer. Roll up as explained above.
Ricotta and Moreno cherry
Mix the ricotta, cherries, and extra cherry juice in a small bowl until thoroughly combined. Spread evenly over the rolled out dough. Roll up as explained above.
Caramelised white chocolate
Warm the caramelised white chocolate in a microwave or small saucepan until it reaches a slow pouring consistency. Spread evenly over the rolled out dough, and sprinkle evenly (and liberally) with white chocolate chips. Roll up as explained above.
22.  Brush the top of the traditional loaf with the coffee glaze (a mixture of 60 ml of strong coffee and 2 tablespoons of sugar, cooled). For other fillings, I used a glaze of a beaten egg and 2 tablespoons of sugar).
23.  Cover tins lightly with a tea towel and allow to rest for around 15 minutes.
24.  Place the tins (without tea towels) into the preheated oven and bake for approximately 15 minutes.
25.  Turn down the oven temperature to slow 150°C / 300°F/ and bake for an additional 45 minutes, or until the top of the loaves are golden and crisp, the texture is firm rather than squishy when gently prodded and a thin skewer inserted into the centre comes out clean. Check on the loaves after a total of about 30 minutes, to ensure they’re not getting too brown – if that looks to be happening, cover them with a sheet of aluminium foil.
Note: I did the first two loaves with the oven initially hotter, then turned down after 15 minutes, and found that the walnut and cherry versions took quite a different time to cook through (the cherry one took almost 15 minutes longer). Consequently, I decided to turn the oven up to the higher temperature for the second batch, and left it there throughout. These second loaves took around an hour to cook, and didn’t end up too dry from the hotter temperature – and it’s less faffing about with a still-rather-temperamental oven!).
26.  Remove bread from oven and brush with melted butter. Allow the loaves to cool on a wire rack for 20-30 minutes, preferably still in the bread pan. (If it’s stupid o’clock and you’ve still got two loaves to cook and need to use the loaf pans, turning them out earlier won’t kill them, but might mean they sink a little as the baked loaves are quite heavy and cooling them in the tin helps them to hold their shape. I think the varied shapes of mine had more to do with slight differences in the rolling technique than with the cooling process).
27.  The loaves can be cut into slices with a serrated knife and it is apparently (and which I overlooked, rather to my regret) easier to do so after turning the bread upside down. I’d be interested to hear from other folks who’ve tried this recipe whether that’s the case and why. I did find they sliced more easily after being refrigerated overnight.

Warning: resting povitica dough may take over your kitchen!

But the results are worth it...

Read more...

Apricots And Chaos

Saturday, August 27, 2011

Sometimes, cakes emerge cleanly from their tins, without leaving crumbs lingering in corners. Sometimes, sauces thicken at just the right time, and don’t bubble away to a burnt and smoking nothing the moment you turn your back. Sometimes, the steak is perfectly cooked when you slice into it. And sometimes, the words flow like gravy over roast chicken.

Sometimes, though, they don’t. And what happens then? Practising. Pondering. Howling at the moon. Furtive baking in the tight crevices in between “real life”. Hoping that you haven’t talked so much that you’ve used up your lifetime’s quota of words already.


Only the foolish might take on bubbling sugar in such a frame of mind. The foolish… or the daring. Daring Bakers dragged me from a reluctant but accidental baking hiatus, and tipped me into sweetness and stickiness. It didn’t turn out quite the way I imagined, but, in the midst of chaos, it turned out at all and, sometimes, that’s more than enough to be grateful for.

The August 2011 Daring Bakers’ Challenge was hosted by Lisa of Parsley, Sage, Desserts and Line Drive and Mandy of What the Fruitcake?!. These two sugar mavens challenged us to make sinfully delicious candies! This was a special challenge for the Daring Bakers because the good folks at http://www.chocoley.com offered an amazing prize for the winner of the most creative and delicious candy!


I wanted to make sweets that tasted real, with a concentrated but subtle flavour from ingredients which don’t have unpronounceable names, and with delicate colouring rarely encountered in the confectionery aisle. Bright, clear, sunny tastes called out to distract me from the tail end of winter. There was a vague idea of making variations on a theme based around one core element. And then a package of apricot nectar, in those little pale blue glass bottles, sealed the deal and the experimenting began.

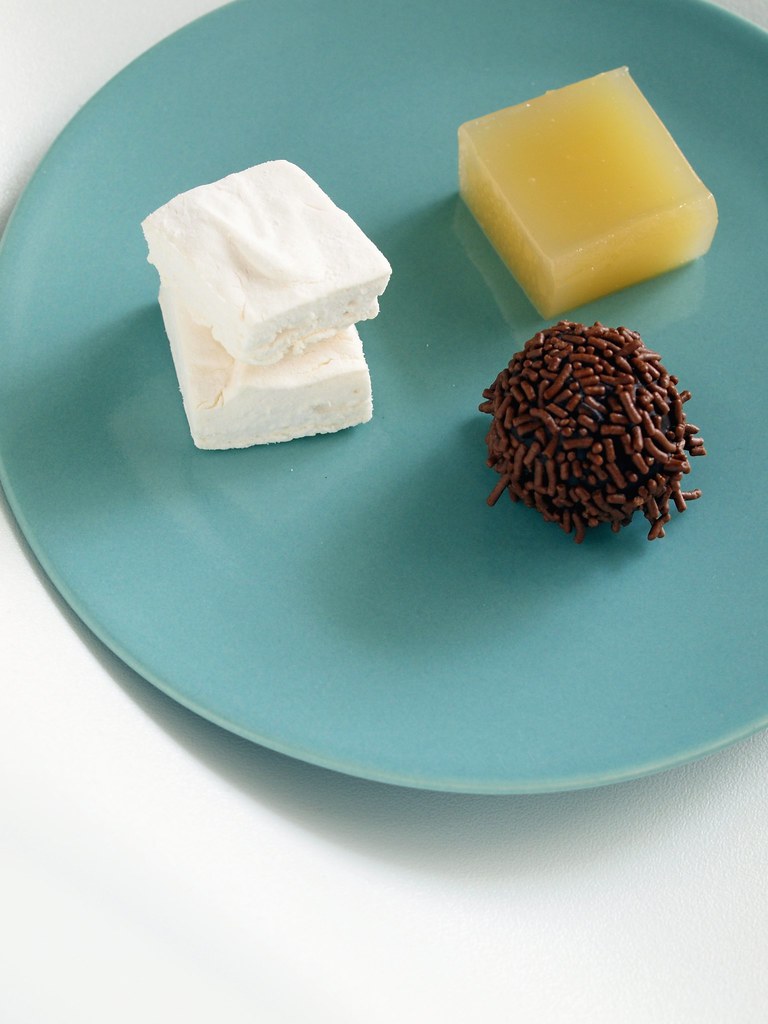
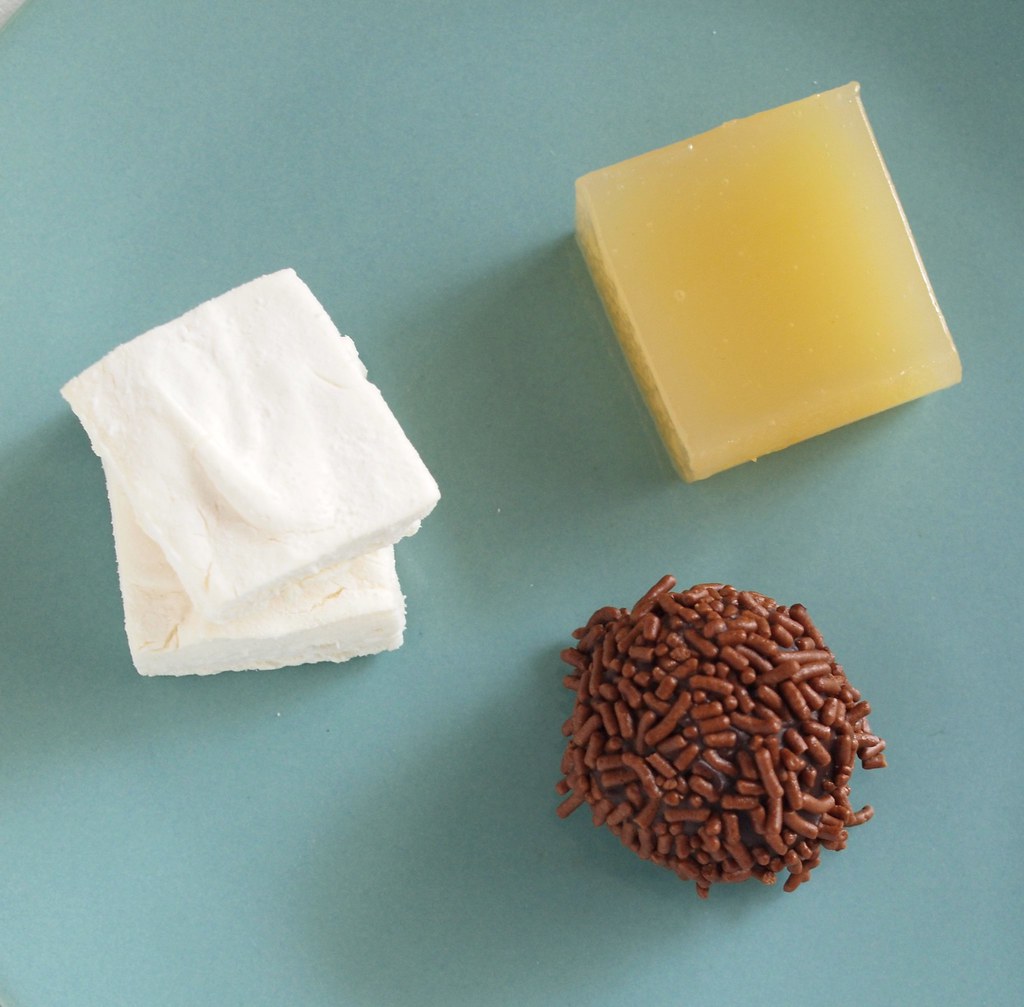
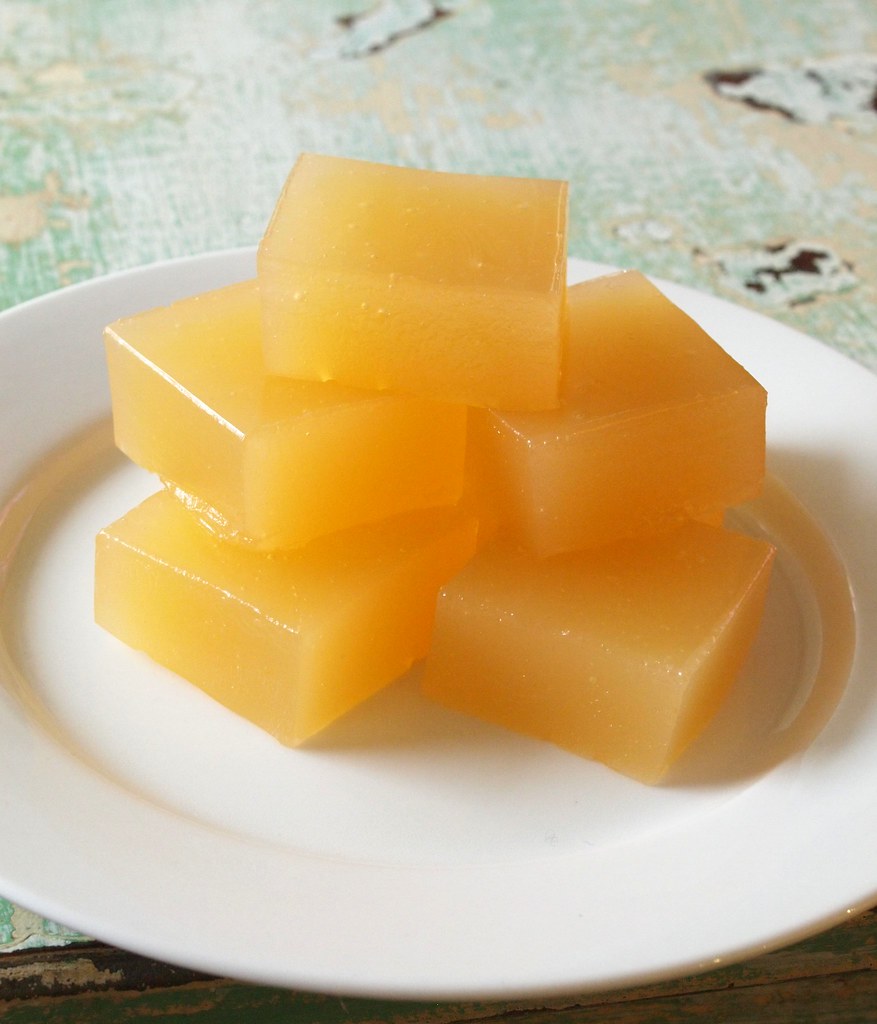
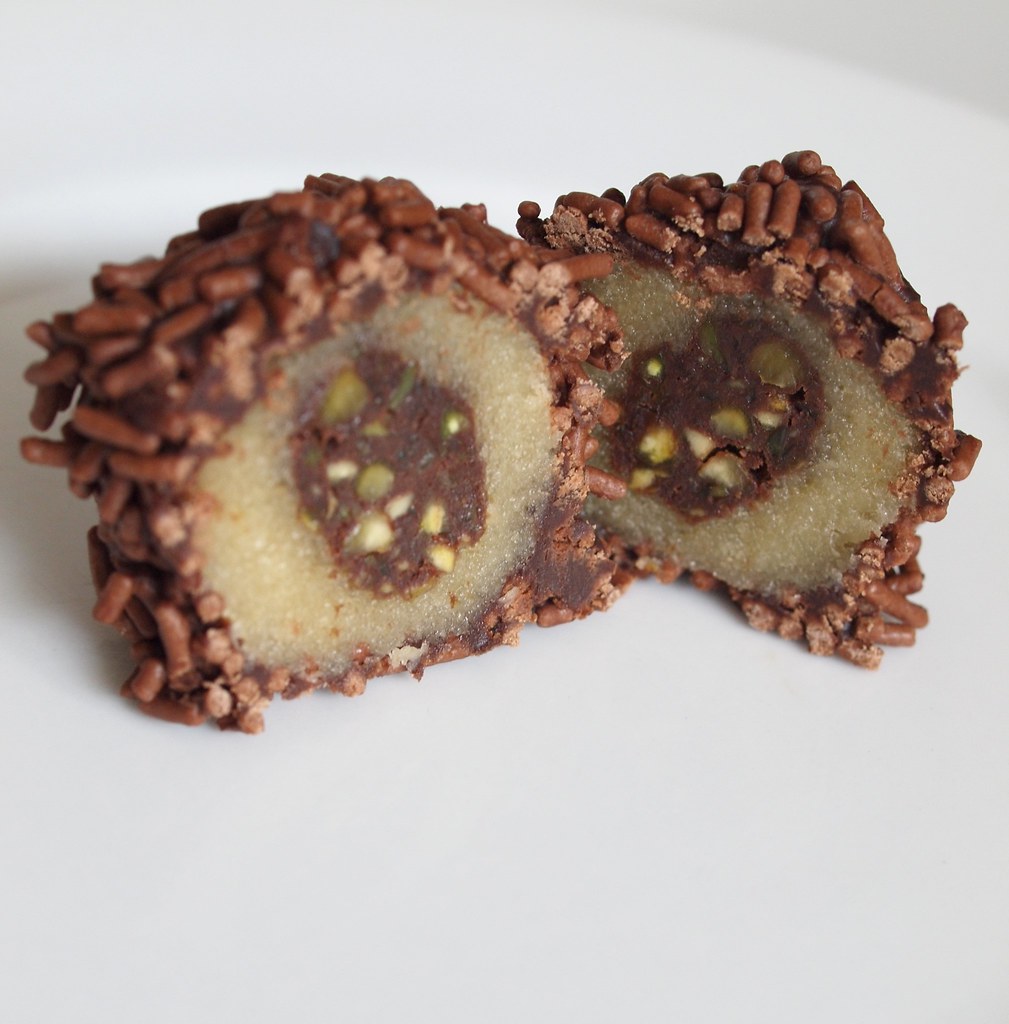
Eventually, a trio of apricot confections (apriconfections?) emerged from the kitchen. There were pale clouds of apricot marshmallow, glassy vivid squares of apricot Turkish delight and stickily dangerous (or should that be dangerously sticky?) chocolate ganache truffles filled with apricot marzipan and chocolate pistachio paste.

If it wasn’t quite the perfect apricot assiette I’d imagined, it was still a more than satisfying sugar high. The Turkish delight, in particular, turned out especially well, with a soft chewy-but-melting texture, a jewel-like glow and an unmistakeable apricot flavour. The marshmallows weren’t quite as fluffy as they’ve been on previous occasions and were so subtle that the apricot could’ve been easily mistaken or overlooked. A little added colour would have perked them up and added the power of suggestion to enhance the taste (although I’d been keen to try to keep the sweets “natural”, without artificial colours, flavours, or added glucose or corn syrup – not from any particular principle other than a desire to see how it turned out). The truffles were appropriately rich and sticky, with the apricot marzipan matching well with the dark chocolate coating, and some crunch added by the chocolate hail on the outside and the crushed pistachios lurking within.


So, if you’d like to try making some apricot confections of your own, this is how they were made…

Apricot Turkish Delight
Adapted from a recipe for passionfruit Turkish delight by Jane and Jeremy Strode published in Good Living on 21 June 2011

What you need
2 cups* / 440 g castor sugar
3 cups / 750 ml water
¼ tsp cream of tartar
1 tbsp lemon juice
¾ cup / 90 g cornflour
250 g icing sugar
18 g / 2 tbsp powdered gelatine
120 ml apricot nectar, refrigerated

What to do
1.       Line a square or oblong baking tin or container with baking paper (I used a 20 cm (8 inch) square cake tin).
2.       Put the caster sugar and ½ cup of the water in a saucepan and cook, stirring occasionally, on a medium heat until the sugar dissolves. Increase the heat to medium-high and bring the sugar syrup to the boil. Allow the syrup to boil until it reaches 115 °C (240 °F). Stir in the cream of tartar and lemon juice (being careful in case the mixture spits a little when you add them).
3.       In another saucepan, combined the cornflour and icing sugar with another ½ cup of water and whisk until smooth. Put the kettle on to boil the remaining 2 cups of water, then whisk this into the cornflour mixture. (Note: this saucepan has not yet been put on the heat).
4.       Add the sugar syrup mixture to the saucepan containing the cornflour mixture. Whisk over medium heat for around 30 minutes, after which the mixture will be thicker and more translucent. (Note: it’s already quite thick and translucent when you start, but will become more so as it’s cooked – it will end up smooth, but quite gloopy. Keep whisking it very regularly – it doesn’t have to be so continuous it gives you a cramp in your arm, but it should be watched carefully and whisked a lot. It will glump and bubble like a brightly coloured version of the Rotorua mud pools, so be careful not to get splashed).
5.       While the mixture bubbles away (and in between whisking), combine the gelatine and cold apricot nectar and stir until smooth. Allow to sit for 10 minutes. When the bubbling mixture reaches the desired thickness, whisk in the apricot nectar and gelatine.
6.       Pour the mixture into the prepared tray. Give it a jiggle so that the mixture levels out, and plonk it down firmly onto the bench top a couple of times to dislodge any air bubbles. Allow to set (either at room temperature or in the fridge). (If putting it in the fridge, be careful not to seal a lid over it, as condensation will form on the surface of the Turkish delight.
7.       When the Turkish delight is firm, slide it (still attached to the paper) from the tray, carefully peel away the paper, and cut with a large sharp knife dipped in hot water or (even better) a pizza cutter. (Note: from an 8 inch tin, cutting 36 (6 x 6) or 49 (7 x 7) squares gives good-sized pieces. The original recipe suggests 24 pieces, but looks like it uses a much deeper container; still, that would be a big sugar hit in one go!).
Apricot Turkish delight will keep in the fridge for at least a week.


Apricot Marshmallows
Based on a recipe by Sugar Plum

What you need
18 g / 2 tbsp powdered gelatine
½ cup / 125 ml apricot nectar, refrigerated
2 cups / 385 g white sugar
½ cup / 125 ml water
1 tsp golden syrup
Olive oil spray
Icing sugar for dusting

What to do
1.       Spray a cake tin or deep baking tray with olive oil spray, and dust thoroughly with a sieved icing sugar It only needs to be a light coating, but get right into the corners, or the marshmallow will stick – it tries to stick to everything!
2.       Place the gelatine and cold apricot nectar into the bowl of a stand mixer and mix on low speed for a minute or two, using the whisk attachment. (Note: If you have a splash guard for your stand mixer, it’s a good idea to fit it now, as boiling sugar syrup is something to definitely keep a safe distance from).
3.       Put the sugar, water and golden syrup in a large saucepan, and stir over medium heat until the sugar dissolves. Increase the heat to medium-high and bring to the boil. Allow the syrup to boil until it reaches 115 °C (240 °F) (this will take around 15 minutes).
4.       With the mixer on low speed, pour the sugar syrup very carefully into the bowl of the mixer. Once all the syrup has been added, gradually increase the speed to medium. Beat the apricot and syrup mixture until it becomes thick, white and glossy and stops increasing in volume (around 10 – 15 minutes).
5.       Spread the marshmallow mixture into the prepared tray, and smooth the top with a spatula dipped in hot water. Dust with sieved icing sugar, and allow to set for at least 4 hours (or overnight).
6.       Carefully prise the set marshmallow from the tin and cut into squares using a sharp knife or pizza cutter. Dust the cut sides of the squares in icing sugar so they don’t stick together.
Marshmallows will keep in an airtight container for at least a week (but will gradually start to dry out as they get older).


Chocolate, Apricot and Pistachio Truffles
A sticky invention of the Sticky Penguin, with ganache recipe based on the Daring Bakers

What you need
100 g almond meal
50 g icing sugar
25 ml apricot nectar (approximately)
50 g pistachios, blanched and with shells and skins removed
200 g dark chocolate
200 ml cream
Dark chocolate hail

What to do
1.       To make the apricot marzipan, place the almond meal and icing sugar in the bowl of a food processor and pulse to combine. Add the apricot nectar, a little at a time, until the mixture comes together into a ball that moves freely (but stickily) around the bowl. Wrap in cling film and refrigerate until required.
2.       Finely chop the dark chocolate and place in a heat-proof bowl. Heat 130 ml of cream in a small saucepan until it bubbles round the edges but doesn’t reach a full boil. Pour the hot cream over the chopped chocolate and stir well until the chocolate is completely melted and the ganache is smooth.
3.       Finely chop the pistachios, and combine with 60 g of the ganache. Place in the freezer until the mixture becomes firm.
4.       Heat the remaining 70 ml of cream, and add to the remaining ganache, stirring in well.
5.       To assemble the truffles, roll the apricot marzipan into balls (I got 12 balls from the quantity I made). Flatten each ball and use a ½ teaspoon measure to scoop a sphere of chocolate and pistachio ganache, and place this in the centre of the marzipan, pinching the marzipan over it to close it together. Reform the ganache-filled marzipan gently into evenly shaped balls. Coat the marzipan balls evenly with the thinner, plain ganache and then roll them in chocolate hail. Refrigerate or freeze until firm (although the truffles will still be a bit sticky).


* All references to cups in the recipes in this post are Australian / metric cups (1 cup = 250 ml)

Read more...

Feats Of Daring - Macadamia & Lemon Myrtle Baklava

Monday, June 27, 2011

Foodie. It's a term that can make some people quail* and others bristle with indignation (or indigestion, perhaps). There's a resemblance to greenie or hippie, with connotations of smug righteousness and well-intended but rather impractical passion. A hint of the facile. "I eat, therefore I am". Or worse, "I eat, therefore I'm going to gloat about it to everybody".


Like it or not, I realised I was a foodie on my honeymoon last year. Roaming Paris and perusing Rome with a long list of patisseries and pasticceria and purposeful intent to visit each and every one. Skyping restaurants in New York from the other side of the world to secure dinner reservations weeks before arrival. Squeaking with glee on first encountering the astonishment of the grande epicerie at Bon Marche. Foraging through cookbook shops, snaffling my way across markets and walking for miles on end in pursuit of all manner of comestibles. Gulp! Or should that be gobble...?

Similarly, I was reluctant to claim the "baker" moniker. Of course I'm not a baker. They know what they're doing. I just make occasional batches of brownies (seven batches in a weekend, for instance). I'm far too rustic and messy to be a real baker. I'm only tinkering in the margins, experimenting. And taking morning tea for my group at work at least once a week. With the occasional evening class thrown in, to learn something a bit more unusual. Much as I can dream up gooey, squishy, crunchy and excessive things to put into a brownie for hours on end, I decided it was time for a bit more of a challenge. After seeing the beautiful confections created by so many others online, I bit the bullet and signed up to Daring Bakers.


For anybody not already familiar with Daring Bakers (the dessert-obsessed counterpart to Daring Cooks), it's an online group which takes on a monthly challenge to test their skills, creativity... and patience. There's a base recipe provided, which provides plenty of scope for variations while helping you learn the basic (or not-so-basic) techniques involved. When I discovered the theme for this month, I wondered quite what on earth I'd got myself into. Erica of Erica’s Edibles was our host for the Daring Baker’s June challenge. Erica challenged us to be truly DARING by making homemade phyllo dough and then to use that homemade dough to make Baklava. Baklava. From scratch. Eeeep!

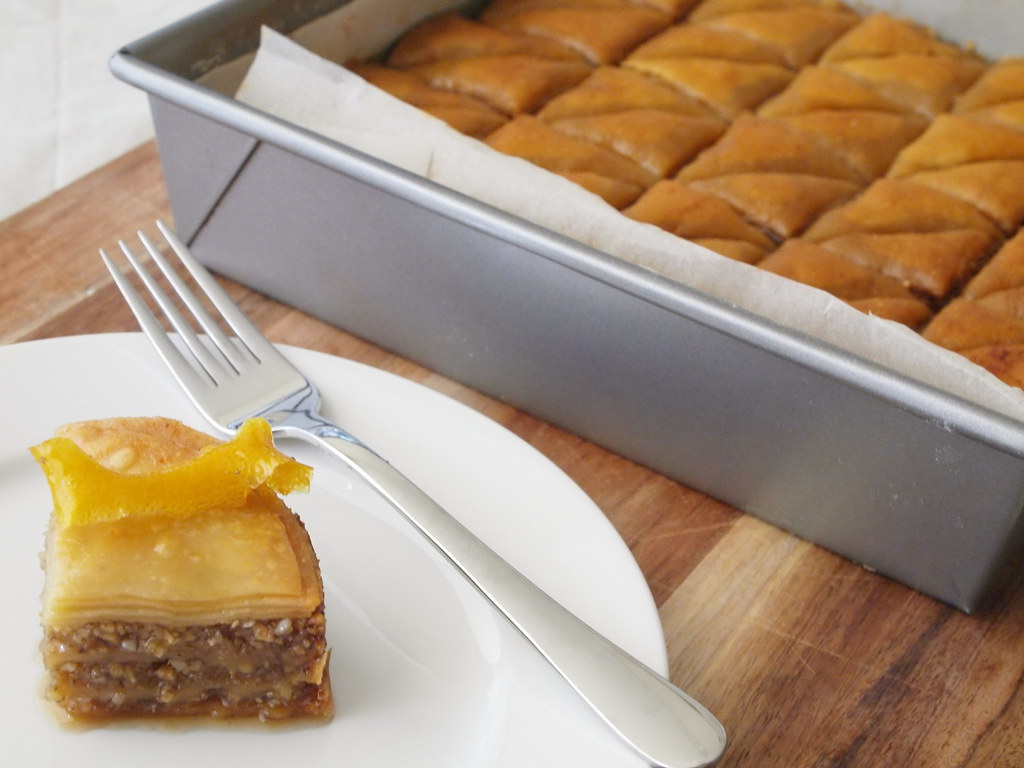
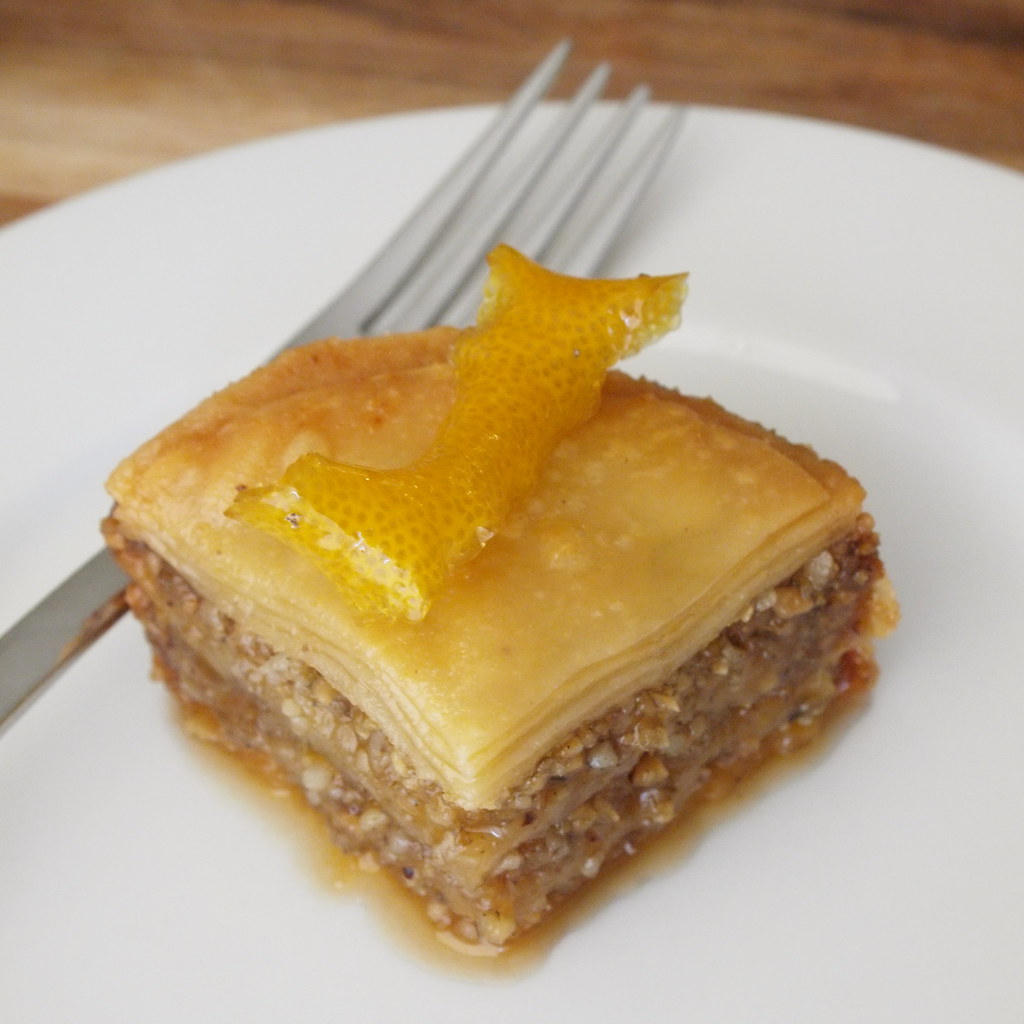
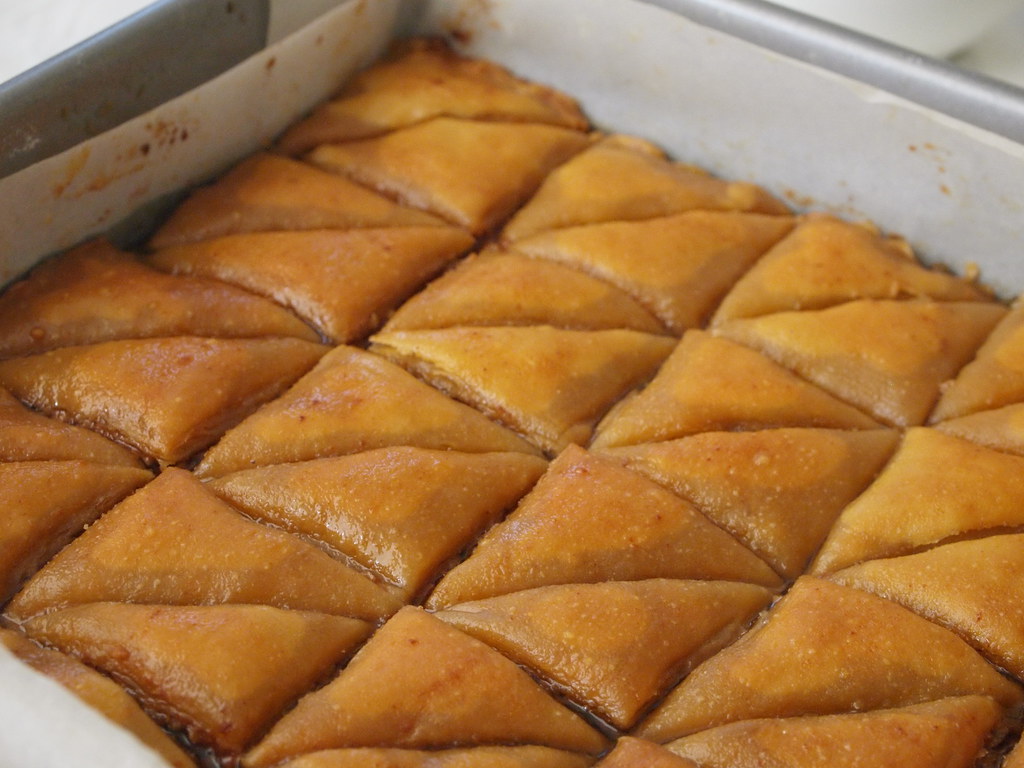
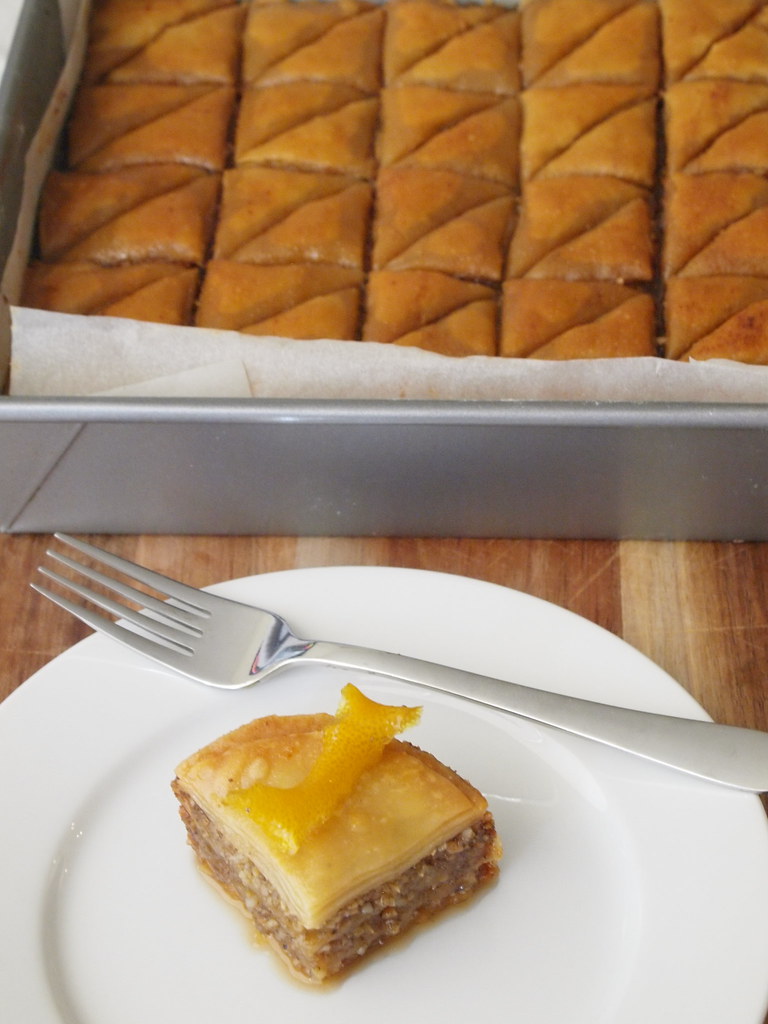
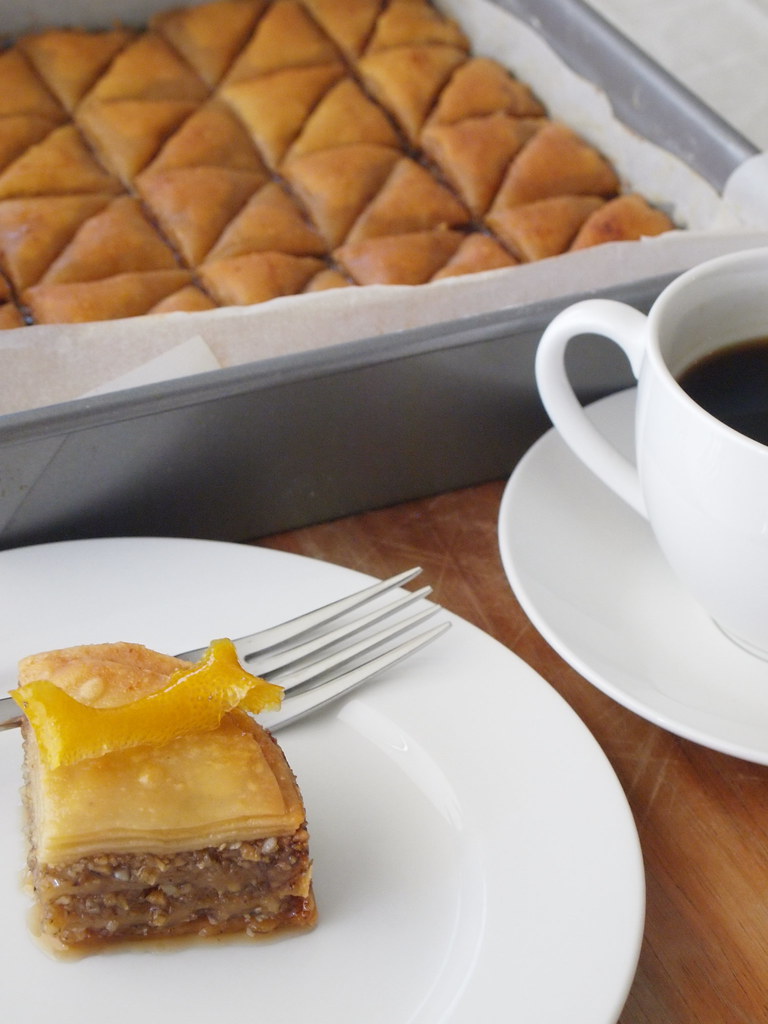
Sticky Penguin's Macadamia & Lemon Myrtle Baklava

I decided to put my own spin on the baklava by adding some local ingredients to give it a different flavour - macadamias, lemon myrtle, and blue box honey. If you'd like to try making it, here's how it was done...

Note: recipes are my adaptation of the Daring Bakers recipes:
- phyllo dough recipe originally from Kaffeehaus - Exquisite Desserts from the Classic Cafés of Vienna, Budapest and Prague, by Rick Rodgers
- baklava recipe originally from Alton Brown, Food Network

Macadamia and Lemon Myrtle Baklava
I doubled the basic recipe for the phyllo dough to make enough to fill a 23 cm (9 inch) square tin and a mini version in a 10 cm (4 inch) round springform tin. Had I been a little more careful with my trimmings, the recipe would've made enough for at least another second mini version. The syrup quantities below have been increased from the original recipe to allow enough for this additional tin. There was plenty of filling (and a little left over) without any changes to quantities (although I was using quite a different nut mixture).

Sticky Penguin's Macadamia & Lemon Myrtle Baklava

What you need
For the phyllo dough
370 g plain flour
¼ tsp salt
210 ml water
4 tbsp / 60 ml vegetable oil (I used grapeseed oil), plus a little extra to brush the dough
1 tsp / 5 ml apple cider vinegar
For the filling
180 g macadamias
180 g almonds, blanched
105 g walnuts
1½ tsp ground lemon myrtle
¼ tsp mixed spice
150 g brown sugar
For the syrup
300 ml honey (I used blue box)
100 ml golden syrup
400 ml water
300 g granulated sugar
3 strips of lemon zest
2 tbsp / 30 ml lemon juice

What you do
Phyllo dough
1. Sieve the flour and salt into the bowl of a stand mixer and stir to combine.
2. Combine the water, oil and vinegar in a separate bowl or measuring jug.
3. With the mixer on low speed, gradually add the wet ingredients to the dry ingredients, mixing with the paddle attachment until it becomes a soft dough. If it doesn't come together, it may be necessary to add a little more water to get to this consistency (although mine was just right with the specified quantities, and quite sticky enough).
4. Change from the paddle attachment to the dough hook with the stand mixer, and let the dough knead for 10 minutes. After this time, it should be smooth, squishy and stretchy.
5. Remove the dough from the mixer and knead by hand for another couple of minutes. During this process, pick up the dough and throw it down hard onto the benchtop several times (which makes a very satisfying thwack, as well as developing the gluten in the flour). I kneaded my dough on a sheet of baking paper and found it didn't need any flour added at this stage to avoid any sticking.
6. Shape the dough into a ball, and lightly cover it with a thin film of oil. Wrap up tightly with plastic wrap and leave to rest for 30-90 minutes (the longer the better). As suggested in the recipe, I left mine for 2 hours and found it very easy to work with. Although, as it got easier to work with as I reached the end of the dough later on, it might be even better left for 3 hours (or perhaps it just improves with practice!).

Filling
While the dough rests, make the filling, so that as soon as the dough is ready, you can begin assembling the baklava. This will avoid the messy predicament of ending up with sheets of phyllo all over the kitchen!
Place all the ingredients into the bowl of a food processor and process on high until finely chopped.

Roll out the phyllo dough
After the dough has rested, it needs to be rolled out as thinly as possible. So thin you can see through it. It sounds scary, but it turned out to be much less of an impossible task, especially after a bit of experimenting with the technique.
1. Tear off a piece of dough about the size of a golf ball, making sure you re-wrap the remaining dough so it doesn't dry out.
2. Liberally flour your work area, rolling pin and hands. I used a piece of dowelling, and it made the process much lighter and easier than a regular rolling pin.
3. Roll the dough out a bit to flatten it out. I then found that the most effective way to roll the dough as thin as needed was to roll with one hand, while using the other hand to gently pull the dough away from the direction I was rolling. After repeating a couple of times, I then turned the dough 90 degrees and continued, so that it ended up evenly shaped.
4. The original recipe suggests wrapping the lightly-rolled dough around your dowel or rolling pin, and roll quickly back and forth, after which the dough neatly unrolls from the pin, thinner and larger. When I tried this, I ended up with a sticky muddle which would not unroll from the pin. But the roll-and-stretch approach produced good results.
5. Keep rolling until the dough is as thin as possible. If it has some small tears, this doesn't matter and won't show, as long as you have one neat and tidy sheet for the very top of the finished baklava. Also, as you cut the phyllo to fit the shape of your tin, if it isn't as thin around the very edges this won't matter as this area will be trimmed away.
6. Towards the end, it can be easiest to pick the dough up and stretch it out with your hands (a little like pizza dough).

Assemble the baklava
1. Line the tin with baking paper and brush with melted butter. Preheat the oven to 180°C (355°F) (I didn't use the fan setting).
2. With a sharp knife or pizza cutter, cut the first sheet of phyllo to fit the base of the tin. As I have several 9 inch square pans (they're the perfect size for brownies), I used an empty tin as a template for cutting out the sheets. If you just have one tin, cutting a piece of paper to the right size would also work well.
3. Carefully place the sheet into the tin, making sure it is flat and not curled up in the corners.
4. Brush the phyllo sheet very lightly with melted butter.
5. Repeat this process with another 4 phyllo sheets, brushing lightly with butter in between. After this, you should have five layers of phyllo in the tin, with butter brushed in between and on the top layer.
6. Add an even layer of the filling on top of the phyllo, making sure it goes right to the edges. The recipe advocates adding 1/3 of the filling, but I found I had so much filling it was more like a bit less than a quarter.
7. Repeat the process with another 5 sheets of buttered phyllo and then add more filling.
8. Repeat the process again.
9. Finish with 5 layers of buttered phyllo. Make sure your final sheet is even and rip-free.
10. Gently tuck any stray edges of phyllo down the sides of the tin using a spatula. Pat the baklava down so that it's even and to remove any air bubbles.
11. Using a sharp knife (a small paring knife worked well, as it was easy to maneuver in the tin), cut the baklava into pieces. I cut mine into 25 squares (5 by 5), then cut each square on the diagonal. If it's tricky to get all the way to the bottom, don't worry as this can be finished part-way through baking, although I found it ok to do fully before baking).
12. Brush liberally with melted butter, ensuring the phyllo is completely covered and there are no bare spots.
13. Bake for 30 minutes, then remove from the oven and, if necessary, finish cutting all the way through to the bottom of the tin. Return the tin to the oven for around another 30 minutes, or until the top of the baklava is an even light golden brown. Mine took exactly one hour in total.

Syrup
Start making the syrup when you put the baklava into the oven, so it will have time to cool to room temperature by the time the baklava is ready. When adding the syrup to the baklava, once of the two needs to be hot, and the other at room temperature - doing it this way round seemed to be quicker and easier than waiting for baklava to cool and adding boiling syrup.
1. Combine all the ingredients for the syrup in a saucepan. Stir occasionally over a medium heat until the sugar has fully dissolved.
2. Bring the mixture to a boil and boil for 10 minutes, stirring occasionally.
3. Set aside to cool, then strain into a jug.

Finishing off
1. As soon as you remove the baklava from the oven, pour the cooled syrup over the top, starting by pouring it along all the cut lines, and finishing by ensuring that the whole surface has been coated with the syrup. It looks like an enormous amount of syrup, but it will absorb to produce a beautifully sticky baklava.
2. Leave the baklava overnight to rest and absorb the syrup. The finished baklava can be stored in an airtight container at room temperature (if it lasts that long) or in the fridge if you prefer (which will make it firmer and less gooey).

Sticky Penguin's Macadamia & Lemon Myrtle Baklava

I was really quite thrilled with how well the baklava turned out, as I'd never made it before (or made my own phyllo pastry). It looked quite convincing, and smelled sweet and fragrant. The Other Penguin was quite impressed with the look of it, too.

The verdict on the tasting will be updated on this post tomorrow, after the finished product has been sampled at work...

* Lightly roasted and wrapped in prosciutto, perhaps? Although not for some of us, who just can't handle cute food...

Read more...

  © Blogger template "Shush" by Ourblogtemplates.com 2009, changed to bits and pieces by the Sticky Penguin