
Feats Of Daring - Macadamia & Lemon Myrtle Baklava
Monday, June 27, 2011
Foodie. It's a term that can make some people quail* and others bristle with indignation (or indigestion, perhaps). There's a resemblance to greenie or hippie, with connotations of smug righteousness and well-intended but rather impractical passion. A hint of the facile. "I eat, therefore I am". Or worse, "I eat, therefore I'm going to gloat about it to everybody".
Like it or not, I realised I was a foodie on my honeymoon last year. Roaming Paris and perusing Rome with a long list of patisseries and pasticceria and purposeful intent to visit each and every one. Skyping restaurants in New York from the other side of the world to secure dinner reservations weeks before arrival. Squeaking with glee on first encountering the astonishment of the grande epicerie at Bon Marche. Foraging through cookbook shops, snaffling my way across markets and walking for miles on end in pursuit of all manner of comestibles. Gulp! Or should that be gobble...?
Similarly, I was reluctant to claim the "baker" moniker. Of course I'm not a baker. They know what they're doing. I just make occasional batches of brownies (seven batches in a weekend, for instance). I'm far too rustic and messy to be a real baker. I'm only tinkering in the margins, experimenting. And taking morning tea for my group at work at least once a week. With the occasional evening class thrown in, to learn something a bit more unusual. Much as I can dream up gooey, squishy, crunchy and excessive things to put into a brownie for hours on end, I decided it was time for a bit more of a challenge. After seeing the beautiful confections created by so many others online, I bit the bullet and signed up to Daring Bakers.
For anybody not already familiar with Daring Bakers (the dessert-obsessed counterpart to Daring Cooks), it's an online group which takes on a monthly challenge to test their skills, creativity... and patience. There's a base recipe provided, which provides plenty of scope for variations while helping you learn the basic (or not-so-basic) techniques involved. When I discovered the theme for this month, I wondered quite what on earth I'd got myself into. Erica of Erica’s Edibles was our host for the Daring Baker’s June challenge. Erica challenged us to be truly DARING by making homemade phyllo dough and then to use that homemade dough to make Baklava. Baklava. From scratch. Eeeep!
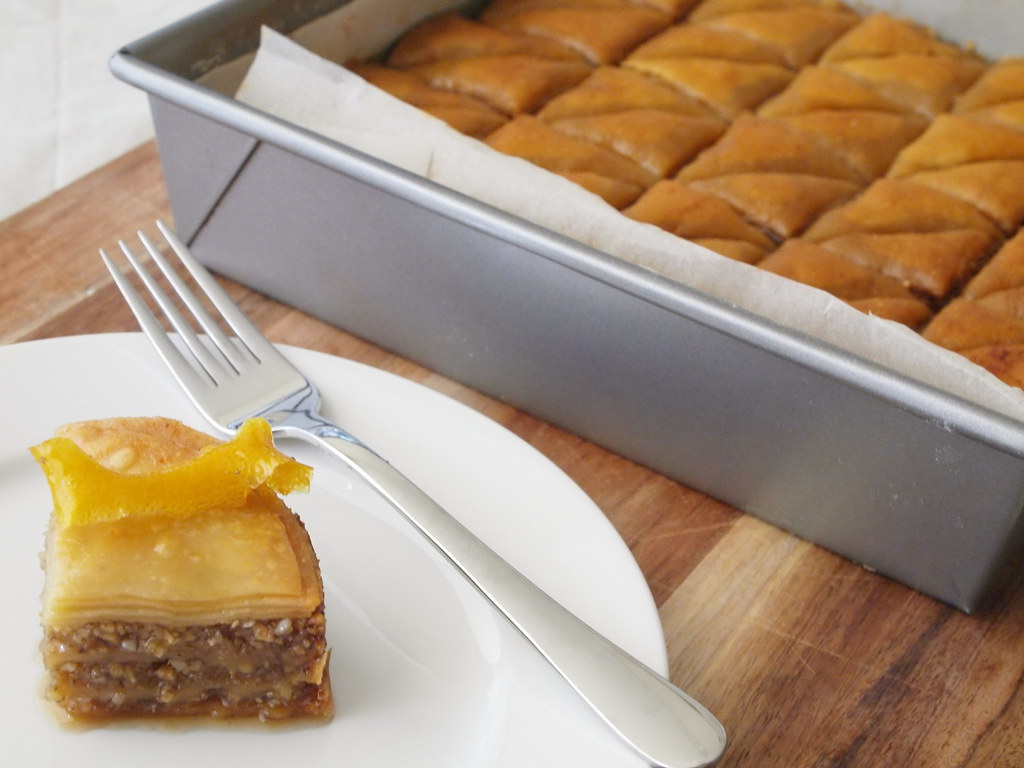
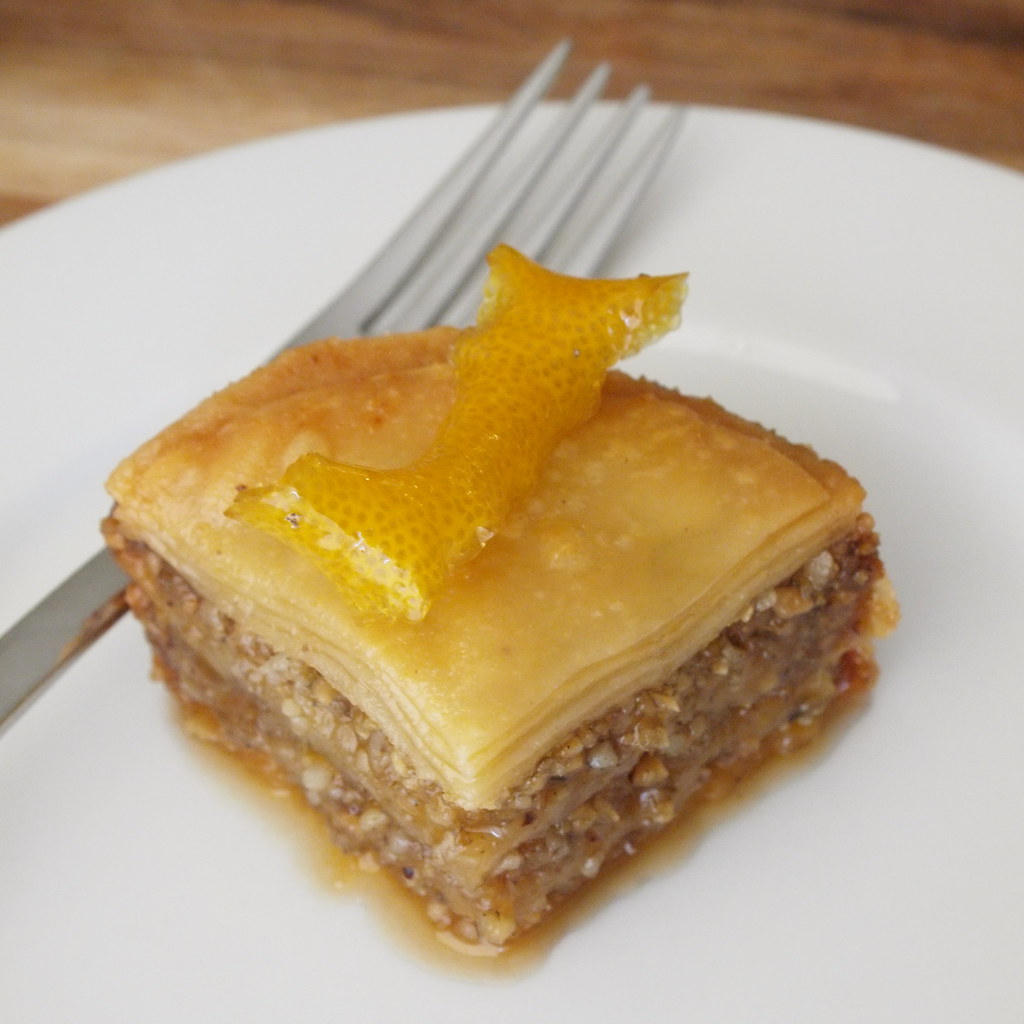
I decided to put my own spin on the baklava by adding some local ingredients to give it a different flavour - macadamias, lemon myrtle, and blue box honey. If you'd like to try making it, here's how it was done...
Note: recipes are my adaptation of the Daring Bakers recipes:
- phyllo dough recipe originally from Kaffeehaus - Exquisite Desserts from the Classic Cafés of Vienna, Budapest and Prague, by Rick Rodgers
- baklava recipe originally from Alton Brown, Food Network
Macadamia and Lemon Myrtle Baklava
I doubled the basic recipe for the phyllo dough to make enough to fill a 23 cm (9 inch) square tin and a mini version in a 10 cm (4 inch) round springform tin. Had I been a little more careful with my trimmings, the recipe would've made enough for at least another second mini version. The syrup quantities below have been increased from the original recipe to allow enough for this additional tin. There was plenty of filling (and a little left over) without any changes to quantities (although I was using quite a different nut mixture).
What you need
For the phyllo dough
370 g plain flour
¼ tsp salt
210 ml water
4 tbsp / 60 ml vegetable oil (I used grapeseed oil), plus a little extra to brush the dough
1 tsp / 5 ml apple cider vinegar
For the filling
180 g macadamias
180 g almonds, blanched
105 g walnuts
1½ tsp ground lemon myrtle
¼ tsp mixed spice
150 g brown sugar
For the syrup
300 ml honey (I used blue box)
100 ml golden syrup
400 ml water
300 g granulated sugar
3 strips of lemon zest
2 tbsp / 30 ml lemon juice
What you do
Phyllo dough
1. Sieve the flour and salt into the bowl of a stand mixer and stir to combine.
2. Combine the water, oil and vinegar in a separate bowl or measuring jug.
3. With the mixer on low speed, gradually add the wet ingredients to the dry ingredients, mixing with the paddle attachment until it becomes a soft dough. If it doesn't come together, it may be necessary to add a little more water to get to this consistency (although mine was just right with the specified quantities, and quite sticky enough).
4. Change from the paddle attachment to the dough hook with the stand mixer, and let the dough knead for 10 minutes. After this time, it should be smooth, squishy and stretchy.
5. Remove the dough from the mixer and knead by hand for another couple of minutes. During this process, pick up the dough and throw it down hard onto the benchtop several times (which makes a very satisfying thwack, as well as developing the gluten in the flour). I kneaded my dough on a sheet of baking paper and found it didn't need any flour added at this stage to avoid any sticking.
6. Shape the dough into a ball, and lightly cover it with a thin film of oil. Wrap up tightly with plastic wrap and leave to rest for 30-90 minutes (the longer the better). As suggested in the recipe, I left mine for 2 hours and found it very easy to work with. Although, as it got easier to work with as I reached the end of the dough later on, it might be even better left for 3 hours (or perhaps it just improves with practice!).
Filling
While the dough rests, make the filling, so that as soon as the dough is ready, you can begin assembling the baklava. This will avoid the messy predicament of ending up with sheets of phyllo all over the kitchen!
Place all the ingredients into the bowl of a food processor and process on high until finely chopped.
Roll out the phyllo dough
After the dough has rested, it needs to be rolled out as thinly as possible. So thin you can see through it. It sounds scary, but it turned out to be much less of an impossible task, especially after a bit of experimenting with the technique.
1. Tear off a piece of dough about the size of a golf ball, making sure you re-wrap the remaining dough so it doesn't dry out.
2. Liberally flour your work area, rolling pin and hands. I used a piece of dowelling, and it made the process much lighter and easier than a regular rolling pin.
3. Roll the dough out a bit to flatten it out. I then found that the most effective way to roll the dough as thin as needed was to roll with one hand, while using the other hand to gently pull the dough away from the direction I was rolling. After repeating a couple of times, I then turned the dough 90 degrees and continued, so that it ended up evenly shaped.
4. The original recipe suggests wrapping the lightly-rolled dough around your dowel or rolling pin, and roll quickly back and forth, after which the dough neatly unrolls from the pin, thinner and larger. When I tried this, I ended up with a sticky muddle which would not unroll from the pin. But the roll-and-stretch approach produced good results.
5. Keep rolling until the dough is as thin as possible. If it has some small tears, this doesn't matter and won't show, as long as you have one neat and tidy sheet for the very top of the finished baklava. Also, as you cut the phyllo to fit the shape of your tin, if it isn't as thin around the very edges this won't matter as this area will be trimmed away.
6. Towards the end, it can be easiest to pick the dough up and stretch it out with your hands (a little like pizza dough).
Assemble the baklava
1. Line the tin with baking paper and brush with melted butter. Preheat the oven to 180°C (355°F) (I didn't use the fan setting).
2. With a sharp knife or pizza cutter, cut the first sheet of phyllo to fit the base of the tin. As I have several 9 inch square pans (they're the perfect size for brownies), I used an empty tin as a template for cutting out the sheets. If you just have one tin, cutting a piece of paper to the right size would also work well.
3. Carefully place the sheet into the tin, making sure it is flat and not curled up in the corners.
4. Brush the phyllo sheet very lightly with melted butter.
5. Repeat this process with another 4 phyllo sheets, brushing lightly with butter in between. After this, you should have five layers of phyllo in the tin, with butter brushed in between and on the top layer.
6. Add an even layer of the filling on top of the phyllo, making sure it goes right to the edges. The recipe advocates adding 1/3 of the filling, but I found I had so much filling it was more like a bit less than a quarter.
7. Repeat the process with another 5 sheets of buttered phyllo and then add more filling.
8. Repeat the process again.
9. Finish with 5 layers of buttered phyllo. Make sure your final sheet is even and rip-free.
10. Gently tuck any stray edges of phyllo down the sides of the tin using a spatula. Pat the baklava down so that it's even and to remove any air bubbles.
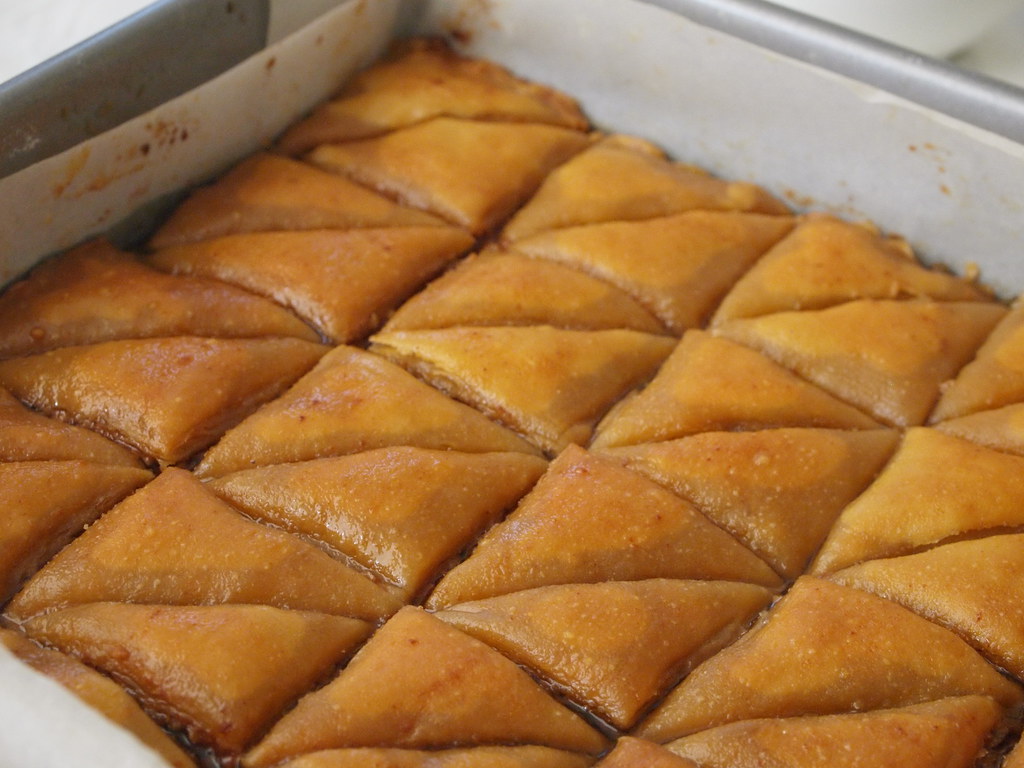
11. Using a sharp knife (a small paring knife worked well, as it was easy to maneuver in the tin), cut the baklava into pieces. I cut mine into 25 squares (5 by 5), then cut each square on the diagonal. If it's tricky to get all the way to the bottom, don't worry as this can be finished part-way through baking, although I found it ok to do fully before baking).
12. Brush liberally with melted butter, ensuring the phyllo is completely covered and there are no bare spots.
13. Bake for 30 minutes, then remove from the oven and, if necessary, finish cutting all the way through to the bottom of the tin. Return the tin to the oven for around another 30 minutes, or until the top of the baklava is an even light golden brown. Mine took exactly one hour in total.
Syrup
Start making the syrup when you put the baklava into the oven, so it will have time to cool to room temperature by the time the baklava is ready. When adding the syrup to the baklava, once of the two needs to be hot, and the other at room temperature - doing it this way round seemed to be quicker and easier than waiting for baklava to cool and adding boiling syrup.
1. Combine all the ingredients for the syrup in a saucepan. Stir occasionally over a medium heat until the sugar has fully dissolved.
2. Bring the mixture to a boil and boil for 10 minutes, stirring occasionally.
3. Set aside to cool, then strain into a jug.
Finishing off
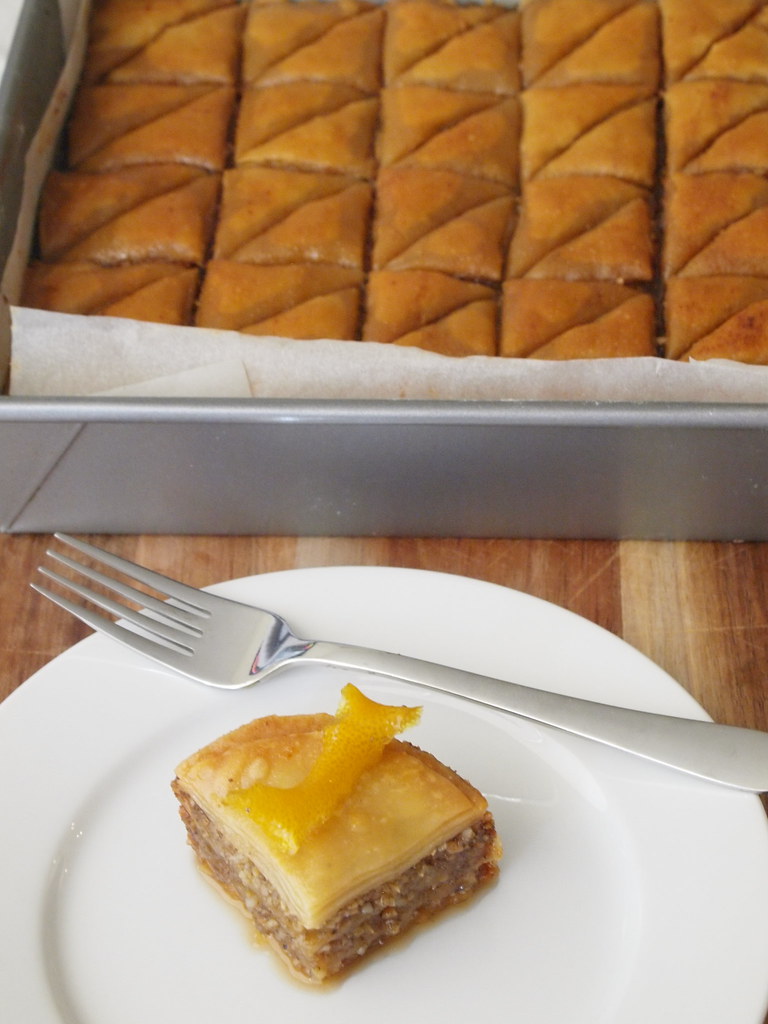
1. As soon as you remove the baklava from the oven, pour the cooled syrup over the top, starting by pouring it along all the cut lines, and finishing by ensuring that the whole surface has been coated with the syrup. It looks like an enormous amount of syrup, but it will absorb to produce a beautifully sticky baklava.
2. Leave the baklava overnight to rest and absorb the syrup. The finished baklava can be stored in an airtight container at room temperature (if it lasts that long) or in the fridge if you prefer (which will make it firmer and less gooey).
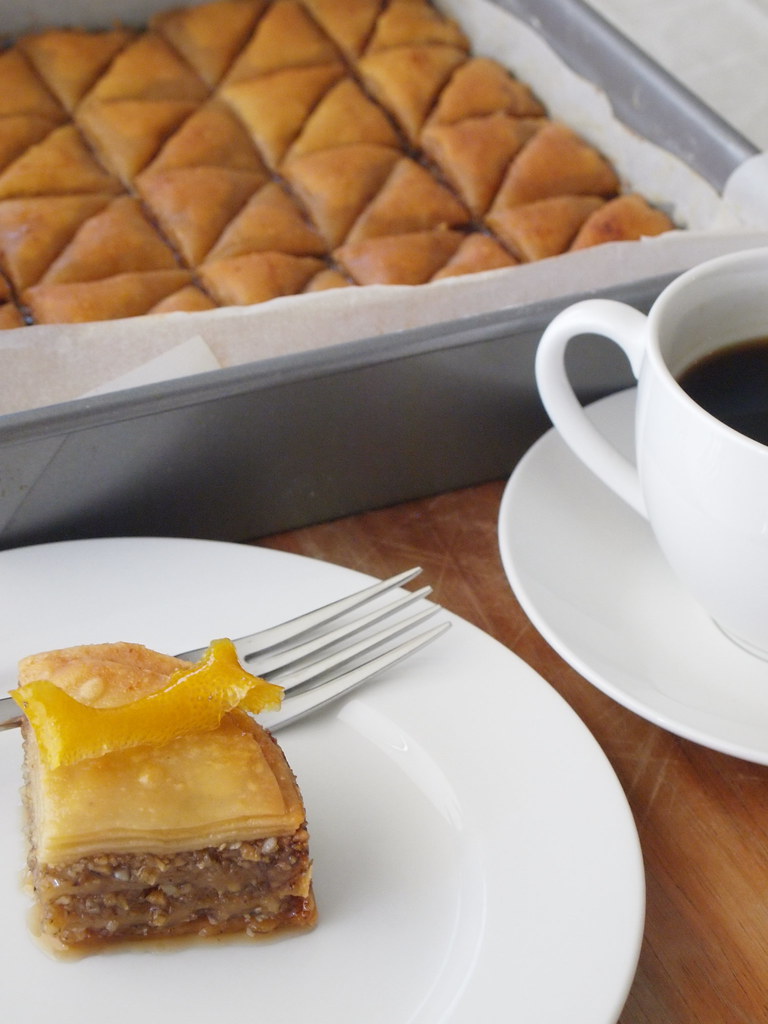
I was really quite thrilled with how well the baklava turned out, as I'd never made it before (or made my own phyllo pastry). It looked quite convincing, and smelled sweet and fragrant. The Other Penguin was quite impressed with the look of it, too.
The verdict on the tasting will be updated on this post tomorrow, after the finished product has been sampled at work...
* Lightly roasted and wrapped in prosciutto, perhaps? Although not for some of us, who just can't handle cute food...
For the filling
180 g macadamias
180 g almonds, blanched
105 g walnuts
1½ tsp ground lemon myrtle
¼ tsp mixed spice
150 g brown sugar
For the syrup
300 ml honey (I used blue box)
100 ml golden syrup
400 ml water
300 g granulated sugar
3 strips of lemon zest
2 tbsp / 30 ml lemon juice
What you do
Phyllo dough
1. Sieve the flour and salt into the bowl of a stand mixer and stir to combine.
2. Combine the water, oil and vinegar in a separate bowl or measuring jug.
3. With the mixer on low speed, gradually add the wet ingredients to the dry ingredients, mixing with the paddle attachment until it becomes a soft dough. If it doesn't come together, it may be necessary to add a little more water to get to this consistency (although mine was just right with the specified quantities, and quite sticky enough).
4. Change from the paddle attachment to the dough hook with the stand mixer, and let the dough knead for 10 minutes. After this time, it should be smooth, squishy and stretchy.
5. Remove the dough from the mixer and knead by hand for another couple of minutes. During this process, pick up the dough and throw it down hard onto the benchtop several times (which makes a very satisfying thwack, as well as developing the gluten in the flour). I kneaded my dough on a sheet of baking paper and found it didn't need any flour added at this stage to avoid any sticking.
6. Shape the dough into a ball, and lightly cover it with a thin film of oil. Wrap up tightly with plastic wrap and leave to rest for 30-90 minutes (the longer the better). As suggested in the recipe, I left mine for 2 hours and found it very easy to work with. Although, as it got easier to work with as I reached the end of the dough later on, it might be even better left for 3 hours (or perhaps it just improves with practice!).
Filling
While the dough rests, make the filling, so that as soon as the dough is ready, you can begin assembling the baklava. This will avoid the messy predicament of ending up with sheets of phyllo all over the kitchen!
Place all the ingredients into the bowl of a food processor and process on high until finely chopped.
Roll out the phyllo dough
After the dough has rested, it needs to be rolled out as thinly as possible. So thin you can see through it. It sounds scary, but it turned out to be much less of an impossible task, especially after a bit of experimenting with the technique.
1. Tear off a piece of dough about the size of a golf ball, making sure you re-wrap the remaining dough so it doesn't dry out.
2. Liberally flour your work area, rolling pin and hands. I used a piece of dowelling, and it made the process much lighter and easier than a regular rolling pin.
3. Roll the dough out a bit to flatten it out. I then found that the most effective way to roll the dough as thin as needed was to roll with one hand, while using the other hand to gently pull the dough away from the direction I was rolling. After repeating a couple of times, I then turned the dough 90 degrees and continued, so that it ended up evenly shaped.
4. The original recipe suggests wrapping the lightly-rolled dough around your dowel or rolling pin, and roll quickly back and forth, after which the dough neatly unrolls from the pin, thinner and larger. When I tried this, I ended up with a sticky muddle which would not unroll from the pin. But the roll-and-stretch approach produced good results.
5. Keep rolling until the dough is as thin as possible. If it has some small tears, this doesn't matter and won't show, as long as you have one neat and tidy sheet for the very top of the finished baklava. Also, as you cut the phyllo to fit the shape of your tin, if it isn't as thin around the very edges this won't matter as this area will be trimmed away.
6. Towards the end, it can be easiest to pick the dough up and stretch it out with your hands (a little like pizza dough).
Assemble the baklava
1. Line the tin with baking paper and brush with melted butter. Preheat the oven to 180°C (355°F) (I didn't use the fan setting).
2. With a sharp knife or pizza cutter, cut the first sheet of phyllo to fit the base of the tin. As I have several 9 inch square pans (they're the perfect size for brownies), I used an empty tin as a template for cutting out the sheets. If you just have one tin, cutting a piece of paper to the right size would also work well.
3. Carefully place the sheet into the tin, making sure it is flat and not curled up in the corners.
4. Brush the phyllo sheet very lightly with melted butter.
5. Repeat this process with another 4 phyllo sheets, brushing lightly with butter in between. After this, you should have five layers of phyllo in the tin, with butter brushed in between and on the top layer.
6. Add an even layer of the filling on top of the phyllo, making sure it goes right to the edges. The recipe advocates adding 1/3 of the filling, but I found I had so much filling it was more like a bit less than a quarter.
7. Repeat the process with another 5 sheets of buttered phyllo and then add more filling.
8. Repeat the process again.
9. Finish with 5 layers of buttered phyllo. Make sure your final sheet is even and rip-free.
10. Gently tuck any stray edges of phyllo down the sides of the tin using a spatula. Pat the baklava down so that it's even and to remove any air bubbles.
11. Using a sharp knife (a small paring knife worked well, as it was easy to maneuver in the tin), cut the baklava into pieces. I cut mine into 25 squares (5 by 5), then cut each square on the diagonal. If it's tricky to get all the way to the bottom, don't worry as this can be finished part-way through baking, although I found it ok to do fully before baking).
12. Brush liberally with melted butter, ensuring the phyllo is completely covered and there are no bare spots.
13. Bake for 30 minutes, then remove from the oven and, if necessary, finish cutting all the way through to the bottom of the tin. Return the tin to the oven for around another 30 minutes, or until the top of the baklava is an even light golden brown. Mine took exactly one hour in total.
Syrup
Start making the syrup when you put the baklava into the oven, so it will have time to cool to room temperature by the time the baklava is ready. When adding the syrup to the baklava, once of the two needs to be hot, and the other at room temperature - doing it this way round seemed to be quicker and easier than waiting for baklava to cool and adding boiling syrup.
1. Combine all the ingredients for the syrup in a saucepan. Stir occasionally over a medium heat until the sugar has fully dissolved.
2. Bring the mixture to a boil and boil for 10 minutes, stirring occasionally.
3. Set aside to cool, then strain into a jug.
Finishing off
1. As soon as you remove the baklava from the oven, pour the cooled syrup over the top, starting by pouring it along all the cut lines, and finishing by ensuring that the whole surface has been coated with the syrup. It looks like an enormous amount of syrup, but it will absorb to produce a beautifully sticky baklava.
2. Leave the baklava overnight to rest and absorb the syrup. The finished baklava can be stored in an airtight container at room temperature (if it lasts that long) or in the fridge if you prefer (which will make it firmer and less gooey).
I was really quite thrilled with how well the baklava turned out, as I'd never made it before (or made my own phyllo pastry). It looked quite convincing, and smelled sweet and fragrant. The Other Penguin was quite impressed with the look of it, too.
The verdict on the tasting will be updated on this post tomorrow, after the finished product has been sampled at work...
* Lightly roasted and wrapped in prosciutto, perhaps? Although not for some of us, who just can't handle cute food...


congrats on your first daring bakers post! looks fab!
What a great job you did on the baklava. Love the flavours...AND you made your own filo. Fantastic!
fabulous!!!
It looks gorgeous, and i love that you used the native flavours, great idea. Can't wait to here if it tastes good?!
Congrats on your very first daring baker's challenge! You did a fine job at making the baklava.. I'm naughty and still have yet to blog about mine eeeek! I love the sound of macadamia and lemon myrtle
Welcome to the gang and congrats on a job very well done! Great idea to incorporate the macadamia and lemon myrtle, sounds delish. Looking forward to the next challenge.