Not Drowning, Swirling - Four Varieties of Povitica

Thursday, October 27, 2011

Change can be good. Especially when you unexpectedly find it down the back of the couch. But if a change is as good as a holiday, too much change can feel about as comfortable as a three month trek across the Arctic wilderness in Jimmy Choos a size too small. Is the ice going to crack underneath me? Is that polar bear eyeing me off for its next meal? Have I got my heel caught in a crevasse?

So, having moved to a new role at work, and in a new grade in dancing, with an exam lurking menacingly round the corner (a bit like a hungry polar bear), I approached the prospect of Daring Bakers with trepidation. Can’t I just come up with another flavour of brownie and not go looking for unfamiliar and difficult things and poking them with a stick to see what happens? Nope…

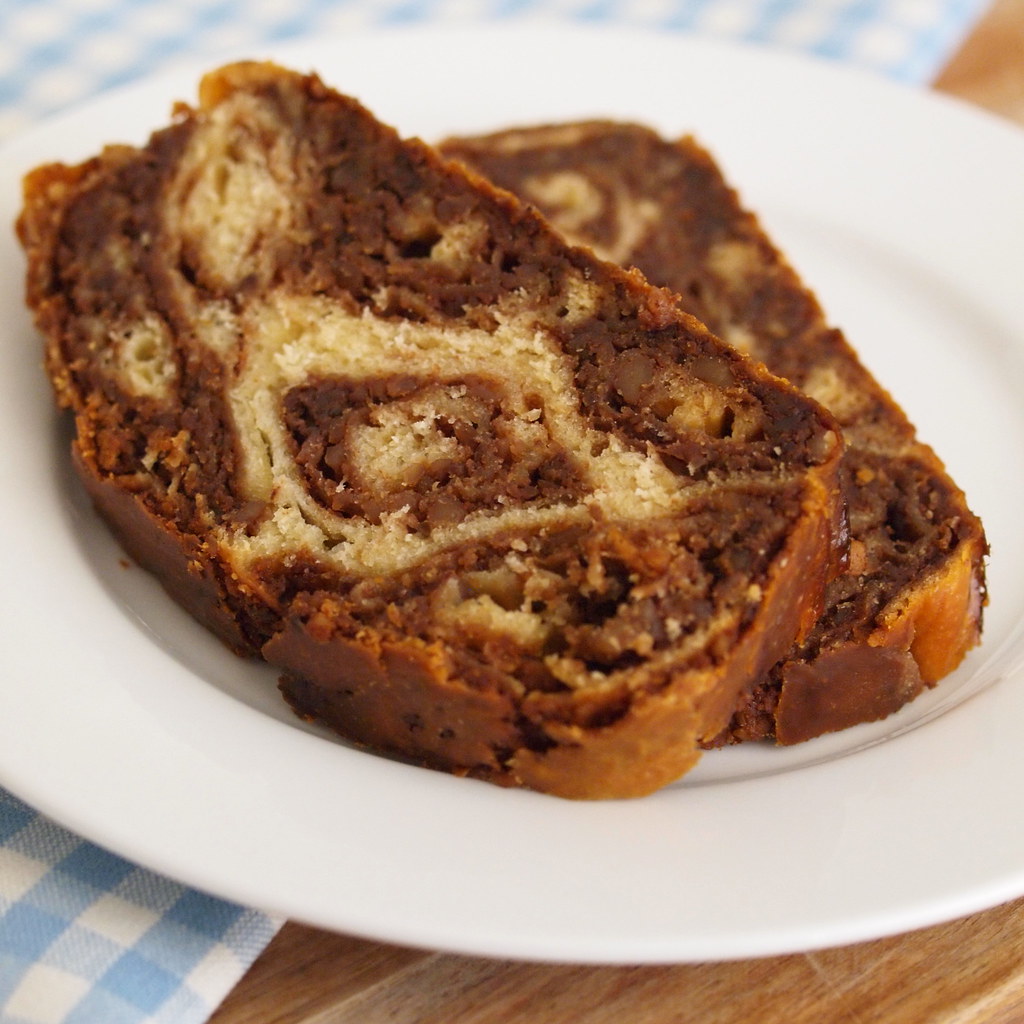
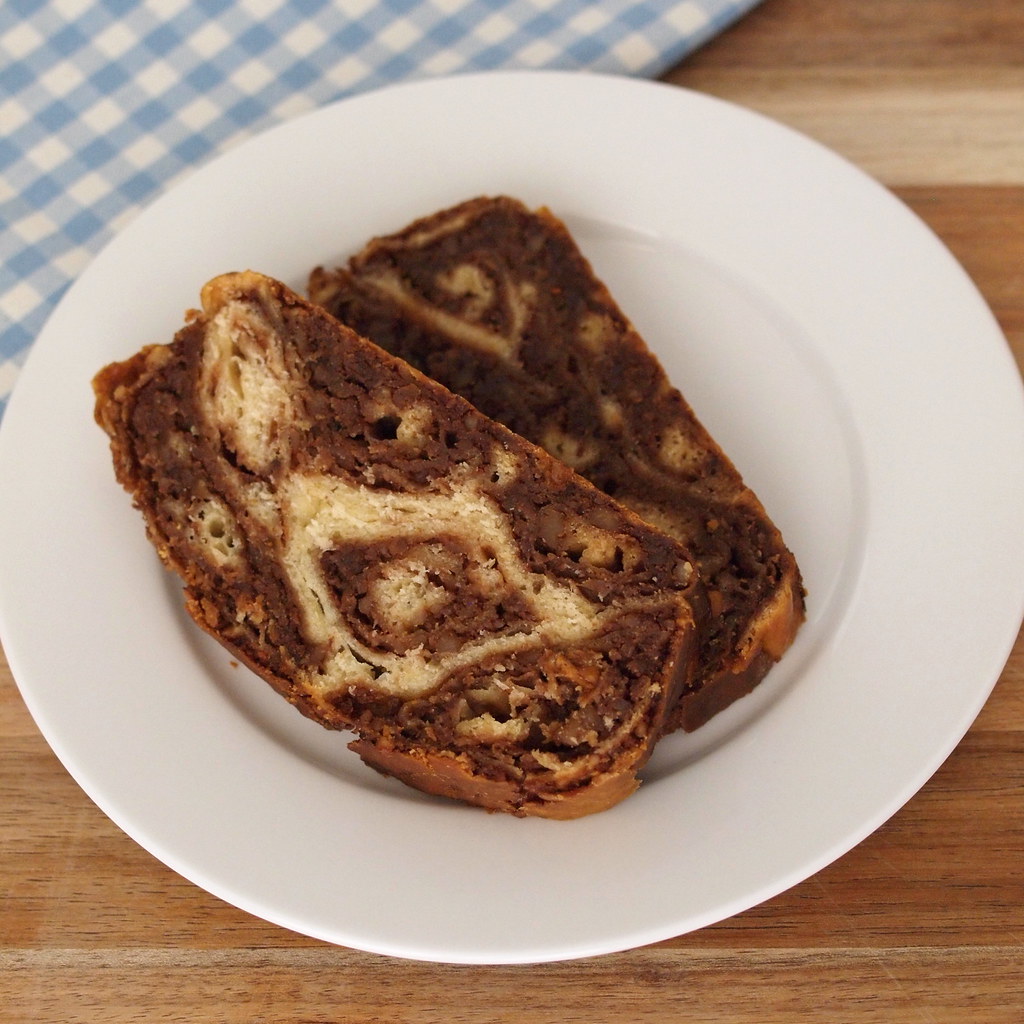
Traditional walnut povitica 

Some Daring Bakers challenges involving making something beautiful (as well as delicious). Lots of them involve making something that’s time-consuming (some of them, mind-bogglingly so). Almost all of them involve making something unfamiliar (because that’s the point). Not many of them involve something a little rustic round the edges, baked in a loaf tin. So, odds are that the rustic loaf is going to involve all sorts of trickiness and will take half the night. And it did. But it was so tasty I quite forgave it, through my sleep-deprived haze. And I was so pleased I gave it a try (even if it turned out a bit more resoundingly rustic than just around the edges).

The Daring Baker’s October 2011 challenge was Povitica, hosted by Jenni of The Gingered Whisk. Povitica is a traditional Eastern European Dessert Bread that is as lovely to look at as it is to eat! It’s a sweet loaf made by rolling up thin dough spread with a filling so that each slice has a beautiful swirled pattern and every bite contains a mix of flavours. The traditional recipe combines ground walnuts with cinnamon, sugar and cocoa, but the recipe lends itself very well to experimenting with other sweet or savoury fillings. The recipe makes a monster four loaves, so there was lots of opportunity to try out some new varieties. As well as the traditional recipe, I also made:
  • Caramelised white chocolate with chocolate chips (if you decide to do this version, you’ll need to have made the caramelised white chocolate in advance – or to be a vampire and so not need any sleep. Luckily, I had a jar I’d prepared earlier for the purpose... though since discovering this recipe, I’ll be needing to make some more)
  • Peanut butter and strawberry jam
  • Moreno cherry and ricotta
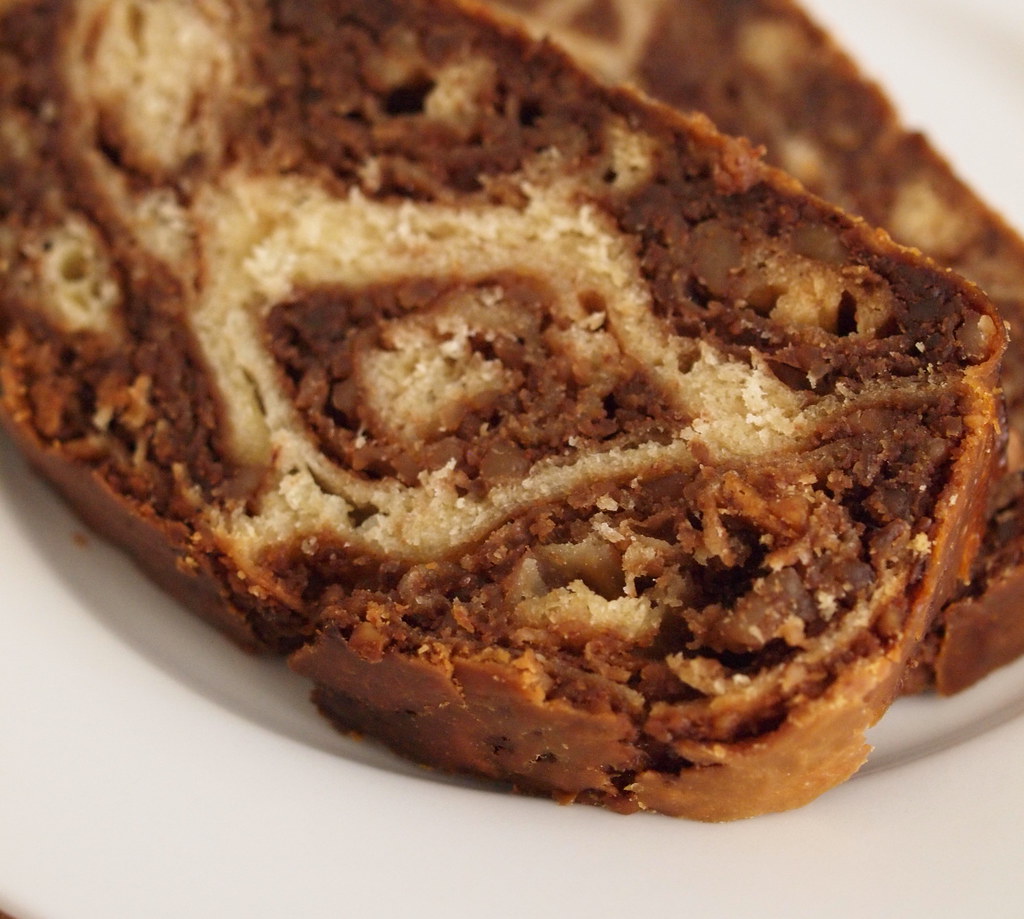
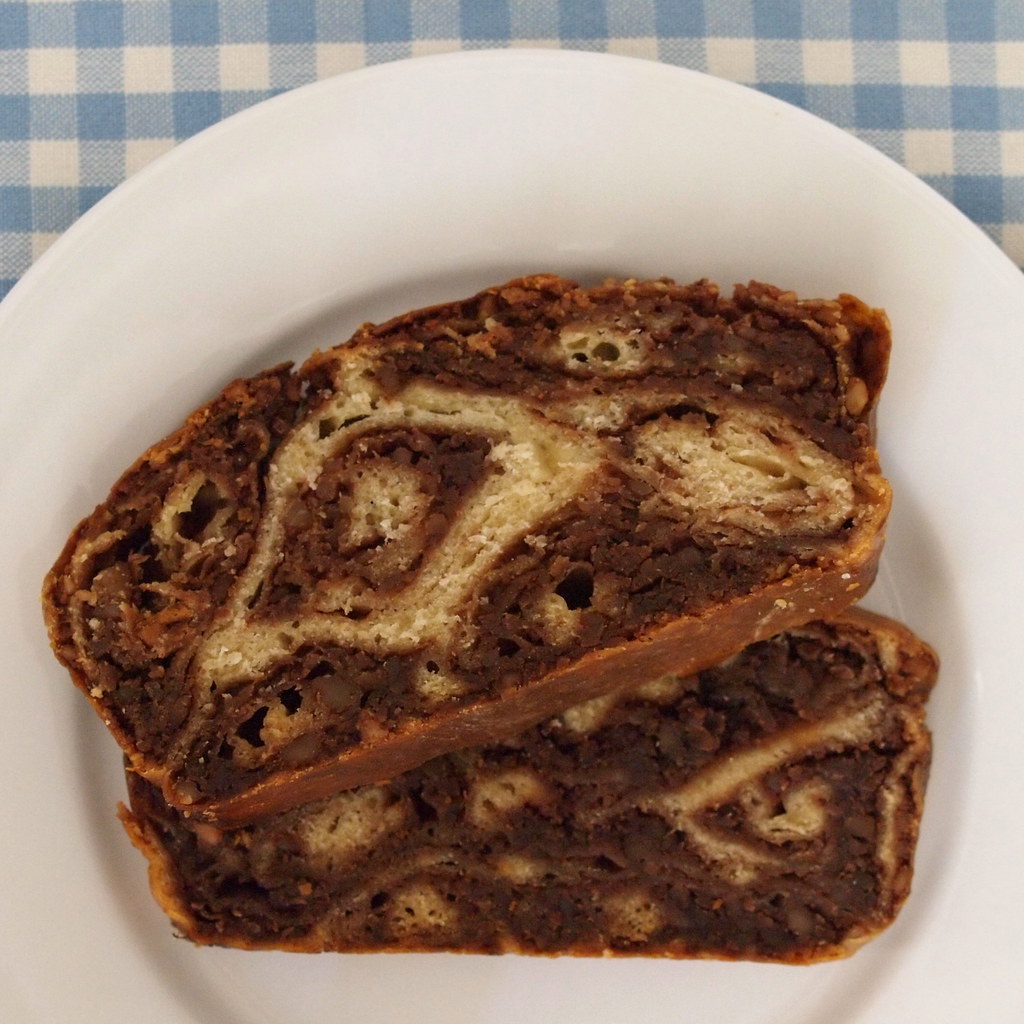
 The povitica has a detailed swirl pattern in each slice

The most challenging part of the recipe involves rolling and stretching the dough to the requisite thin-ness and shaping it into loaves; otherwise, the recipe is relatively straightforward. It does involve quite a lot of “process” though – getting started late on a Sunday afternoon with the added distractions of a (thankfully rare) crash of the Daring Bakers site and an (even more thankfully rare) lengthy phone call by the Other Penguin to wrangle a travel arrangements, during which the noisy machinations of the KitchenAid would not have been well received.

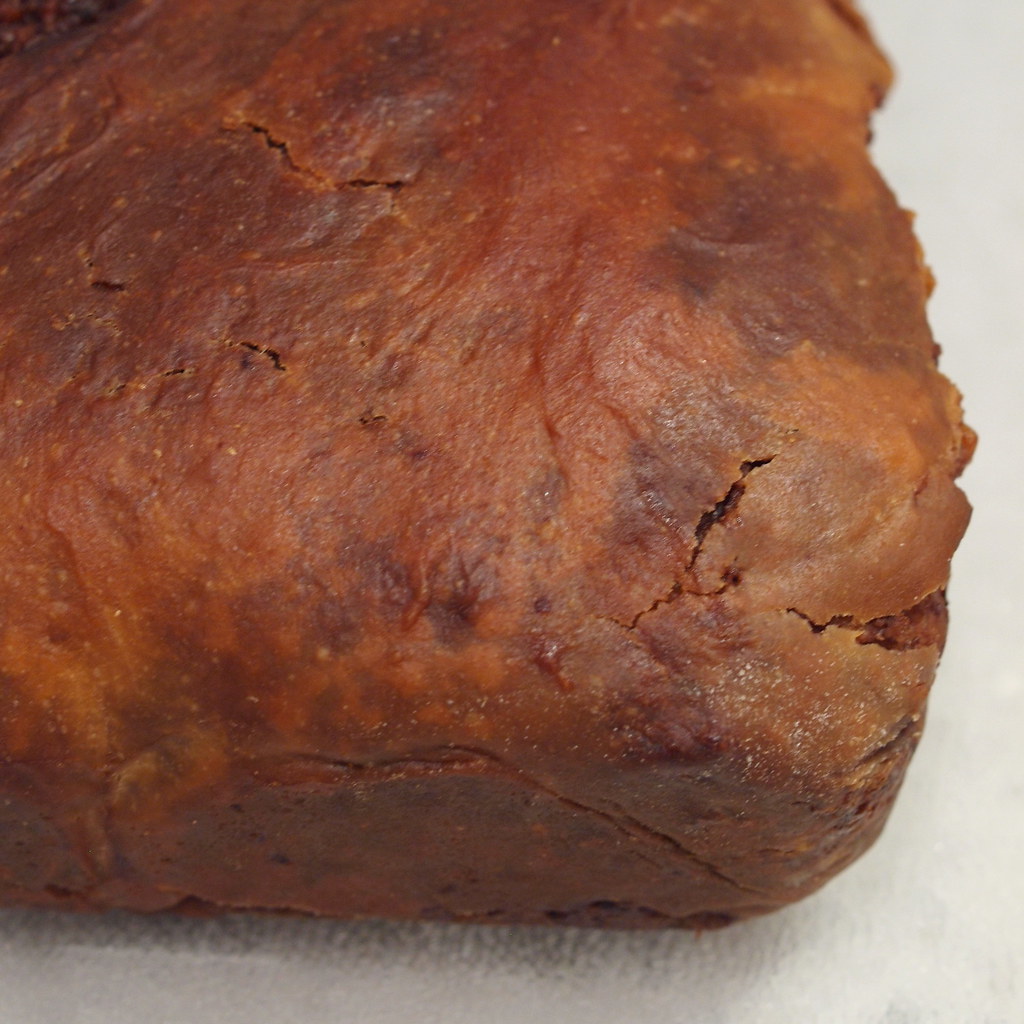
The finished loaves, however, were definitely well received. They came out a deep golden brown and their unexpected heft belied their light-but-filling texture. When cut open, the filling formed a clear swirl pattern – I’d been a little worried it might just become a jumbled, albeit tasty, mixture. The different fillings impacted the consistency of the loaves, as well as their cooking time – the walnut and peanut butter versions came out dense and tightly coiled, while the cherry and ricotta one took quite a bit longer to cook through as the filling was wetter. As helpfully foreshadowed in the comments for the challenge, allowing the bread to cool completely and to sit overnight in the fridge made it easier to cut evenly. Even so, it was a little crumbly round the edges, probably from how it was rolled up and coiled into the tin. 

 The crunchy golden crust on the peanut butter and strawberry jam povitica
I tried a little of the peanut butter and the walnut versions, and was pleasantly surprised. The bread itself was sweet-tasting, and reminded me of a heavier version of Chinese milk bread. Combined with the well-dispersed filling, it had an unexpectedly subtle flavour and was neither too plain nor too stodgy. The traditional walnut version was It’s well suited to a simple morning or afternoon tea, but could also be good at breakfast time (I’d be interested to see how it came out if you toasted it) or for one of those late-afternoon high teas which graze across baking, charcuterie, cheese and fruit (one of my favourite things about Christmas with my family). The bread is quite filling, so more than one of those options might leave you a little sleepily full, much as I’d love to advocate baked goods for every meal! 

I would definitely like to try making the dough again, although next time I’ll scale it back to half the quantity and just make two loaves. A marzipan version, a little like a swirly stollen, is an appealing possibility. More likely, though, is that I’ll try using the dough for loaves or small rolls without the swirled filling, or with some fruit or chocolate scattered through. A dark chocolate chip version might even tame my longing for a pain viennois chocolat, which I’ve been carrying since that wonderful discovery in Paris last year. 
If you’d like to try making povitica ("povateetsa") for yourself, here’s how it was made:

What you need
To activate the yeast
2 tsp / 9 g sugar
1 tsp 3 g plain flour
2 tbsp / 14 g dry yeast
½ cup / 120 ml warm water
Dough
2 cups / 480ml full cream milk (as we don’t tend to have this around, I referred to Joy of Baking and substituted skim milk with 50 g extra butter added)
¾ cup / 170 g sugar
3 tsp / 18 g salt
4 large eggs (at room temperature, lightly beaten)
½ cup / 115 g butter (melted and cooled)
8 cups / 1.12 kg plain flour
Walnut filling (these quantities were for one loaf – if you make the above dough recipe and want to do all of them with this filling, it’ll need to be scaled up by 4)
1 ¾ cups / 280 g walnuts (ground – I used whole ones and whizzed them in a food processor)
½ cup / 113 g sugar
2 tbsp cocoa powder (this is way more than the recipe called for in the original recipe, but I wanted to go extra chocolatey, and also to have a greater colour contrast in the swirls)
¼ tsp cinnamon
¼ cup / 60 ml milk (I used skim)
¼ cup / 56 g butter
1 egg, lightly beaten (note: the recipe for the full quantity, which makes 4 times this amount, uses 2 eggs – as others had needed to add more milk to make the filling wetter, it seemed sensible to use a whole egg and no extra milk, than to use half an egg and get rid of the other half – this worked well – the mixture didn’t need any extra milk to be spreadable)
¼ tsp vanilla extract
Peanut butter and jam filling
240 g peanut butter (I used smooth, but crunchy would work well for the textural contrast)
55 ml milk (just under ¼ cup)
400 g jam (I used strawberry)
Ricotta and cherry filling
375 g light smooth ricotta
200 g (approximately) Moreno cherries (squashed), plus 3 tbsp (45 ml) juice from the jar (a small splosh, for those of a less precise persuasion)
Caramelised white chocolate filling
1 batch of caramelised white chocolate (made from 400 g white chocolate, using this recipe)
White chocolate chips – enough to cover the dough as liberally as you wish (I used around 150 g))
Glaze (for traditional version)
¼ cup / 120 ml strong coffee (cooled)
2 tbsp / 28 g sugar (which I added to the hot coffee so that it dissolved)
Melted butter
Glaze (for the other versions)
1 egg, lightly beaten
2 tbsp / 28 g sugar (which I added to the hot coffee so that it dissolved)
Melted butter 
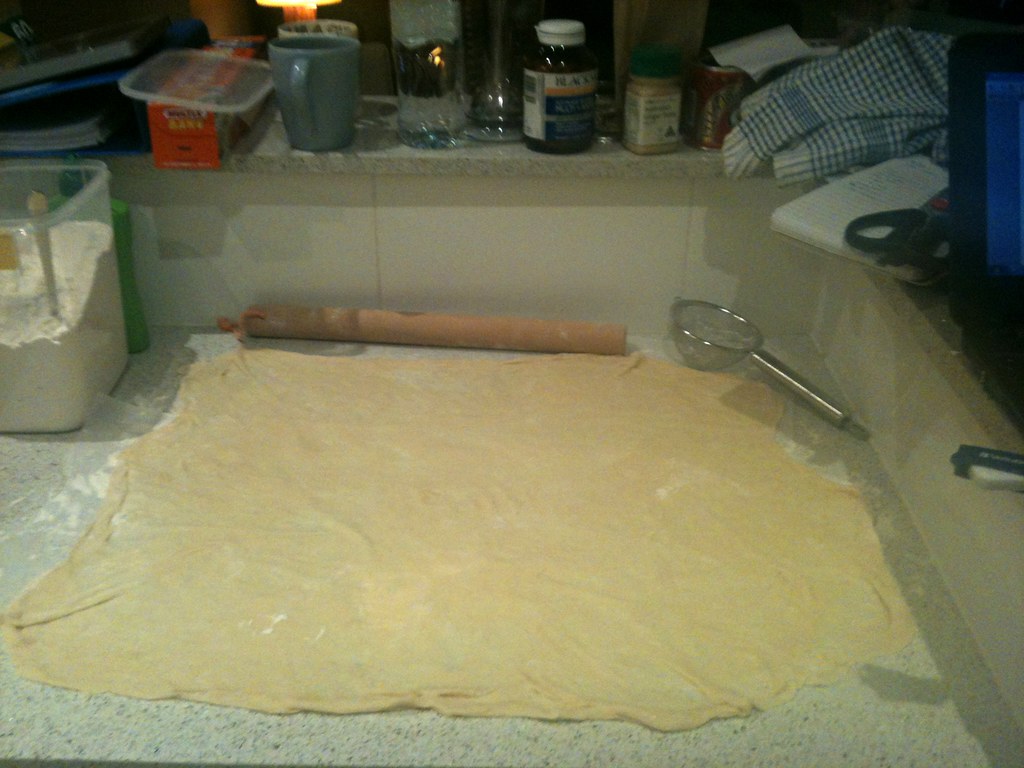
The dough needs to be rolled our very thinly before being spread with the filling

What to do
To activate the yeast
1.     Put 2 teaspoons of sugar, 1 teaspoon of flour and 2 tablespoons of yeast into a jug or small bowl. Stir and then add 120 ml warm water and stir again to combine.
2.     Cover with plastic wrap, put in a warm place in the kitchen and allow to stand for 5 minutes.
Note: if you activate the yeast before starting making the dough, as I did, it ends up sitting for a lot longer than 5 minutes, although this didn’t seem to cause a problem. Next time, though, I would activate the yeast part-way through making the dough, after removing the scalded milk from the heat (step 3 below).
To make the dough
3.     Heat the milk (or, if using skim milk, the milk and 50 g extra butter) in a saucepan until just below boiling point (about 180°F/82°C), stirring regularly so that a skin doesn’t form on top. It should be scalding hot, but not boiling (this can be done using a sugar thermometer, or just by eye and experience). Allow the milk to cool slightly (until it is about 110°F/43°C, or very warm but safely bearable to the touch – this took about 10 minutes, for the avoidance of burnt fingers, for anybody else who lacks asbestos hands!).
4.     In the bowl of a stand mixer (or a large bowl if you’re going to mix the dough by hand), combine the cooled scalded milk, 170 g sugar, and 3 teaspoons salt.
5.     Add the lightly beaten eggs, yeast mixture, cooled melted butter, and 280 g of the sieved flour (about a quarter of the total amount).
6.     Mix thoroughly and slowly add the remaining flour (840 g if you use it all), mixing well until the dough starts to clean the bowl. Note: At this point, much as I’d seen from the challenge that the dough was meant to be quite sticky and that others didn’t need all 1.12 kg of flour, I decided it was entirely too sticky and added around another 75 g (½ cup) of flour. It was still very sticky, but at that point I decided to live with it and see what happened, which ended up turning out quite well).
7.     Change the mixer attachment from the beater to the dough hook and knead until smooth (if making the dough by hand, turn – or, perhaps more likely, scrape – the dough out onto a floured surface and knead, gradually adding flour a little at a time, until smooth and a bit less sticky). As I was making the dough in the ever-reliable KitchenAid, I didn’t add any more flour at this stage (although I did worry whether I should – this was even stickier than brioche dough).
8.     Divide the dough into 4 equal pieces (they should each weigh about 550 g).
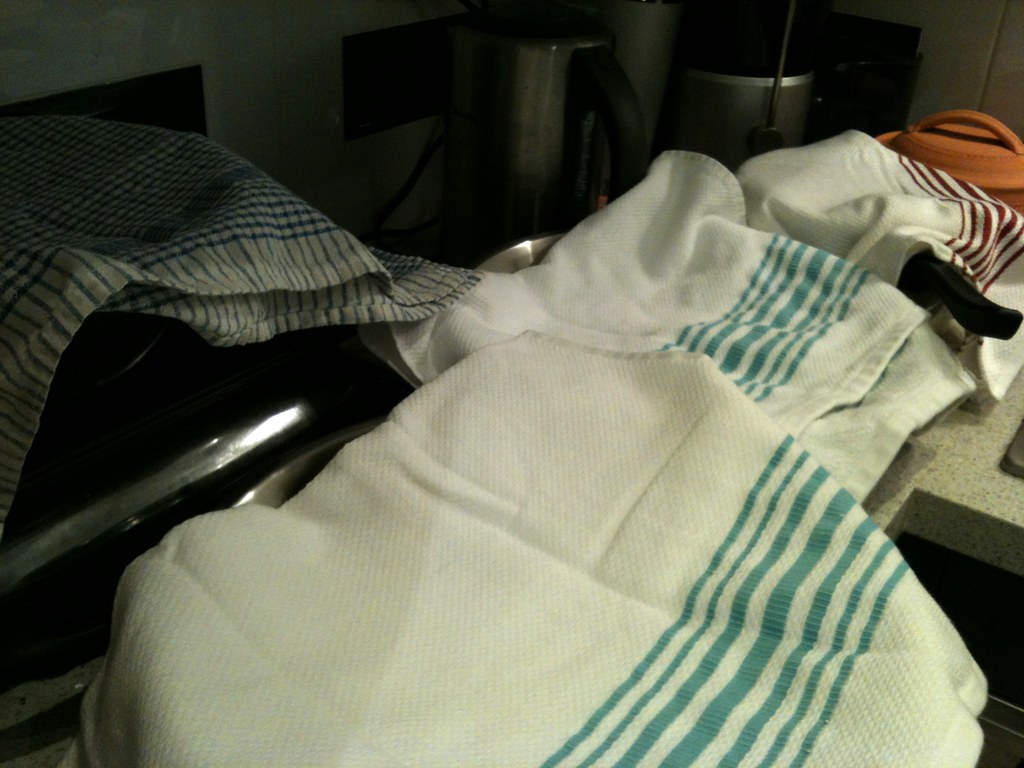
9.     Place the dough into 4 large lightly oiled bowls (large saucepans work if you’re starting to run out of bowls – if you’re starting to run out of kitchen bench space by now, you’re in the same spot I was in...) cover loosely with a layer of plastic wrap and then a tea towel. Allow the dough to rest and rise for 1 ½ hours in a warm place, after which it should be roughly doubled in size.
Traditional walnut filling
10.  Place the ground walnuts, sugar, powder and cinnamon and cocoa powder in a bowl and stir to combine.
11.  Heat the milk and butter to boiling and pour over the nut and sugar mixture.
12.  Add the egg and vanilla and mix thoroughly.
13.  Allow to stand at room temperature until ready to be spread on the dough. (If the mixture thickens, add a small amount of warm milk – I didn’t need to do this having scaled the recipe to use more egg).
To roll and fill the dough and make the loaves
14.  Preheat oven to moderate 180°C / 350°F, and line your loaf tins with baking paper (I only had two loaf tins, so I baked in two batches).
15.  Cover the kitchen bench with non-stick baking paper, ensuring it overlaps so there aren’t any gaps.
Note: The original recipe advocates rolling the dough, and forming the loaves, on a clean sheet or cloth – I’ve found previously, with dough – including phyllo – that baking paper seems to work just as effectively for this purpose, and creates less washing (which is important, given this recipe seems to use almost every utensil in the kitchen, as well as most of the tea towels).
16.  Sprinkle the paper with a couple of tablespoons to a handful of sieved flour (use flour sparingly, but ensure there is a light sprinkle over the whole surface as, without it, the dough may well stick when you go to roll it up).
17.  Place one of the four blobs of dough on the baking paper and roll it out with a lightly floured rolling pin, starting in the middle and working your way out, until it is roughly 40 cm square (15 inches).
18.  Using a combination of the rolling pin and your hands, roll, stretch or gently pull the dough out from the centre until it is thin and a consistently almost-translucent. You should be able to see the outline of a pattern through the dough (if you slide a picture or some writing under the baking paper). Try to keep the shape roughly square. Gently sliding your lightly floured hand, palm down, beneath the dough as you go will help make sure it doesn’t stick to the paper.
19.  Dollop filling evenly over the rolled out dough and, using a spoon or your fingers, spread over the dough until evenly covered.
20.  Gently and tightly roll up the dough. There are several ways to do this:
-        The easiest way is to just roll the dough along its horizontal edge (either from front to back or from back to front depending on which is easier – I found this was much of a muchness) until you have one long, thin sausage of dough. Then, coil the dough around itself into the base of the loaf tin (a little like in the picture shown, courtesy of the Daring Bakers website):

-        Alternatively, roll the edge of the dough nearest you into the centre, and roll the edge furthest away into the centre, so there are two long sausages of dough joined up beside each other. Then, carefully fold the long ends of the sausage on top of each other (so that you have a roughly loaf-shaped lump which is two sausages wide, and three sausages high), as shown in the diagram below from the povitica genius at Wolf's Den.


21.  Repeat the filling and rolling process with the remaining three blobs of dough to create another three loaves, coiling each sausage of dough in its own loaf tin. The different fillings I used are prepared as follows:
Peanut butter and jam
Place the peanut butter and milk in a microwave-safe bowl or a small saucepan, and heat until the peanut butter is soft. Stir thoroughly until well combined. Spread the peanut butter evenly over the rolled out dough. Then, dollop with strawberry jam and spread this evenly over the peanut butter layer. Roll up as explained above.
Ricotta and Moreno cherry
Mix the ricotta, cherries, and extra cherry juice in a small bowl until thoroughly combined. Spread evenly over the rolled out dough. Roll up as explained above.
Caramelised white chocolate
Warm the caramelised white chocolate in a microwave or small saucepan until it reaches a slow pouring consistency. Spread evenly over the rolled out dough, and sprinkle evenly (and liberally) with white chocolate chips. Roll up as explained above.
22.  Brush the top of the traditional loaf with the coffee glaze (a mixture of 60 ml of strong coffee and 2 tablespoons of sugar, cooled). For other fillings, I used a glaze of a beaten egg and 2 tablespoons of sugar).
23.  Cover tins lightly with a tea towel and allow to rest for around 15 minutes.
24.  Place the tins (without tea towels) into the preheated oven and bake for approximately 15 minutes.
25.  Turn down the oven temperature to slow 150°C / 300°F/ and bake for an additional 45 minutes, or until the top of the loaves are golden and crisp, the texture is firm rather than squishy when gently prodded and a thin skewer inserted into the centre comes out clean. Check on the loaves after a total of about 30 minutes, to ensure they’re not getting too brown – if that looks to be happening, cover them with a sheet of aluminium foil.
Note: I did the first two loaves with the oven initially hotter, then turned down after 15 minutes, and found that the walnut and cherry versions took quite a different time to cook through (the cherry one took almost 15 minutes longer). Consequently, I decided to turn the oven up to the higher temperature for the second batch, and left it there throughout. These second loaves took around an hour to cook, and didn’t end up too dry from the hotter temperature – and it’s less faffing about with a still-rather-temperamental oven!).
26.  Remove bread from oven and brush with melted butter. Allow the loaves to cool on a wire rack for 20-30 minutes, preferably still in the bread pan. (If it’s stupid o’clock and you’ve still got two loaves to cook and need to use the loaf pans, turning them out earlier won’t kill them, but might mean they sink a little as the baked loaves are quite heavy and cooling them in the tin helps them to hold their shape. I think the varied shapes of mine had more to do with slight differences in the rolling technique than with the cooling process).
27.  The loaves can be cut into slices with a serrated knife and it is apparently (and which I overlooked, rather to my regret) easier to do so after turning the bread upside down. I’d be interested to hear from other folks who’ve tried this recipe whether that’s the case and why. I did find they sliced more easily after being refrigerated overnight.

Warning: resting povitica dough may take over your kitchen!

But the results are worth it...

Read more...

Apricots And Chaos

Saturday, August 27, 2011

Sometimes, cakes emerge cleanly from their tins, without leaving crumbs lingering in corners. Sometimes, sauces thicken at just the right time, and don’t bubble away to a burnt and smoking nothing the moment you turn your back. Sometimes, the steak is perfectly cooked when you slice into it. And sometimes, the words flow like gravy over roast chicken.

Sometimes, though, they don’t. And what happens then? Practising. Pondering. Howling at the moon. Furtive baking in the tight crevices in between “real life”. Hoping that you haven’t talked so much that you’ve used up your lifetime’s quota of words already.


Only the foolish might take on bubbling sugar in such a frame of mind. The foolish… or the daring. Daring Bakers dragged me from a reluctant but accidental baking hiatus, and tipped me into sweetness and stickiness. It didn’t turn out quite the way I imagined, but, in the midst of chaos, it turned out at all and, sometimes, that’s more than enough to be grateful for.

The August 2011 Daring Bakers’ Challenge was hosted by Lisa of Parsley, Sage, Desserts and Line Drive and Mandy of What the Fruitcake?!. These two sugar mavens challenged us to make sinfully delicious candies! This was a special challenge for the Daring Bakers because the good folks at http://www.chocoley.com offered an amazing prize for the winner of the most creative and delicious candy!


I wanted to make sweets that tasted real, with a concentrated but subtle flavour from ingredients which don’t have unpronounceable names, and with delicate colouring rarely encountered in the confectionery aisle. Bright, clear, sunny tastes called out to distract me from the tail end of winter. There was a vague idea of making variations on a theme based around one core element. And then a package of apricot nectar, in those little pale blue glass bottles, sealed the deal and the experimenting began.

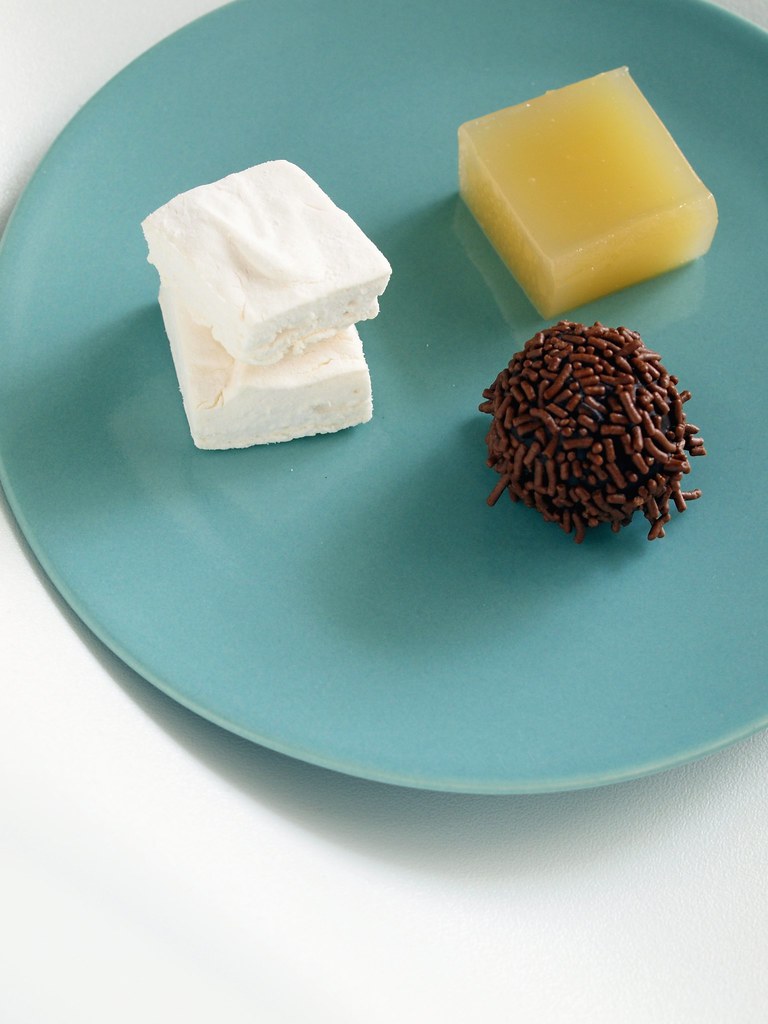
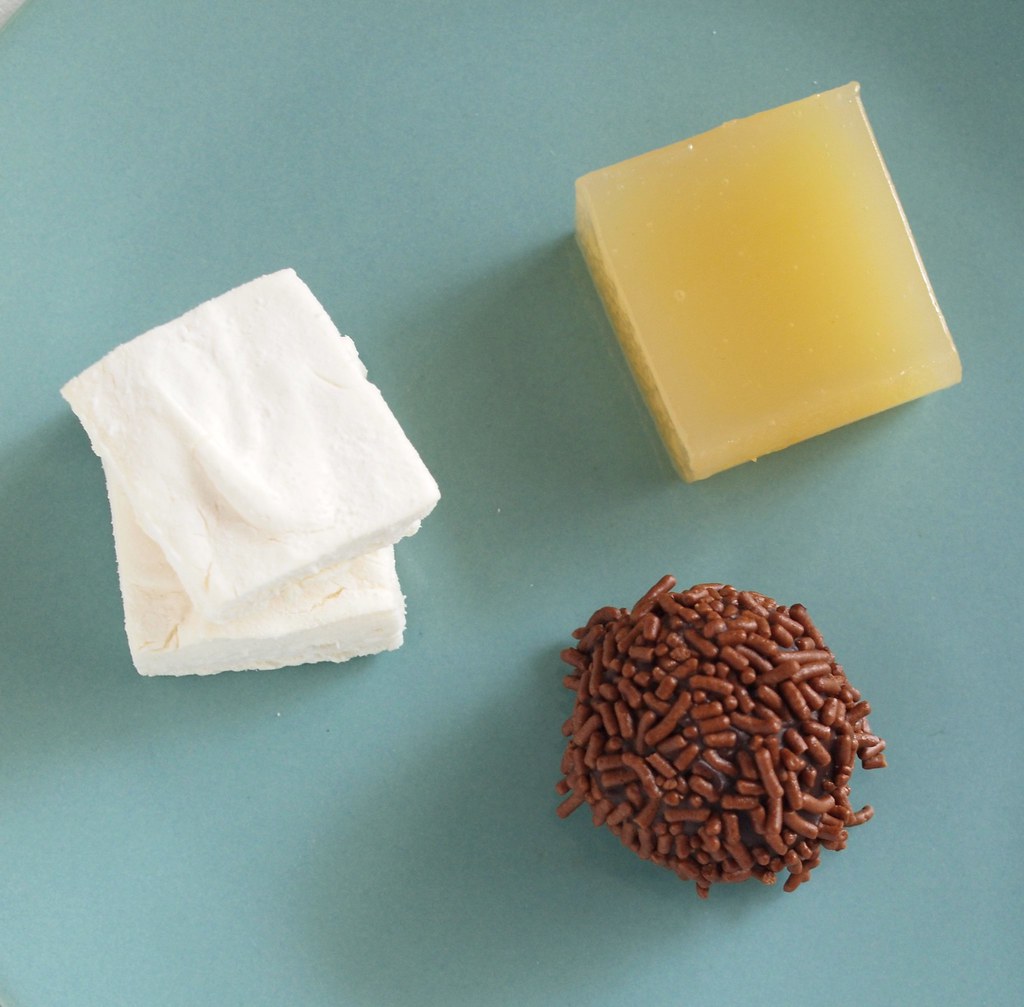
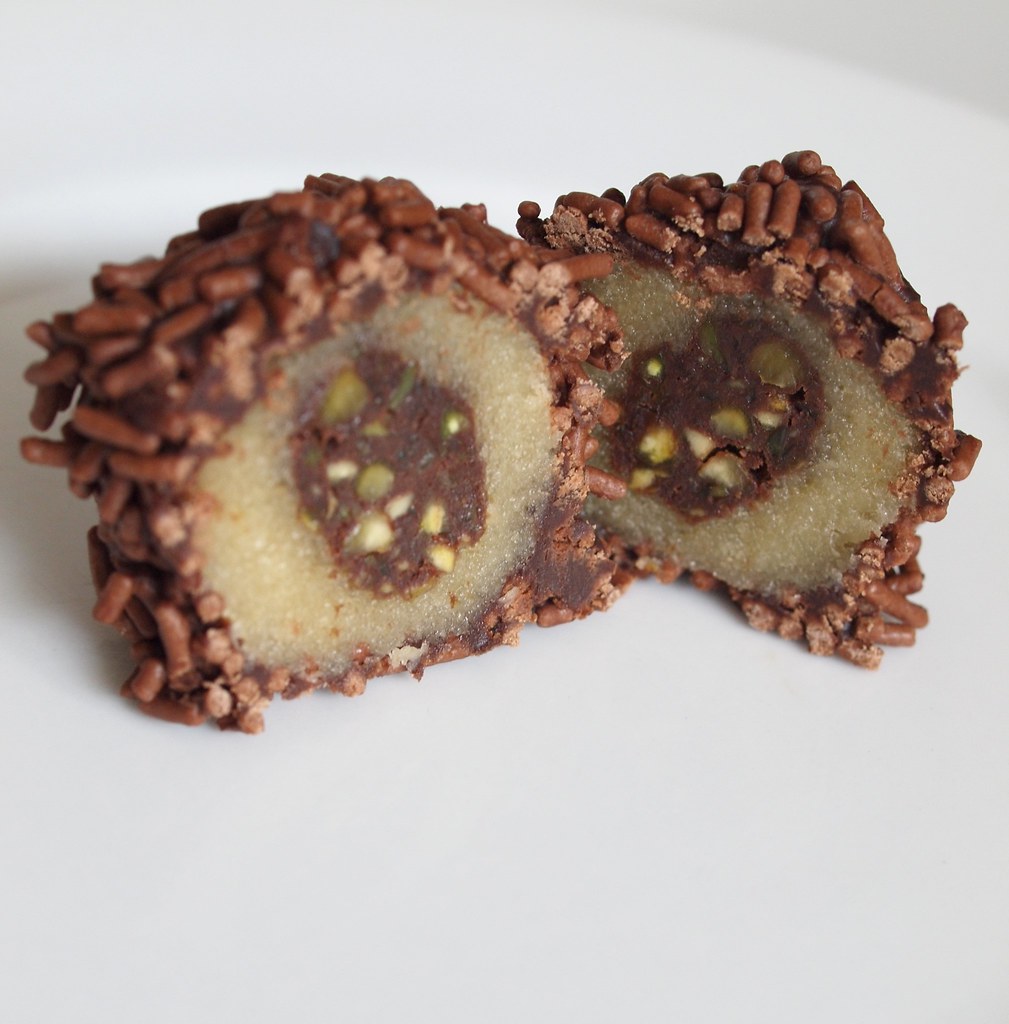
Eventually, a trio of apricot confections (apriconfections?) emerged from the kitchen. There were pale clouds of apricot marshmallow, glassy vivid squares of apricot Turkish delight and stickily dangerous (or should that be dangerously sticky?) chocolate ganache truffles filled with apricot marzipan and chocolate pistachio paste.

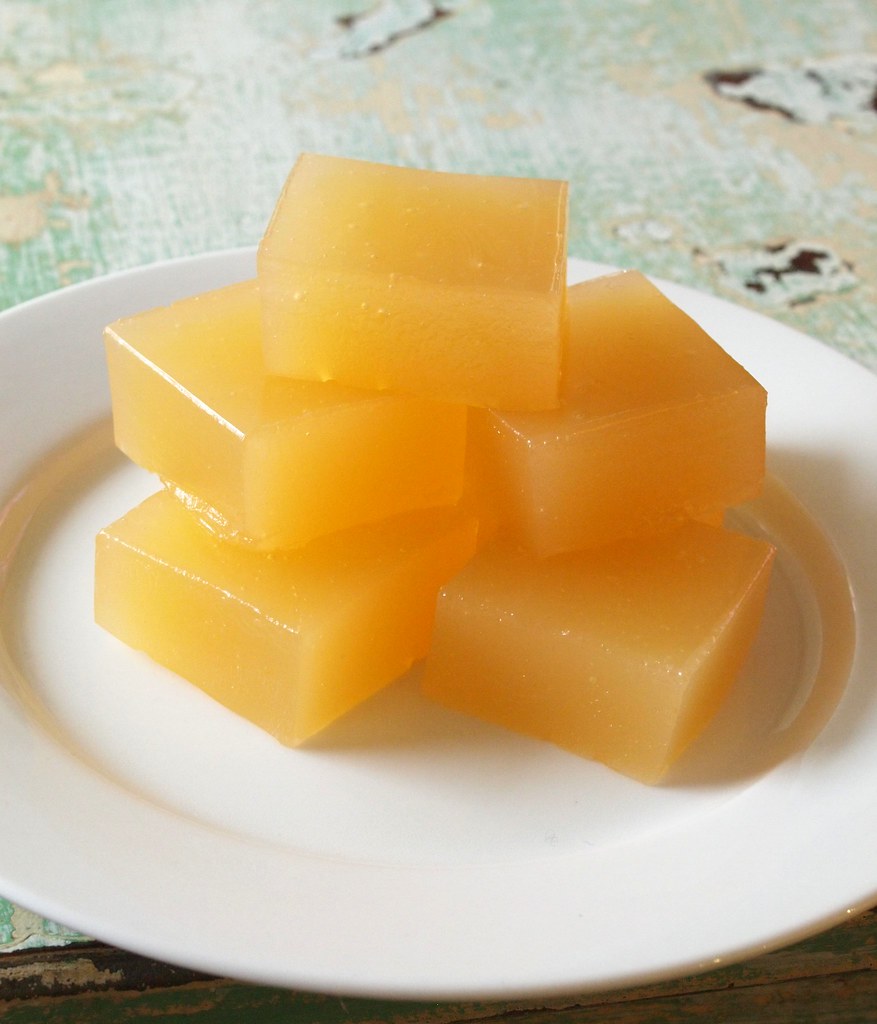
If it wasn’t quite the perfect apricot assiette I’d imagined, it was still a more than satisfying sugar high. The Turkish delight, in particular, turned out especially well, with a soft chewy-but-melting texture, a jewel-like glow and an unmistakeable apricot flavour. The marshmallows weren’t quite as fluffy as they’ve been on previous occasions and were so subtle that the apricot could’ve been easily mistaken or overlooked. A little added colour would have perked them up and added the power of suggestion to enhance the taste (although I’d been keen to try to keep the sweets “natural”, without artificial colours, flavours, or added glucose or corn syrup – not from any particular principle other than a desire to see how it turned out). The truffles were appropriately rich and sticky, with the apricot marzipan matching well with the dark chocolate coating, and some crunch added by the chocolate hail on the outside and the crushed pistachios lurking within.


So, if you’d like to try making some apricot confections of your own, this is how they were made…

Apricot Turkish Delight
Adapted from a recipe for passionfruit Turkish delight by Jane and Jeremy Strode published in Good Living on 21 June 2011

What you need
2 cups* / 440 g castor sugar
3 cups / 750 ml water
¼ tsp cream of tartar
1 tbsp lemon juice
¾ cup / 90 g cornflour
250 g icing sugar
18 g / 2 tbsp powdered gelatine
120 ml apricot nectar, refrigerated

What to do
1.       Line a square or oblong baking tin or container with baking paper (I used a 20 cm (8 inch) square cake tin).
2.       Put the caster sugar and ½ cup of the water in a saucepan and cook, stirring occasionally, on a medium heat until the sugar dissolves. Increase the heat to medium-high and bring the sugar syrup to the boil. Allow the syrup to boil until it reaches 115 °C (240 °F). Stir in the cream of tartar and lemon juice (being careful in case the mixture spits a little when you add them).
3.       In another saucepan, combined the cornflour and icing sugar with another ½ cup of water and whisk until smooth. Put the kettle on to boil the remaining 2 cups of water, then whisk this into the cornflour mixture. (Note: this saucepan has not yet been put on the heat).
4.       Add the sugar syrup mixture to the saucepan containing the cornflour mixture. Whisk over medium heat for around 30 minutes, after which the mixture will be thicker and more translucent. (Note: it’s already quite thick and translucent when you start, but will become more so as it’s cooked – it will end up smooth, but quite gloopy. Keep whisking it very regularly – it doesn’t have to be so continuous it gives you a cramp in your arm, but it should be watched carefully and whisked a lot. It will glump and bubble like a brightly coloured version of the Rotorua mud pools, so be careful not to get splashed).
5.       While the mixture bubbles away (and in between whisking), combine the gelatine and cold apricot nectar and stir until smooth. Allow to sit for 10 minutes. When the bubbling mixture reaches the desired thickness, whisk in the apricot nectar and gelatine.
6.       Pour the mixture into the prepared tray. Give it a jiggle so that the mixture levels out, and plonk it down firmly onto the bench top a couple of times to dislodge any air bubbles. Allow to set (either at room temperature or in the fridge). (If putting it in the fridge, be careful not to seal a lid over it, as condensation will form on the surface of the Turkish delight.
7.       When the Turkish delight is firm, slide it (still attached to the paper) from the tray, carefully peel away the paper, and cut with a large sharp knife dipped in hot water or (even better) a pizza cutter. (Note: from an 8 inch tin, cutting 36 (6 x 6) or 49 (7 x 7) squares gives good-sized pieces. The original recipe suggests 24 pieces, but looks like it uses a much deeper container; still, that would be a big sugar hit in one go!).
Apricot Turkish delight will keep in the fridge for at least a week.


Apricot Marshmallows
Based on a recipe by Sugar Plum

What you need
18 g / 2 tbsp powdered gelatine
½ cup / 125 ml apricot nectar, refrigerated
2 cups / 385 g white sugar
½ cup / 125 ml water
1 tsp golden syrup
Olive oil spray
Icing sugar for dusting

What to do
1.       Spray a cake tin or deep baking tray with olive oil spray, and dust thoroughly with a sieved icing sugar It only needs to be a light coating, but get right into the corners, or the marshmallow will stick – it tries to stick to everything!
2.       Place the gelatine and cold apricot nectar into the bowl of a stand mixer and mix on low speed for a minute or two, using the whisk attachment. (Note: If you have a splash guard for your stand mixer, it’s a good idea to fit it now, as boiling sugar syrup is something to definitely keep a safe distance from).
3.       Put the sugar, water and golden syrup in a large saucepan, and stir over medium heat until the sugar dissolves. Increase the heat to medium-high and bring to the boil. Allow the syrup to boil until it reaches 115 °C (240 °F) (this will take around 15 minutes).
4.       With the mixer on low speed, pour the sugar syrup very carefully into the bowl of the mixer. Once all the syrup has been added, gradually increase the speed to medium. Beat the apricot and syrup mixture until it becomes thick, white and glossy and stops increasing in volume (around 10 – 15 minutes).
5.       Spread the marshmallow mixture into the prepared tray, and smooth the top with a spatula dipped in hot water. Dust with sieved icing sugar, and allow to set for at least 4 hours (or overnight).
6.       Carefully prise the set marshmallow from the tin and cut into squares using a sharp knife or pizza cutter. Dust the cut sides of the squares in icing sugar so they don’t stick together.
Marshmallows will keep in an airtight container for at least a week (but will gradually start to dry out as they get older).


Chocolate, Apricot and Pistachio Truffles
A sticky invention of the Sticky Penguin, with ganache recipe based on the Daring Bakers

What you need
100 g almond meal
50 g icing sugar
25 ml apricot nectar (approximately)
50 g pistachios, blanched and with shells and skins removed
200 g dark chocolate
200 ml cream
Dark chocolate hail

What to do
1.       To make the apricot marzipan, place the almond meal and icing sugar in the bowl of a food processor and pulse to combine. Add the apricot nectar, a little at a time, until the mixture comes together into a ball that moves freely (but stickily) around the bowl. Wrap in cling film and refrigerate until required.
2.       Finely chop the dark chocolate and place in a heat-proof bowl. Heat 130 ml of cream in a small saucepan until it bubbles round the edges but doesn’t reach a full boil. Pour the hot cream over the chopped chocolate and stir well until the chocolate is completely melted and the ganache is smooth.
3.       Finely chop the pistachios, and combine with 60 g of the ganache. Place in the freezer until the mixture becomes firm.
4.       Heat the remaining 70 ml of cream, and add to the remaining ganache, stirring in well.
5.       To assemble the truffles, roll the apricot marzipan into balls (I got 12 balls from the quantity I made). Flatten each ball and use a ½ teaspoon measure to scoop a sphere of chocolate and pistachio ganache, and place this in the centre of the marzipan, pinching the marzipan over it to close it together. Reform the ganache-filled marzipan gently into evenly shaped balls. Coat the marzipan balls evenly with the thinner, plain ganache and then roll them in chocolate hail. Refrigerate or freeze until firm (although the truffles will still be a bit sticky).


* All references to cups in the recipes in this post are Australian / metric cups (1 cup = 250 ml)

Read more...

From Couch Potato To Decadent Dessert - Peanut Sticky Rice Dumplings with Chocolate Shortbread and Salted Caramel Sauce

Wednesday, July 13, 2011

Does reality television kill off brain cells like a game of Space Invaders so that you stare slack-jawed at the accomplishment of others while sitting glued to the couch, shovelling down fast food? Or does it inspire you to leap forth, conquering new frontiers you would never have imagined? The truth is probably somewhere in between, but that would never make the news...


Last week, Marty Wilson wrote in the Sydney Morning Herald about what else people could accomplish in the time they spend watching reality shows and the artificial emotions experienced from vicariously living through the contestants. As a population, we watch more TV than ever before, we get bigger by creeping increments, we move less. But the (increasing) weight of statistics conceals the quiet minority, gobbling it up like a packet of salt and vinegar chips without pausing to brush the crumbs from its Snuggie.

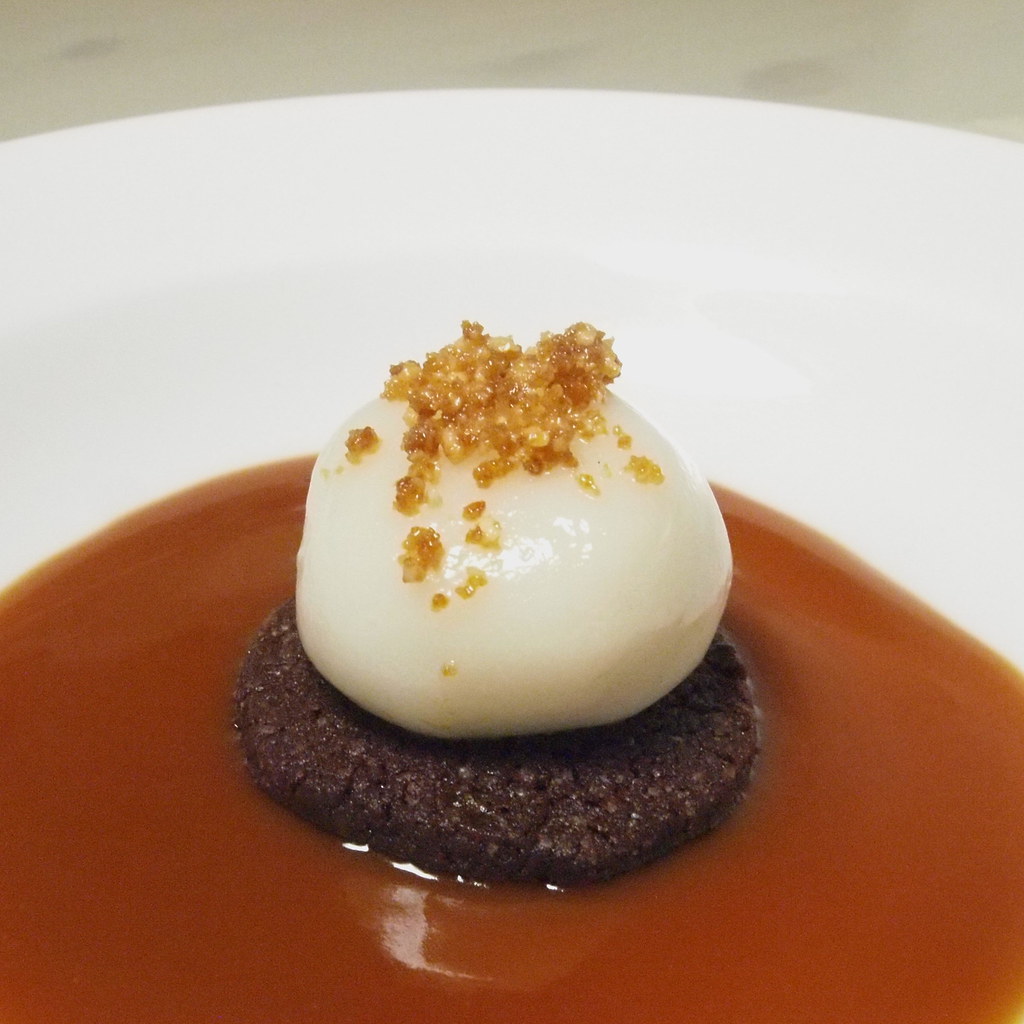
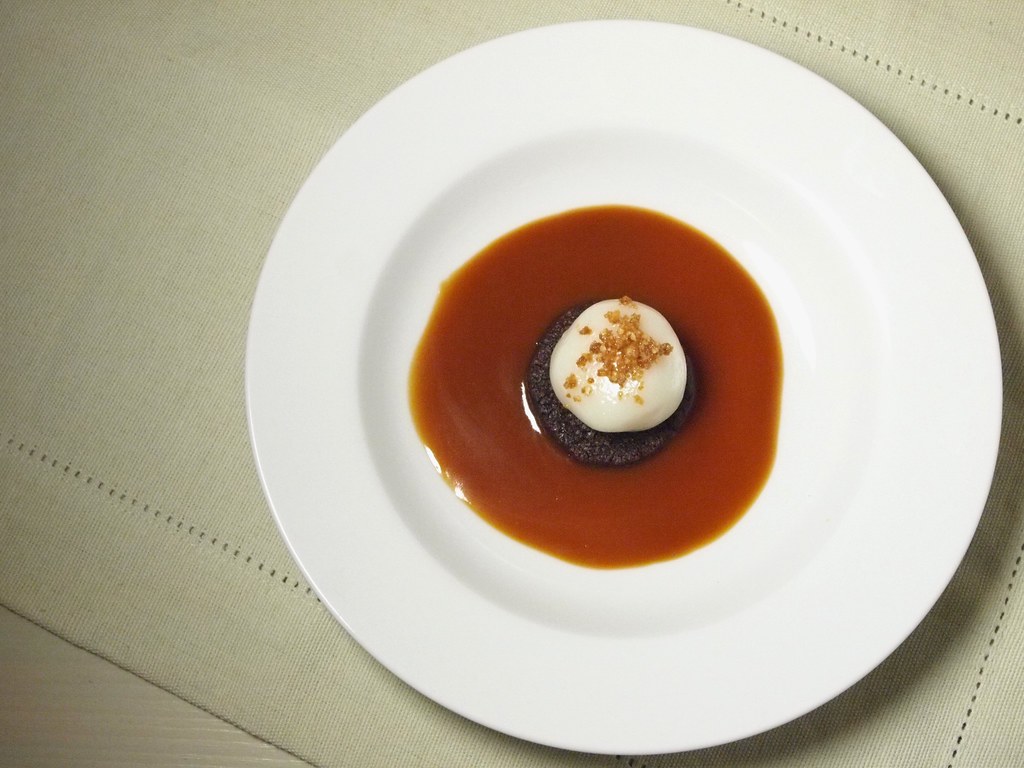
Sticky Penguin's sticky rice dumplings with peanut filling, chocolate shortbread and salted caramel sauce
From reality TV inspiration to the sticky reality of dessert... 

Because some people are out there, writing their novels or working as lifeguards on the weekend or renovating the house. And some of them (especially, perhaps, the ones doing all those things) collapse in a heap at the end of the day and watch some TV to relax and switch off from whirling thoughts of chapter structures, training drills, how they’re going to fit the microwave into the redesigned kitchen or whatever else has been occupying their attention.

Others see people on TV doing something that looks like fun and think “Wow, I’d like to try that!”. In the place where that brain cell was killed off, a seed gets planted instead. That’s partly why I’m writing a food blog. Watching the enthusiastic amateurs on MasterChef make a huge range of dishes (and, sometimes, a hell of a mess as well), push their limits in the kitchen and visibly improve their skills was so much more approachable and motivating than watching a well-prepared and tightly edited chef make the same recipes. And into the kitchen I went. Tentatively at first, and then with increasing confidence (punctuated with regular baking fails, but also lots of things devoured happily by friends, workmates and the Other Penguin (who has infinite patience with a cinnamon-sprinkled and chocolate-daubed blur dashing between bowls and saucepans in the wee small hours, and even with the ensuing mountain of washing up).

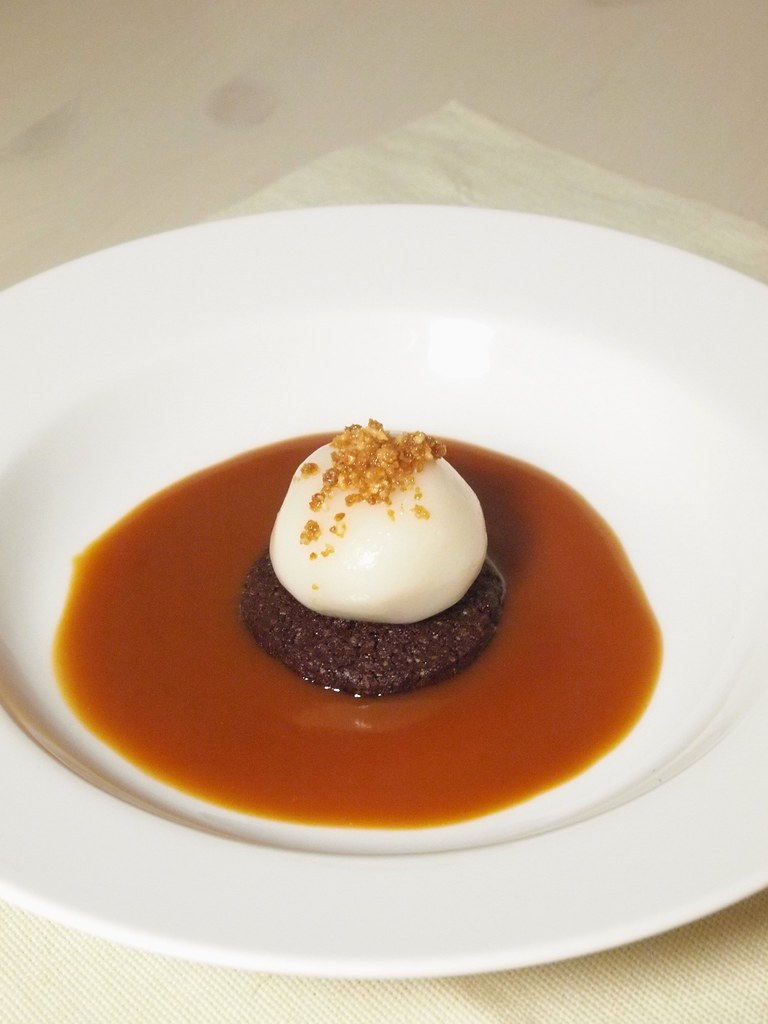
This season, still watching MasterChef (go Team Billy!), I turn over ideas of what I’d make if faced with that particular range of ingredients. I look at the techniques and think of other places I could apply them. And, on a good day (and there are more and more of those), looking at a recipe gives me an idea for an adaptation of my own, or even a completely different dish. And, just this week, this led to sticky peanut dumplings with chocolate shortbread and salted caramel sauce…

Sticky Penguin's sticky rice dumplings with peanut filling, chocolate shortbread and salted caramel sauce
Crunchy peanut filling

Alvin Quah was one of my favourite contestants on the second series of MasterChef – owing to a wonderfully sly sense of humour and a range of recipes that looked evocative and delicious in equal measure. He returned to the current series as a guest on last Friday’s masterclass, where he made black sesame dumplings in ginger syrup with wonton wafers. It looked like a perfect winter dessert – warming but not too stodgy. I’ve often enjoyed sweet, sticky dumplings with a peanut paste filling at yum cha, and this provided a starting idea. But, rather than pairing them with other Asian flavours, I took inspiration from the likes of Dan Hong and David Chang, and decided on the combination of peanuts, chocolate and caramel for a different twist.

I started out with such a vivid impression of the dessert I was aiming to create that I was a little apprehensive that it might’ve all been a little premature. Perhaps I’d bitten off more than I could chew – as those glutinous dumplings can be very chewy indeed. As the components gradually came together, I started to relax a bit more and felt quite proud when it was completed, as it was more elaborate than a lot of my usual baking inventions...

Sticky Penguin's sticky rice dumplings with peanut filling, chocolate shortbread and salted caramel sauce
Can you have too much caramel sauce...?

This is how it was made:
Sticky Penguin’s Peanut Sticky Rice Dumplings with Chocolate Shortbread and Salted Caramel Sauce
What you need
For the shortbread
125 g (1 US cup) plain flour
63 g (¼ US cup) white sugar
32 g (¼ US cup) icing sugar
3 tbsp Dutch cocoa powder
¼ tsp salt
1 tsp vanilla extract
113 g (½ US cup) butter
Cold water as required (I used about 3 tsp)

For the dumpling filling
75 g peanuts (unshelled and unsalted)
37 g butter
37 g sugar

For the dumplings
250 g glutinous rice flour
240 ml water (approximate)

For the salted caramel sauce
115 g butter
200 g white sugar
300 ml heavy cream
Salt to taste

What to do
For the chocolate shortbread
(adapted from a previously adapted recipe)
1. Combine the flour, white sugar, icing sugar, cocoa powder and salt in the bowl of a food processor, and pulse until evenly combined.
2. Add the vanilla extract and butter, and pulse to combine until the mixture resembles coarse breadcrumbs.
3. Add the water, a teaspoon at a time, until the mixture comes together into a dough that rumbles round the bowl leaving just a few sticky traces behind.
4. Turn out the dough onto a piece of kitchen wrap or baking paper and roll into an even sausage (I made mine about 30 cm long and as wide as the circle formed when you join your thumb to your middle finger). Refrigerate for 30 minutes.
Note: if you’re trying to be efficient (and in a sticky penguin’s case, trying is usually the operative word), the dumplings can be made and filled while the shortbread dough chills and firms up.
5. Preheat the oven to 190°C / 375°F and line two baking sheets with non-stick paper. 
6. Using a serrated knife, cut the chilled dough in slices around 3-4 mm thick and place on the baking sheets. As the dough warms up a little, the cookies can be reshaped slightly if needed (if you're being fussy and want to make them completely round).
7. Bake the shortbread for around 12 minutes. The cookies will be firm around the edges but still a little soft in the middle when they are ready - they firm up as they cool. Cooking them longer will make them more of a brittle consistency.
8. Allow the shortbread to cool on a wire rack so they're barely warm before using them in the dessert. Leftover cookies (as the recipe makes more than you'll need for 16 dumplings) are great with a cup of tea (or, with the rich chocolate flavour, an espresso).

For the dumpling filling
1. Grind the peanuts until they are reduced to very small pieces (just a little finer than the consistency coarse breadcrumbs or sea salt flakes). I used a food processor to do this (a stick blender attachment would be more efficient with this small quantity, but, alas, mine has recently died).
2. Melt the butter and sugar in a small saucepan, and then stir in the crushed peanuts. Stir to combine thoroughly, and continue cooking for a minute or two. Set the resulting crunchy peanut paste aside to cool. 

For the dumplings
(made using the recipe  from Alvin Quah, with my notes on what I discovered in the process of making dumplings for the first time)
1. Place the glutinous rice flour in a medium sized mixing bowl (the texture was loose enough that I opted not to sieve my flour, and didn’t end up with lumpy dumplings) and make a well in the centre.
2. Gradually add the water into the centre, mixing with one hand (or with a small metal spoon). Keep adding the water until the mixture comes together into a firm paste,  which doesn't stick to your fingers (at least, not more than a tiny bit - I'm incapable of working dough without ending up in a bit of a sticky mess!). 
Note: I made my dumplings  in advance and left them for around half an hour while I pottered onto other kitchen experiments... when I came back to  fill them, the dough had dried out and cracked when I tried to work it. I made a second batch of dumplings and used a tiny bit more water to make the dough more malleable, and rolled and filled the dumplings straight away, which was much more successful. I also followed rolled and filled the dumplings, as per the following three steps, one at a time, so that the dough didn't dry out quicker from sitting there in smaller pieces. 
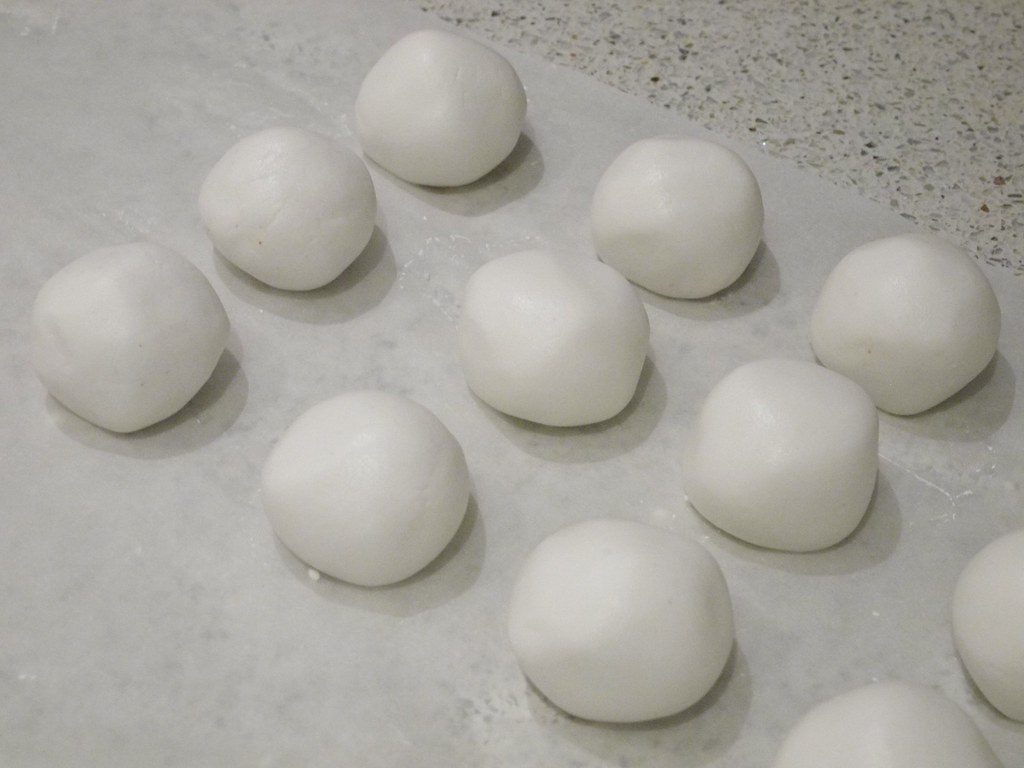
3. Divide the dough into 15-16 even pieces (they will weigh around 30 g each, if you're being fussy and want them all the same size), and roll each piece into a ball.
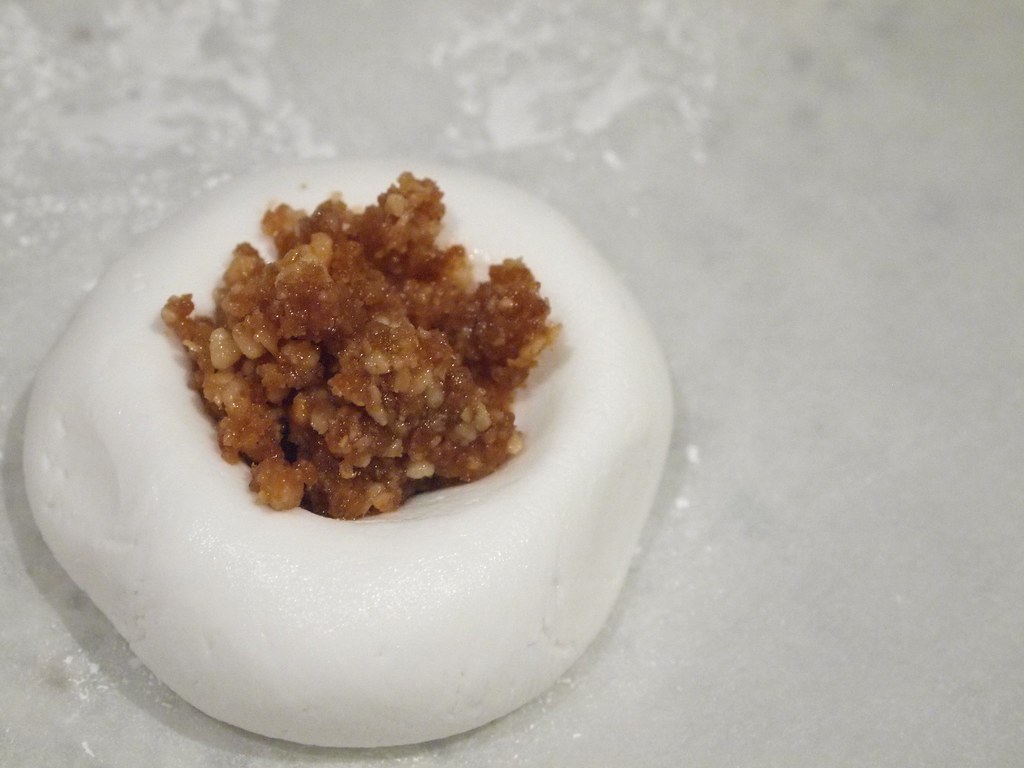
4. Gently flatten each dumpling a little, and press an indentation into it to contain the filling. Scoop a small amount of peanut filling into the centre of each dumpling (I found a measuring teaspoon was the ideal shape and size for this).
5.  Fold the edges of the dumpling over the filling and press them together to seal the join. Roll the dumpling lightly between the palms of your hands to achieve a uniform shape and remove the sign of the join.
Note: When folding and sealing the dumplings, it is preferable for the filling to remain centred inside them, rather than off to one side. Next time I make these, I will roll the dumplings a little thinner and squeeze in more filling for a better squish-to-crunch ratio. 
6. The dumplings can now be set aside until you're ready to start assembling the dessert.
7. To cook the dumplings, bring a large saucepan of water to the boil. Carefully add the dumplings (I lowered each one into the water using a quarter cup measure) and use a metal spoon to separate any that cluster together (I cooked the dumplings in two batches to avoid overcrowding). The dumplings are cooked when they float to the surface of the water (this took about 5 minutes).
8. Remove the dumplings from the boiling water (I used the cup measure again) and drain on a plate. I was very wary of using a sieve or kitchen paper to drain the dumplings, in case they stuck.

Sticky Penguin's sticky rice dumplings with peanut filling, chocolate shortbread and salted caramel sauce

For the salted caramel sauce
(adapted, just a little, from Ready for Dessert, by David Lebovitz)
1. Place the butter and sugar in a large, heavy-bottomed saucepan (it's important to use a big saucepan, as the sauce will bubble up when the cream is added) and cook over a medium heat until the butter melts and the sugar has dissolved. Stir occasionally.
2. Continue cooking until the melted butter and sugar caramelise to a deep, rich golden colour. For quite a lot of the cooking process, the melted butter didn't emulsify with the sugar and floated as a separate layer on top. This will be resolved as it continues to cook and thicken, and a bit of a stir with a silicone spatula also helps.
3. Once you've boiled the caramel until it is as dark as you'd like, making sure you don't let it burn, remove it from the heat and, standing well back as it bubbles, add the cream and whisk like mad. Keep whisking until the mixture is smooth.
4. Add salt to taste (I used just under a teaspoonful).
5. Sieve the sauce into a container - it will keep for over a week in the fridge, and the recipe makes more than you will need for the dessert (though it is utterly delectable, so having some on hand for top ups might also be an option!).

To assemble the dessert
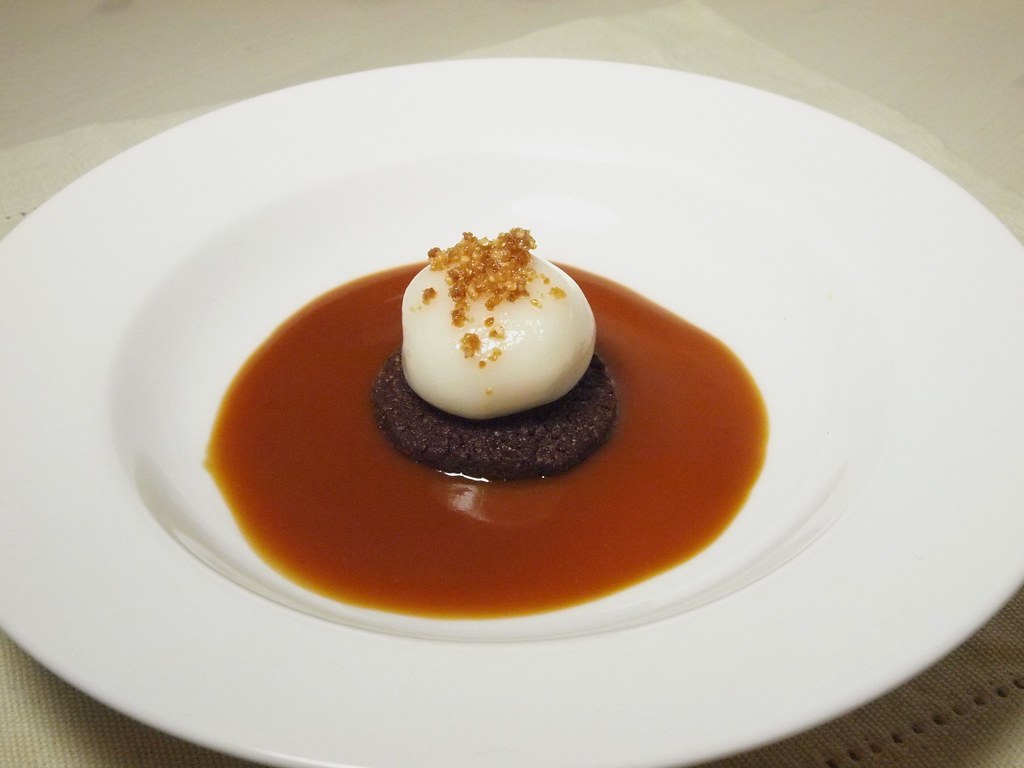
1. Place several spoonfuls of the salted caramel sauce in a flat bowl and swirl to evenly coat the bottom.
2. Put a shortbread biscuit in the centre of the caramel sauce.
3. Balance a dumpling on the shortbread, and sprinkle lightly with some of the leftover peanut filling.

Sticky Penguin's sticky rice dumplings with peanut filling, chocolate shortbread and salted caramel sauce

The finished dessert was much more glamorous anything that's eventuated on a Sunday night at home before. It turned out very close to my imagining, and the mix of flavours and textures made the overall dish better than the sum of the parts. The silky caramel sauce unites the sleekly chewy dumpling with the crunchy crumble of the shortbread. The saltiness of the nuts and caramel, the slight bitterness of the dark chocolate just balance out the overall sweetness of the dish. I also liked that the dumpling, rather than making the dish heavy, was a simple contrast with the other flavours.

The Other Penguin, not typically a dumpling fan, polished it off, pronouncing the caramel sauce his favourite part. This is definitely a recipe I will return to – it would be ideal for dinner parties, as the components can be made in advance, and the dumplings cooked in a few minutes before serving.

Sticky Penguin's sticky rice dumplings with peanut filling, chocolate shortbread and salted caramel sauce

After my first attempt at making sticky rice dumplings, I've decided that I’d far rather be one of the people who does stuff and then watches crap TV shows to unwind, rather than somebody with impeccable taste and nothing to show for it. Now, I’m off to knock up a batch of scones in the ad break...

Read more...

Pulled Pork? Pull The Other One!

Tuesday, July 5, 2011

Sandwiches tend to be practical. Utilitarian. A concise report rather than a dulcet whisper. A pit-stop for fuel rather than a longed-for indulgence. The Other Penguin flat out refuses to buy them, on the basis that paying for something so mundane and so readily made at home is a highly objectionable concept. While I don't go quite that far, the number of sandwiches that are etched in my memory are few and far between.

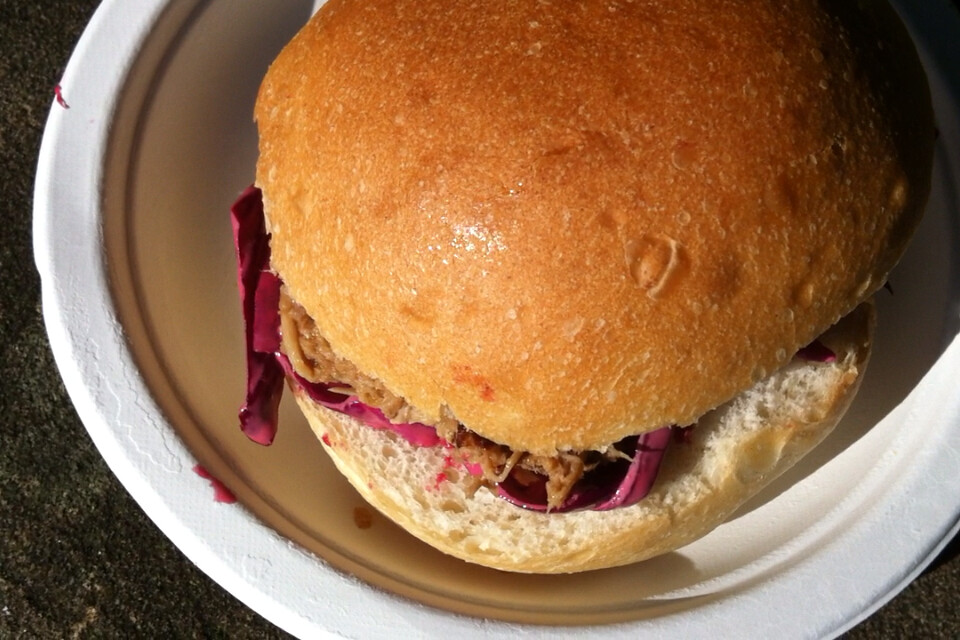
Don't be deceived by its innocent appearance - this roll packs a porcine punch!

The Sticky Penguin Sandwich Hall of Fame comprises the following members (some of which, I'm almost certain, are all the more alluring for being hard to come by):

  • Coronation chicken from Albion Caff in Shoreditch. London's a long way for a sandwich, though (even one that good, and large enough to qualify as dinner).
  • Special chicken salad* with celery and mayonnaise on fluffy white bread, that used to be served in the murky peace and quiet of the cafe underneath David Jones, before it was very ill-advisedly removed to stuff in more cosmetics. Preferably accompanied with thin and crispily golden chips (that'd be the sandwich, not the make-up. Not so keen on fries with that when hunting down mascara or browsing the latest OPI shades). 
  • Ham and cheese baguette in the cafe at the Louvre. A combination of the appetite built up wandering corridors gazing at art, the happy surprise of finding exactly-what-I-felt-like-eating at a major tourist spot (let alone finding it well-executed) and the timeless simplicity of the food itself.  
  • Just about anything from EARL Canteen (with preference for the slow-cooked lamb or - so far, alas, only vicariously - the duck confit).
  • Sausage and tomato sauce sandwiches, made using cold left-over sausages. Long ago, a favourite lunch-box discovery (second only to leftover home-made lasagna**) and now a summertime pleasure after over-catering for barbecues, and Christmas treat when down the coast (the Trifle-Eating Cat's Parents have a ready supply of sausages, and aren't the slightest bit sparing in their use. Squee!)
  • And an honorary mention also goes to just about anything from the now-departed and much missed Moose General Store.
Having settled on that list (with one notable omission, which is of such significance as to warrant proper consideration separately), I will doubtless go pootling through the week beset by random thoughts of the Sandwiches I Loved And Forgot. Which tends to be the way when trying to come up with any sort of definitive list, from groceries to wedding guests.

This weekend, though, a new contender for the Best Ever Sandwich emerged. Like the cool new kid at school, it swaggered in and grabbed my attention, distracting me from faithful and familiar friends... 

Could you go past the pulled pork?

The prospect of a trip to the Pyrmont Growers Market was sufficiently enticing to prompt a rare early start on a Saturday morning. It was ages since I'd paid a visit, and I was keen to suss out what interesting discoveries might be made. The market was bigger, busier and much muddier than I remembered . Old favourites like the Australian Honey Sellers and Whisk & Pin had been joined by wontons, micro herbs and an array of condiments that bordered on boggling. 

I'd run out the door without breakfast in the hope that something tasty would present itself, and I wasn't disappointed. There were lengthy queues for coffee and at any stall with the wafting fragrance of bacon. There was also a stall offering a minimalist menu of pulled pork rolls and porridge. It smelt fabulous. It looked delicious. I got in during a rare lull in the crowd. Much as the porridge, on offer with rhubarb and almonds, sounded entirely satisfying, there was no going past the pork. And there it was... a sandwich revelation...

The pulled pork (made with Berkshire free range pork) was matched with vividly pink beetroot coleslaw, squirted with a tangy barbecue sauce that bore as much resemblance to the usual sugary gloop as a duck does to a flamingo. The roll was soft and tender, filling but still light, and the perfect size and shape to pick up. The proportions of pork, slaw, sauce and bun were the edible equivalent of the golden ratio. Heaven, without need of a stick. I perched on a sandstone wall and blissfully munched until all that remained was a warm, comfortable not-too-fullness and a fuchsia smear on the plate. The astonishing sandwich came from The Table Sessions, which also does guerrilla dining events in Sydney, something which I'm now going to need to investigate very thoroughly.

Once more, for those who missed it! Complete with dodgy camera phone photos... 

Have you had a sandwich that elevates the lunch--on-the-run staple to something special? I'd love to hear about it, and where you found it. I suspect the next stop on the trail to find culinary nirvana might need to involve a Reuben...

* For those to whom "special chicken" denotes a source of protein originating from almost any bird, beast, fish or creature other than an actual chicken, I believe the description of "special" is properly applied in this instance to the chicken as turned into a salad, or perhaps to the sandwich in its entirety.
** The range of foods which a Sticky Penguin will cheerfully tuck into with relish (not literally - I've never been one for pickles and suchlike) at cold-to-room-temperature is an occasional source of mystification to others. Perhaps it's because microwaves are relatively rare in the Antarctic. But then again, so's home-made lasagna...

Read more...

Talking About Food Doesn't Have To Be Funny

Saturday, July 2, 2011

When I first came to Australia, I wanted to fit in with all the desperation my ten-year-old heart could muster. I longed to fly under the radar after the “new girl” awkwardness had faded. But there were two things that stood in my way. The twin crimes of an English accent and an apparently precocious vocabulary marked me as that most un-Australian of things, “up myself”. I was frustrated and confused by it – I’d recently arrived from a small-ish town in New Zealand, where I’d never been singled out for being different, much less had it held against me.

What time had (mostly) dismissed as the ability of children of a certain age to go straight for the jugular came back to me earlier today. Sue Bennett’s article in the weekend Sydney Morning Herald transported me from sprawling on the couch with the weekend papers on my lap to standing in a playground in the height of summer with my words stuck in my throat.

Bennett takes a well-worn Blundstone to people who say foreign words with the accompanying accent when it isn’t native to themselves. Saying parmegiano instead of parmesan, for instance. Such pronunciation apparently amounts to pretentiousness of, if not the worst kind, at least a kind that can be safely lampooned from behind the pie stand.

The particularly blood-boiling example Bennett gives is when people apply an accent when all they’ve done is to live there. How dare they have the temerity to live in Italy for ten years and then come back here and talk about gelato instead of ice cream? Or have spent a decent length of time in France and be so bold as to not stumble when pronouncing hors d’oeuvres. And a friend who’s travelled widely in China and can hold their own ordering dim sum is a rare gift, and no cause for mockery.

When we travel abroad and try different foods in their countries of origin, efforts, however wobbly and unconvincing, to speak the local language almost always receive a kind reception. Why can’t we practice a little before we go without being sneered at? Why not show respect for another whose food you’ve had a lifelong love for by trying not to mangle the names of recipes and ingredients. The “poor ill-educated person out there” at the deli counter, patisserie or café who doesn’t know the word might not mind finding out what it is, as long as you don’t ram it down their throat.

Sure, there are some people with affectations to rival Hyacinth Bucket’s, who grasp at every misplaced opportunity to appear more sophisticated. And I’ll cheerfully laugh at that sort of thing through a mouthful of sausage roll. But the idea that simply using the right word for something, native pronunciation and all, makes you a snob is to sit in a Vegemite-smeared cave of ignorance.

On the multicultural platter that is Sydney’s food scene, should we have to ask for gnocchi, pho, dulce de leche or (gulp) gewürztraminer in broad ‘Strine? And where would Bennett have us draw the line? Should we all be calling a jus a juice or lumping it in alongside lumpy gravy? And there’s the never-ending macaron versus macaroon debate that’s been bubbling away ever since we discovered those delectably impossible confections. How presumptuous of us to lay claim to these foods with names that make us feel more comfortable. If all we want is comfort, why not stay at home with cheese on toast. As long as it isn’t groo-yeah, that is. Better just have a couple of slices of good old Bega tasty.

We want to embrace the ever-increasing variety of delicious food that’s available here, as long as it fits in and we don’t have to use any funny words. If we applied that sort of logic to people, there’d be an uproar. Oh, hang on…

But if you say tomato on toast and I say bruschetta, does it really matter? If we can eat better, travel more, and revel in the opportunity to enjoy everything that other parts of the world have to offer, getting caught up in the semantics seems a petty schoolyard relic. Some of us, though, are left with the memory of a choked up feeling that didn’t have words, as though a piece of prosciutto had gone down the wrong way.

Read more...

  © Blogger template "Shush" by Ourblogtemplates.com 2009, changed to bits and pieces by the Sticky Penguin